

Simple Macrame Bracelet DIY
 For many of us, it would be very easy to complain about this long, cold winter that seems to be never ending. But, if you try to find the good, you might say one of the advantages to being stuck inside is having the opportunity to work on projects. Of course we have choices... organizing random things and cleaning out closets or dabbling in a little DIY. This week I chose DIY.
The other day I was in the mood to play around with some of my jewelry supplies. I wanted to do something simple that didn't take a lot of time so I decided to whip up a few bracelets, macrame style. And when I say, whip up, I mean it. Macrame is a simple project that anyone can do, including kids! Perfect for a rainy, or in my case, snowy day!
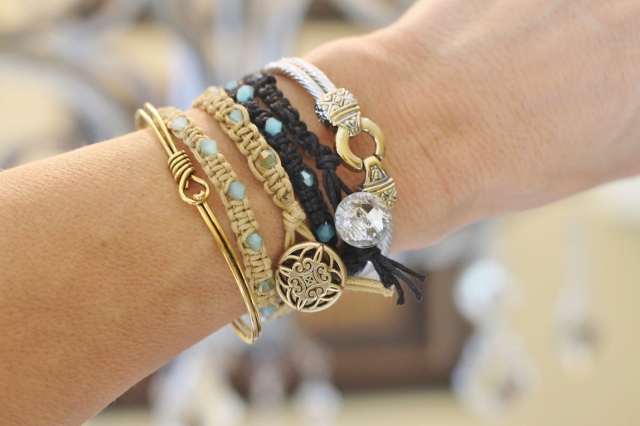
 I love unique jewelry, especially bracelets that can be stacked together. This project is a very inexpensive way to add to your arm party! I don't really have a specific method for this because I just sat down and started playing but I'll give you a very simple overview of what I did.
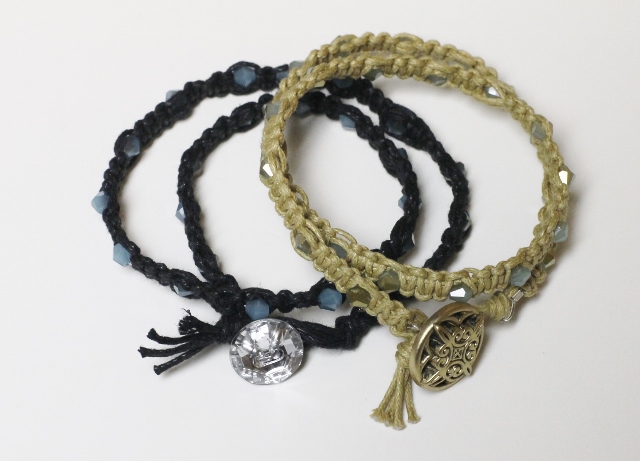
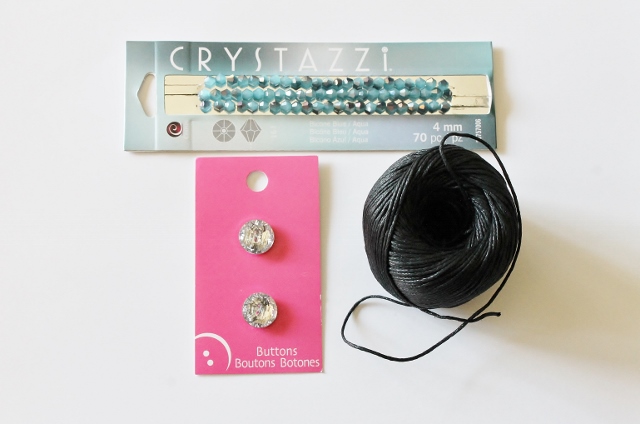 I started with just a few supplies: skinny waxed cotton cord, small crystal beads and some crystal buttons for the toggle clasp.
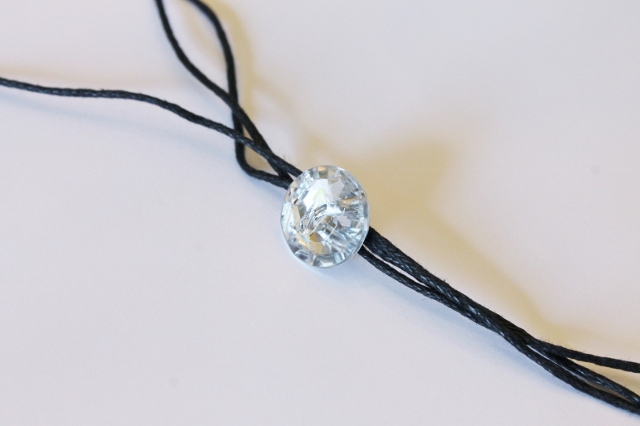 I threaded 4 very long strands of cord (more than double the length of the actual bracelet I was making) through the back of the button. The type of button I chose had a wire loop on the back which made threading easy. Standard buttons won't work.
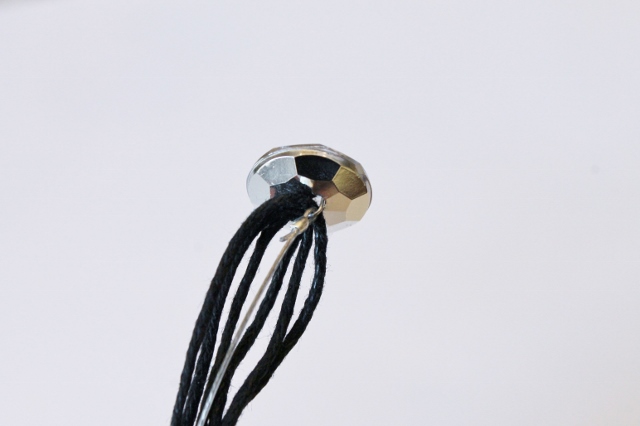 I wanted to use small beads that could not be strung onto this cord so I added a piece of jewelry wire to the button. To keep it simple use beads that are large enough to thread onto the cord.
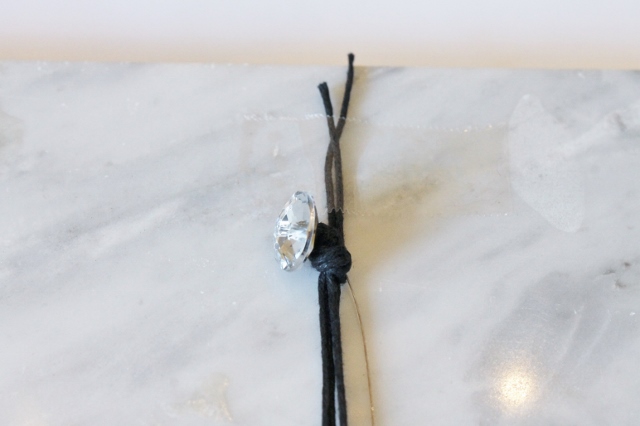
I tied a knot at the end of the cord right under the button. Instead of cutting the excess cord, I taped it to a work surface to make knotting and beading easier.
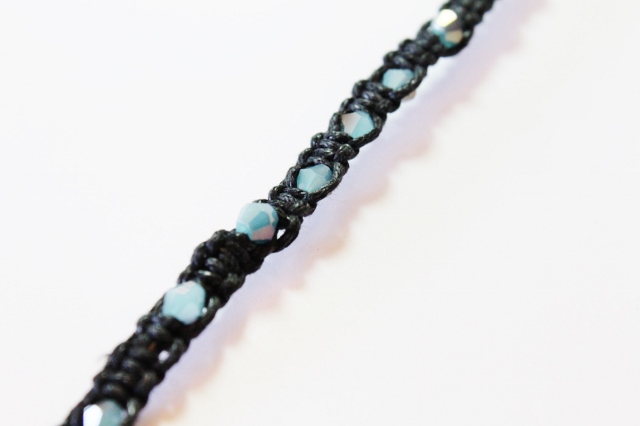
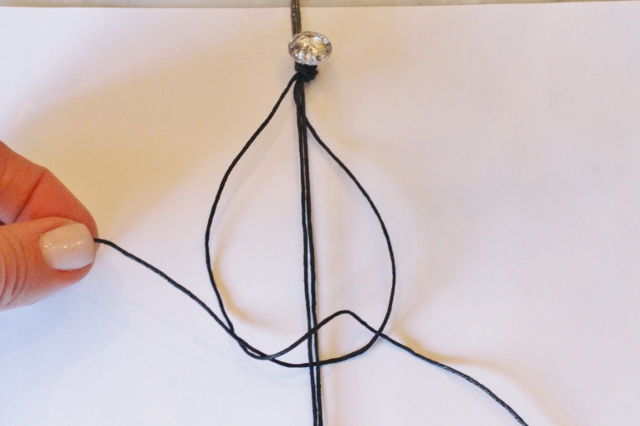 I began to tie square macrame knots alternately with the outside strands of cord. The middle strands stay stationary through the entire process.
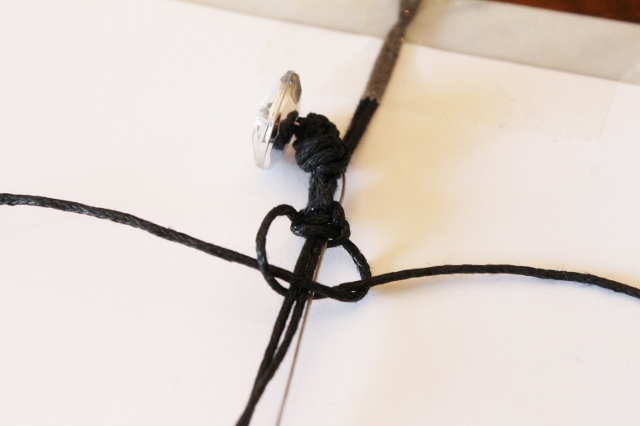
 After several knots were tied I added a bead. I tied the next knot right around the bead. If you are not using jewelry wire you will thread your beads onto the middle strands of cord.
 I didn't count knots or beads so there is no rhyme or reason to these particular bracelets. You can always make patterns and count knots if you prefer a more uniform look. I was going for a less structured piece.
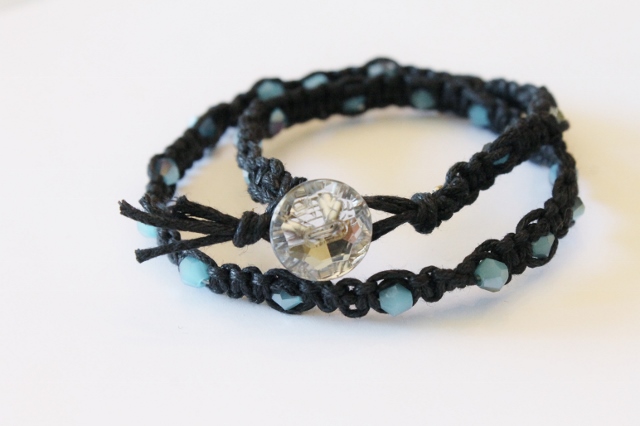
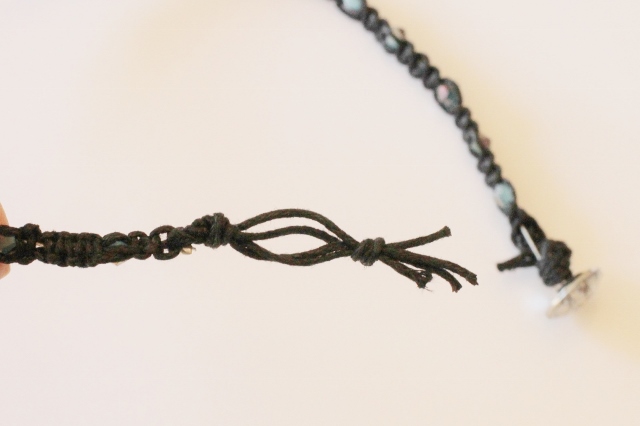 Once the bracelet was the length I wanted, I created a loop at the end of the cord that would fit over the button to close the bracelet.
That's it! It really is easy but if you find these steps hard to follow and you need more help, you can find plenty of tutorials on Macrame on Pinterest or the internet! Try your own technique to make a more personalized piece. You really can't go wrong!
Have a wonderful weekend!
Leslie xo
Favorite Things
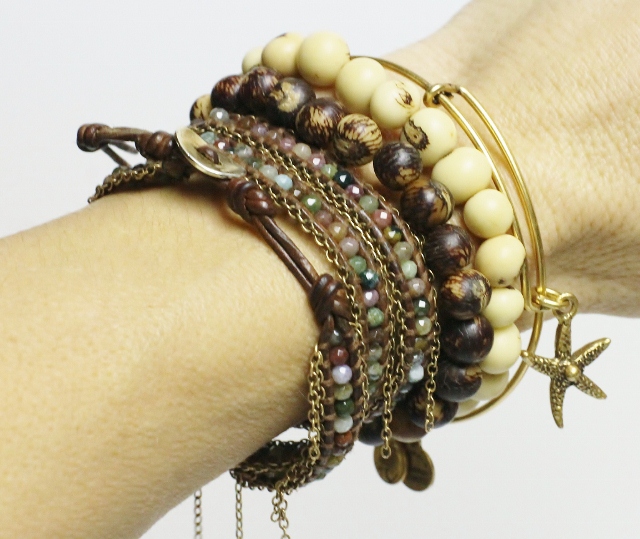 Accessories are such a fun part of getting dressed and what we choose tells so much about us. Each piece adds personality to whatever we wear and helps us create our own individual style. Whether we are wearing jeans or a little black dress, we make a statement with the accessories we choose. Right now the stacking bracelet trend is popular and I am a huge fan! It's given us the green light to dig through our jewelry boxes and pile on our favorite pieces. I thought I would share some of mine. Happy Friday!
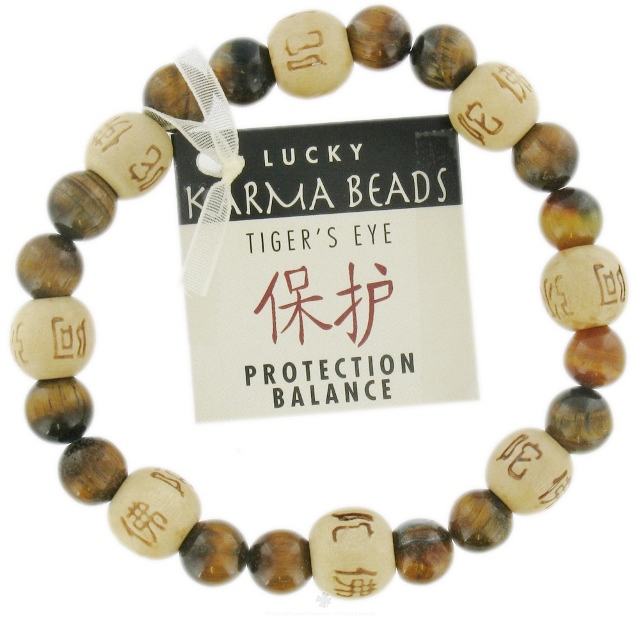 I found some fun beaded bracelets at a little shop at the beach that are similar to these Lucky Karma Beads. They are made with beads that represent a different energy or purpose.
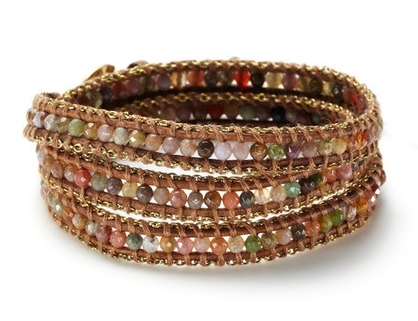
One of my all time favorites is this Chan Luu bracelet that I bought on Gilt. It's made with Jasper, gold chain and leather and was a steal at about half price.
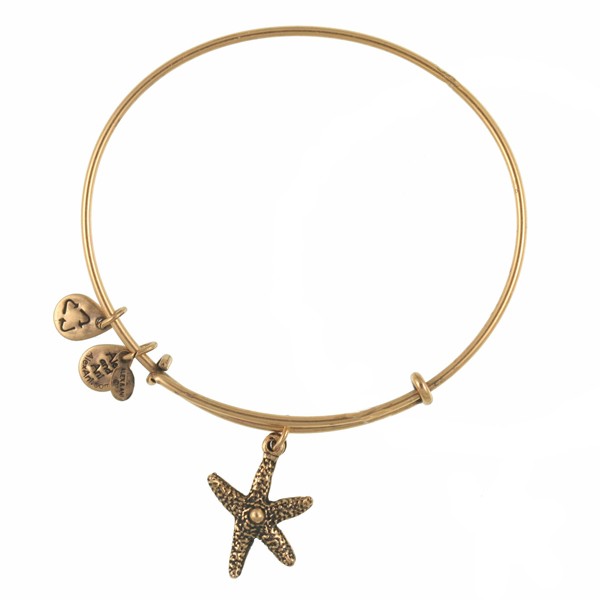
One of my best friends gave me this Starfish Bangle from Alex and Ani. It is my new favorite. Each eco-friendly piece is created to uplift and inspire with a positive message. You can create your own story by collecting and stacking your favorite ones.
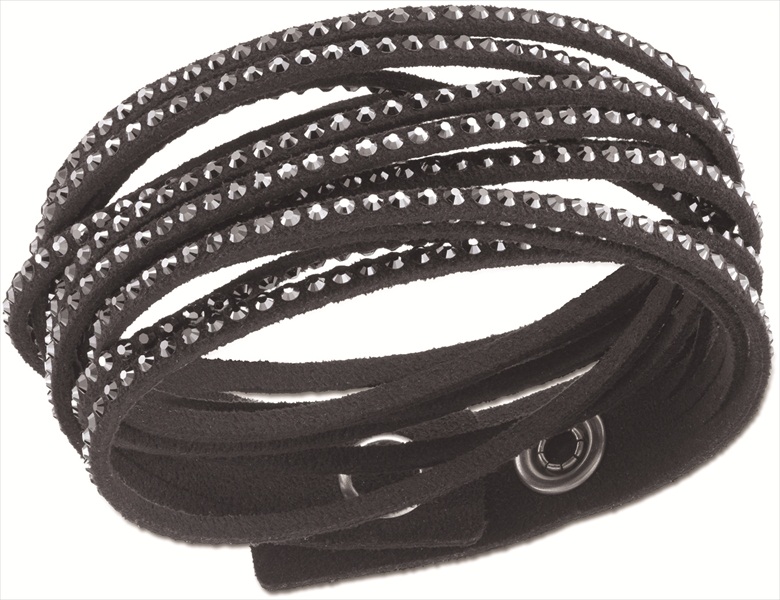 This Slake Black Bracelet from Swarovski is a lot of fun. It's one bracelet that gives the illusion of a stack of bracelets. It's unbelievably lightweight and very comfortable to wear.
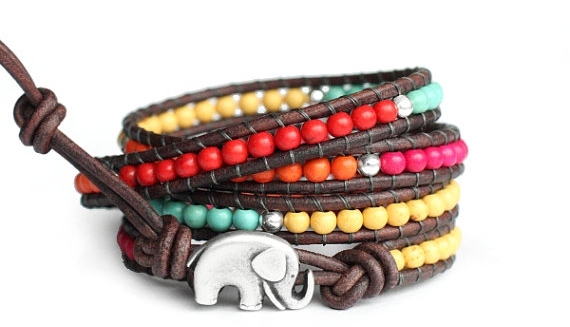 This leather beaded wrap bracelet from The Lucky Elephant was a gift from my daughter, Lauren. We fell in love with these bracelets because they are beautifully made and fun to wear but also because of what they represent. Apparently an elephant with it's trunk raised up is considered good luck and is known to bring excellent fortune and the power to take away troubles. You can't argue with the power of positive thinking!
These bracelets all mean something different. Whether they were a gift from someone special or a just a great deal, they have a story. What is your jewelry saying about you? It's a fun thing to think about. Have a great weekend!
Leslie xo
Summer Fun ~ Simple Jewelry Making Tutorial

I consider myself a creative person. Always thinking, always creating and constantly looking for unique ways to do things. About ten years ago, on a rainy day, I took my daughter Lynsie and her friend to a bead store at the beach to make jewelry. I was hooked and fell in love with the idea of designing unique pieces of jewelry. I ended up starting a small business the following year. I sold the jewelry I designed at local events and eventually to retail stores and an online boutique. I am doing much less designing these days, just special orders and events, but I love to sit down and create a unique piece of jewelry for myself or my daughters once in a while, just for fun.
For this post I thought I'd show you how easy it is to create your own jewelry. I put together a step-by-step guide with video tutorials to help you. Once you have the basics down, the possibilities are endless. It's a fun thing to do with your kids or girlfriends too. So let’s grab some supplies and get started!
*All of the supplies that are listed here can be found at most craft stores like Michaels or purchased online at sites like Auntie's Beads.
BEADS
You can go to any craft store to buy beads. When I am designing a piece of jewelry I will use anything from high quality sterling silver and crystal to beads from broken jewelry, antique stores, etc. So feel free to use whatever you like, it's your bracelet! This bracelet does not have a pattern so any color and shape will do. Try to choose beads that are not too big. Since this will be one long strand you want to keep it light so smaller beads are better. Mine range from tiny seed beads to 10 mm pearls and crystals.

BEADING WIRE ~ TOGGLE CLASP ~ CRIMPING BEADS
beading wire ~ you will want to use a flexible beading wire that is not too heavy. I used a .021 inch diameter, 7 strand beading wire from Beadalon. *The color is listed as "bright" or "clear" but it's actually silver wire.
toggle clasp ~ a toggle clasp comes in two pieces and lots of different shapes and sizes. Toggle clasps are much more interesting than a regular clasp and they make taking your bracelet on and off easier. Use whatever fits your style.
crimping beads ~ crimping or crimp beads are used to secure the wire on the ends of the bracelet. I used 2x2mm sterling silver crimping beads.

TOOLS
wire cutter ~ wire or end cutter
crimping tool ~ this tool secures the crimping bead to the wire to close the end of your bracelet (a must have for making jewelry)
pliers ~ flat nose pliers to hold or pull your wire
 Now that you have your supplies you are ready to start creating! Place your beads on a jewelry mat or towel to keep them from rolling around while you work.
Step 1: Start stringing your beads one at a time onto the beading wire while the wire is still attached to the spool. Feel free to design your bracelet to fit your style. If you want to make a pattern it's a good idea to arrange the beads on your mat before you string them. I like to just grab and string my beads in no particular order for a look that is unique.
http://www.youtube.com/watch?v=LO7s4uOs1fE
Step 2: This is where you will need to decide how many times you want your bracelet to wrap around your wrist. Measure your wrist. Take the measurement of your wrist and add an inch. Multiply that number by the number of times you want the bracelet to go around your wrist. Example: 6" (my wrist) + 1" = 7" X 4 (number of times I want the bracelet to wrap around) = 28" (the total length of my beaded wire). String your beads until the strand is that long.
http://www.youtube.com/watch?v=WLp1dx_Qg1A&feature=player_detailpage
Step 3: Now that you are finished stringing your beads you are ready to close the ends of the wire. You will start with the end of the wire that is not attached to the spool. Slide a crimping bead onto the wire. Next slide one end of your clasp onto the wire. Take the end of the wire and go back through the crimping bead. Use your pliers to pull the wire close to the clasp. Use your crimping tool to pinch the crimping bead closed. Cut the excess wire. You are almost finished!
http://www.youtube.com/watch?v=8mJXgGeCTEk&feature=player_embedded#t=0s
~ Before you finish your bracelet it's a good idea to do a size check. Hold onto the unfinished end of your strand of beads and wrap it around your wrist to see how it will fit. Keep in mind that your toggle clasp will add about 1/2 " or so depending on its size. If it fits , move to step 4. If you think it's too long, move to step 4 and remove a few beads once the wire is cut. If it's too short, move to step 4 but allow for extra wire so you can add some beads before finishing the bracelet.
Step 4: Grab the end of the beaded wire without the clasp and cut it from the spool making sure to leave at LEAST 6" to work with. Push the beads down to the closed end so there are no gaps between the beads. Slide a crimping bead onto the wire. Slide the other half of your toggle clasp on next. Take the end of your wire and go back through the crimping bead *(Ok this is where I make a mistake! In the video I say toggle when I meant crimp. You will see what I mean but you will get it because you already did it. Trust me, it was not worth remaking the video but it is worth pointing out). Working with your pliers, pull your wire tight against the end of the toggle clasp making sure the beads are lined up nicely and there are no gaps in the wire. Use your crimping tool to secure the end of the wire. Cut the excess wire with your cutting tool. Congratulations! You have just completed your wrap bracelet!
http://www.youtube.com/watch?v=5uhSVrvsluM&feature=player_detailpage
Wasn't that easy? I hope you enjoyed the video tutorials! I would love your feedback since this was my first attempt at using them. It was quite a process to figure it all out (I won't even tell you how hard my daughters and I laughed at my voice when we watched them) but I think it will be fun to bring you a variety of posts that include them. I think it makes it more personal. And speaking of personal, I plan to introduce myself to you as soon as I can do it without laughing! I want you to get to know me and I want to know you! As always, I would love to hear from you!
Happy Beading, Happy Summer!
Leslie
Here's what's coming up...
You can put any content in here.