

Simple Pasta Salad Recipe
 It's hard to believe June is upon us! I don't know where the time goes but it seems like every time I blink, another year goes by! My house is buzzing right now. There are kids home from college, a wedding coming up and people coming and going every day. It's total chaos and I love it! Everyone has a different schedule though so planning meals can be tough with a full house. It's a challenge to keep the pantry and fridge stocked let alone have something prepared when someone needs a quick meal. There are certain things that are great to have on hand during busy times and pasta salad is one of them. It's inexpensive, easy to make in large quantities and tastes great, especially when you have a recipe like the one I am sharing today. It's an old recipe that has been in my family for several generations. My grandma made it, my mom made it and now I make it. It's simple but delicious.
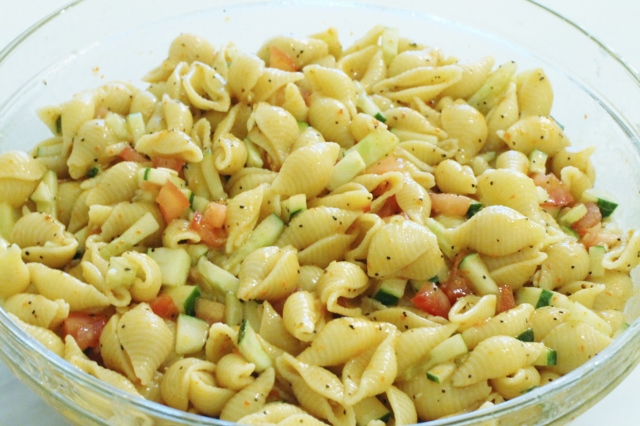
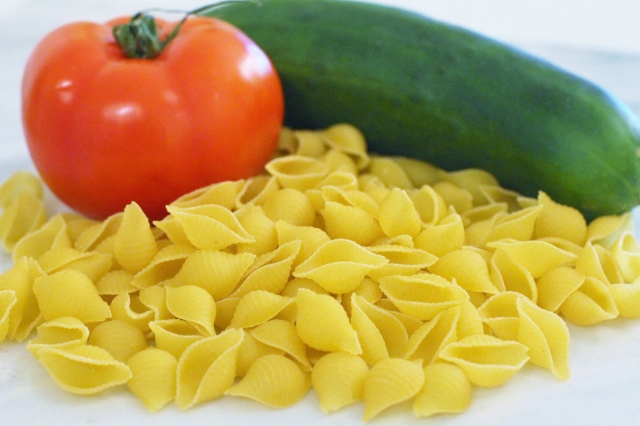 Small pasta shells, tomatoes and cucumbers are the main ingredients in this recipe.
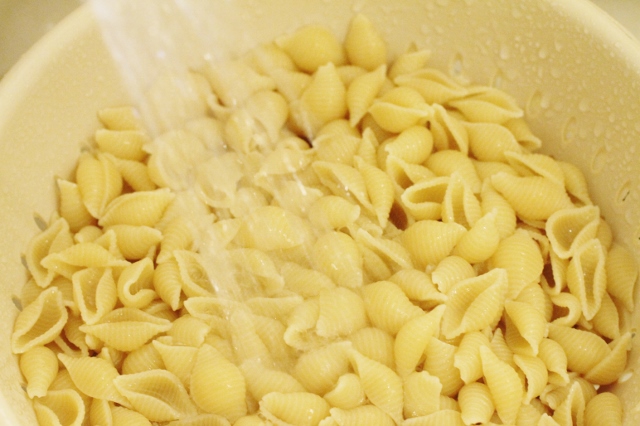 It's easy to make. Just boil the pasta, rinse it in cold water and drain.
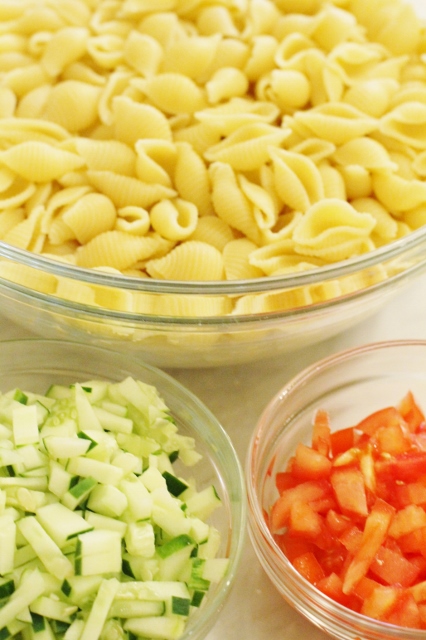 Add chopped cucumber and tomato.
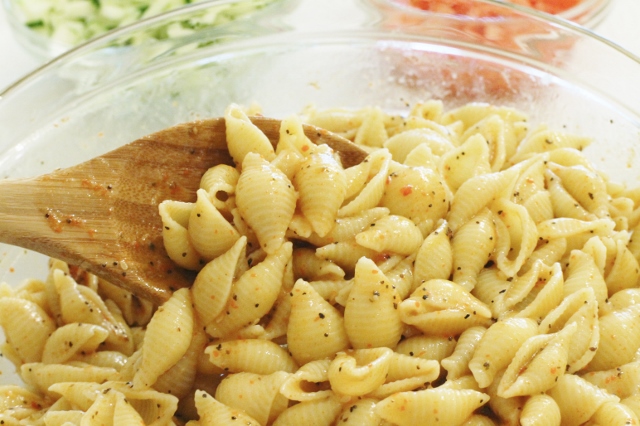 Toss with McCormick Salad Seasoning, onion powder and Wishbone Italian Dressing.
 That's it. It doesn't get much easier!
Keep it simple and enjoy!
Leslie xo
- 1 pound small pasta shells
- 1 large tomato chopped fine
- 1 cucumber diced
- onion powder
- 1/2 bottle of McCormick Salad Seasoning
- 1 large bottle Wishbone Italian Dressing
- Croutons (optional)
- Cook pasta according to package directions. Drain and place in a large bowl.
- Toss cooked pasta with Salad Seasoning and Dressing.
- Add a sprinkle of onion powder and stir.
- Add cucumber and tomato and toss until combined.
- Add croutons.
- Refrigerate.
- Serve cold.
Mother's Day Brunch Recipe Ideas
 Fresh Berries in Orange Juice
I recently published a post about a Baby "Sprinkle" I hosted for my daughter, Lauren. It was a recap of the wonderful little brunch we put together to celebrate my newest grandchild, who will be arriving this month. Oh just typing that makes me giddy! Anyway, since it was a Favorite Things post, there were no recipes included with the photos. I have been receiving requests for some of those recipes ever since. I thought it would be fun to share them today since we will be celebrating Mother's Day this weekend. We served French Toast Souffle and Sun-dried Tomato and Asparagus Frittata at the Sprinkle. I added the Fresh Berries in Orange Juice recipe because it goes well with the other two. Together they are all you need for a perfect Sunday brunch!
This Fresh Berries in Orange Juice recipe is a fun way to serve a fruit salad. Fresh squeezed orange juice and a sprinkle of confectioner's sugar adds a little extra flavor and sweetness while still keeping it healthy. And it looks pretty too!
- one cup fresh sliced strawberries
- one cup fresh blueberries
- one cup fresh red raspberries
- one cup fresh blackberries
- 3/4 cup fresh squeezed orange juice
- 1 tablespoon confectioner's sugar plus extra for sprinkling
- Place berries in a large bowl, set aside.
- Add confectioner's sugar to orange juice and mix until combined.
- Pour orange juice mixture over berries and toss lightly.
- Sprinkle confectioner's sugar over berries before serving.
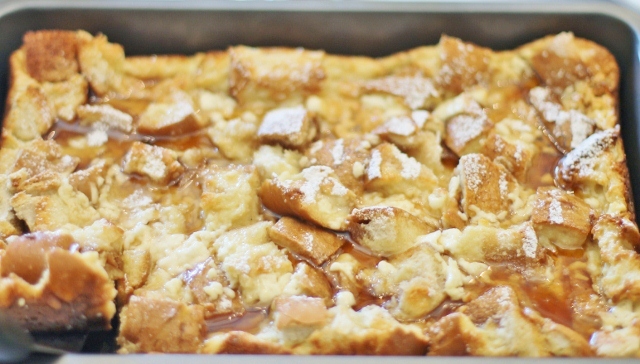 French Toast Souffle
This recipe for French Toast Souffle is amazing! My sister Lori served it at a brunch she had a few years ago and it was a hit. I made sure I had the recipe before I left. It is now one of our favorites. You prepare it a day ahead so it's ready to go when you are.
- 10 cups sturdy white bread cut into 1" cubes (about 16 slices)
- 8 ounces cream cheese, softened
- 8 large eggs
- 1 1/2 cups milk
- 2/3 cup half-and-half
- 1 1/4 cups maple syrup divided into 1/2 and 3/4 cups
- 1/2 teaspoon vanilla
- 2 tablespoons confectioner's sugar
- Place bread cubes in a 13 X 9" pan that has been sprayed with cooking spray.
- Beat cream cheese until smooth.
- Add eggs, one at a time, mixing well after each addition.
- Add milk, half-and-half, 1/2 cup of maple syrup and vanilla. Mix until smooth.
- Pour cream cheese mixture over top of bread.
- Cover and refrigerate overnight.
- Preheat oven to 375 degrees.
- Remove bread from refrigerator; let stand on counter for 30 minutes.
- Bake for 50 minutes or until set.
- Sprinkle souffle with confectioner's sugar and serve with maple syrup.
 Sun-dried Tomato and Asparagus Frittata
A Frittata is a nice way to serve eggs at a brunch. It's easier than making individual omelettes and less work than quiche. You can add anything you want to it so use this as a base recipe and customize it to your own taste.
- 1 dozen large eggs
- 1/2 cup sun dried tomatoes
- 1/2 lb asparagus, cleaned and cut into 1" pieces
- olive oil
- your favorite grated cheese for sprinkling
- Beat eggs until fluffy.
- Drizzle 2-3 tablespoons of olive oil in the bottom of a large non-stick skillet over medium heat.
- Add asparagus and sun-dried tomatoes and saute until heated through and asparagus is cooked.
- Add eggs and lightly swirl pan to distribute asparagus and tomatoes.
- Gently run a rubber spatula around the inside edge of the pan as the eggs begin to cook to help eggs spread out. Cook on medium to low heat until the eggs begin to set on the bottom of the pan.
- Once the eggs are starting to set on the bottom but still wet on top, place entire pan under broiler (on low) until eggs are cooked through and no longer wet.* If you are using a skillet with plastic handles, cover them with foil before placing pan under the broiler.
- Turn off broiler and sprinkle cheese over top of Frittata.
- Transfer Frittata to a large cutting board or leave in pan and cut into pie shaped slices to serve.
Easy Black Bean Salsa Recipe
 It's hard to believe today is the last day of April. Spring is moving along and the months are flying by. How can it be May already? What's fun about the time flying is with each new month comes some new reason to celebrate and for me, an excuse to throw a party! This weekend, on May 5th, people everywhere will be celebrating Cinco de Mayo. To get into the spirit of this Mexican holiday, I thought I would share one of my family's favorite recipes for Black Bean Salsa. My daughter Lynsie started making this salsa when she was in college. It was a great tailgate food then and makes a great party food now. The recipe yields a huge bowl of salsa so it's perfect for a crowd. It's simple to make and great to have on hand when you have a houseful of people or feel a happy hour brewing!
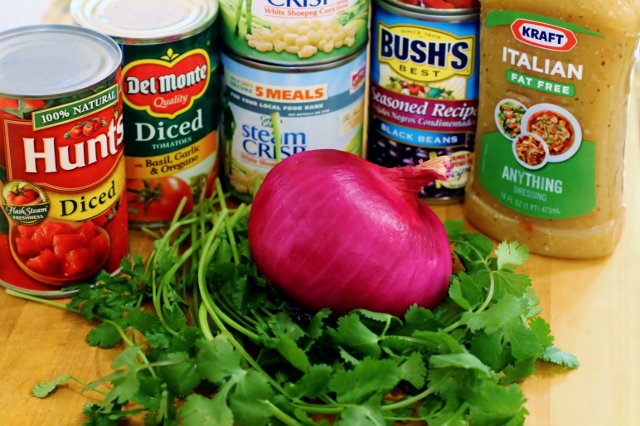 This recipe is so simple because almost every ingredient comes from a can or bottle.
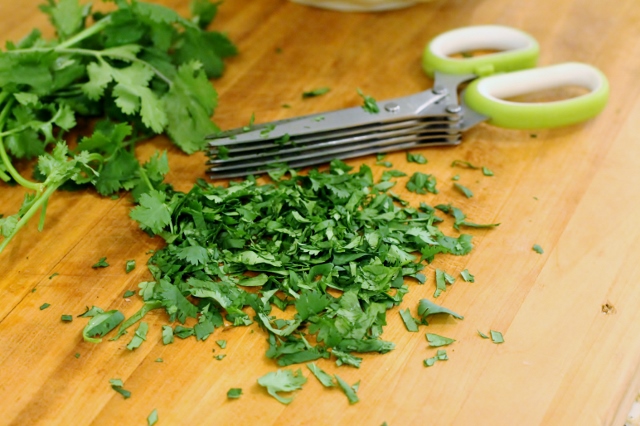 Fresh chopped Cilantro makes the flavor come alive in this salsa recipe. You can use as much or as little as you like.
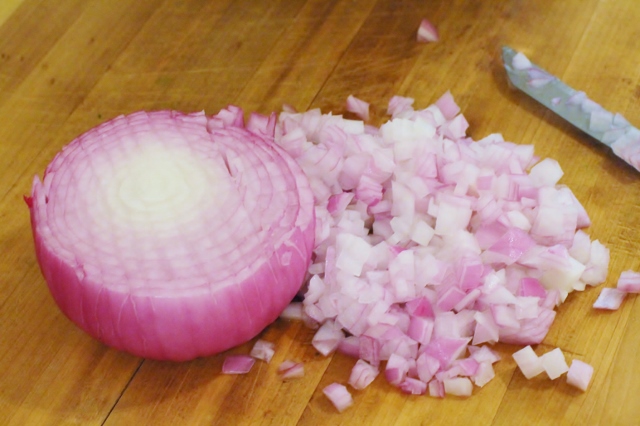 Chopped red onion is the only other ingredient that you need to prepare.
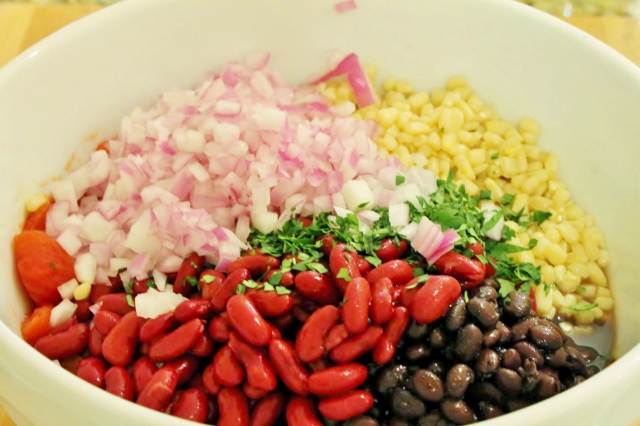 Everything gets tossed into a bowl and refrigerated.
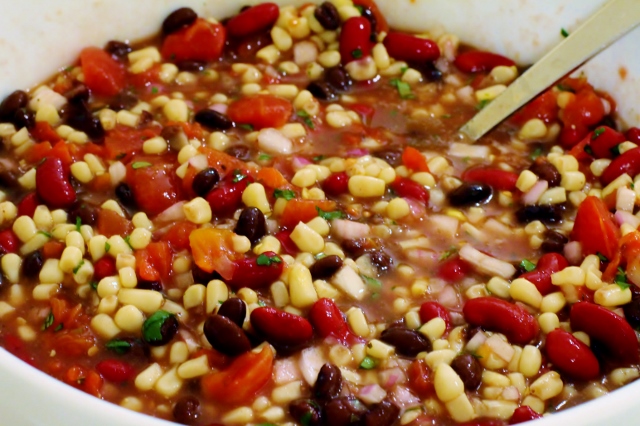 It's the perfect quick recipe for picnics, happy hours or parties. Just add chips and you are good to go!
- 1 can diced tomatoes (basil, oregano & garlic flavored)
- 1 can regular diced tomatoes
- 1 can Seasoned Recipe black beans (Bush's)
- 1 can Seasoned Recipe kidney beans (Bush's)
- 2 cans white shoepeg corn
- 8 ounces fat free Italian dressing
- chopped cilantro
- chopped red onion
- Drain liquid from kidney beans and black beans but do not rinse. Drain corn.
- Add all canned ingredients to a large bowl.
- Chop onion (to taste) and add to bowl. Use as much as you like. I used about 2/3 of a large onion.
- Chop cilantro (to taste) and add to other ingredients. I used about 1/4 cup of chopped cilantro.
- Stir ingredients together and refrigerate.
- Best served cold. Make a day ahead if possible so flavors have a chance to blend.
- Add chips and serve!
Enjoy!
Leslie xo
Green Beans with Bacon and Brown Sugar Recipe
 You might be surprised to see a Saturday post. Well, I was typing a recipe for someone and started thinking about how many times I have been asked for this particular dish and I figured why not put it on the blog so whoever wanted it could come here and print it. Consider it a bonus recipe! It's a delicious but simple green bean recipe that I found in the Williams-Sonoma Thanksgiving recipe booklet last year. It was a huge hit and is now a favorite for us. I am making it again for Easter. It's a nice change from the standard green bean casserole so if you want something new, this is a good one to try. I couldn't find the recipe on the Williams-Sonoma website and the booklet was seasonal so here you go:
- 8 thick slices of bacon
- 6 tablespoons unsalted butter, melted
- 1 ½ teaspoons salt
- ¾ teaspoons roasted garlic powder (regular is fine)
- 1 ½ lbs green beans, trimmed and blanched
- ¼ cup firmly packed light brown sugar
- Preheat oven to 350 degrees. Line a baking sheet with parchment.
- In a large nonstick frying pan over medium heat, cook bacon in batches until the slices are just beginning to brown along the edges but are still underdone and pliable, 4-6 minutes. Transfer to a paper towel lined plate and let cool, then cut each slice in half crosswise.
- In a small bowl, whisk together the butter, salt and garlic powder.
- Divide the green beans into 16 equal portions, about 6 beans each. Gather each portion into a neat bunch and wrap a half slice of bacon around the center to hold the beans together. Place the bundles on the prepared baking sheet with the loose ends of the bacon underneath. Sprinkle the brown sugar evenly over the bundles and drizzle with the butter mixture.
- Roast until the bacon is cooked through and browned, 20 – 25 minutes. Let stand for 3-5 minutes. Transfer the green bean bundles to a warmed platter and serve immediately.
- Once the bacon is partially cooked and cooled, toss it with the blanched green beans and place in a large pan or casserole dish.
- Drizzle the butter mixture over the beans and bacon and toss together.
- Sprinkle with the brown sugar.
- Bake until bacon pieces are cooked and beans are heated through.
Enjoy!
Leslie xo
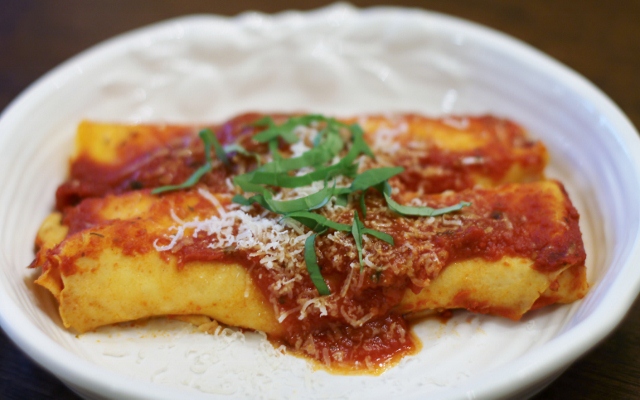
Homemade Manicotti
 I love pasta. Whether it's a bowl of linguine or a plate of lasagna, it's all good to me. Most of the time I will make a simple dish like penne or spaghetti with marinara sauce but once in a while, when I have some time, I'll make something a little more involved like homemade manicotti. Instead of using store bought pasta I make crepes. They are actually easier to fill and they taste so much better. I'll show you how I made mine.
 I have a basic crepe recipe I use for both sweet crepes and manicotti. There are only a few ingredients. If I am making sweet crepes I add sugar.
 I like to add different ingredients to the crepe mixture for a little extra flavor. It's fun to be creative here. I have been in the mood for basil lately so I decided to add some to this batch. By the way, these cool scissors make cutting fresh herbs so much easier. If you chop a lot of herbs, I highly recommend getting a pair!
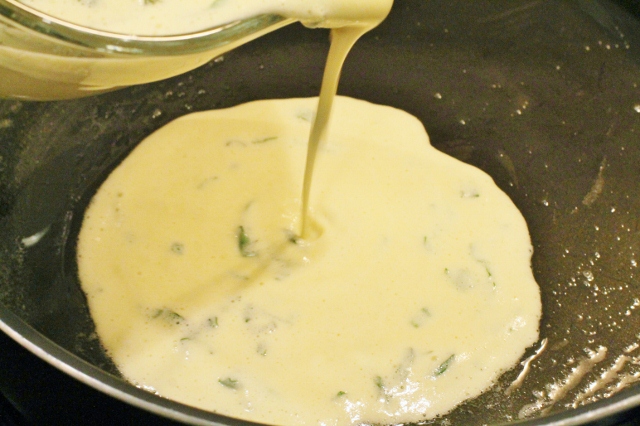 I do not use a crepe pan. I use a large frying pan that is brushed lightly with olive oil and a tiny bit of butter. I keep the heat low so the crepes don't burn or stick. I pour the crepes the same way I would pour a pancake but I make them much thinner. I flip them with a regular spatula.
 A thinner crepe makes a lighter, tastier manicotti.
 One recipe yielded fifteen 6-7 inch crepes.
 I fill the crepes with a blend of cheeses, egg and seasoning.
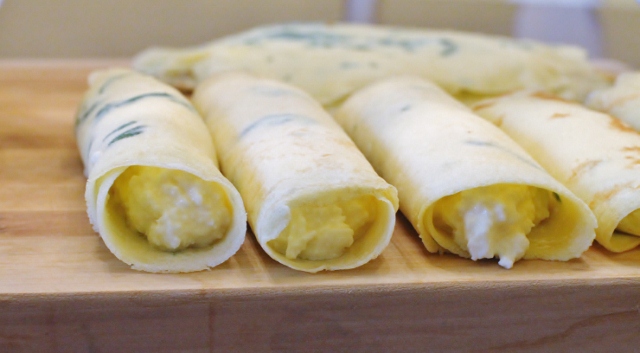 Once the crepes are rolled I will bake some and freeze the rest. I like to freeze them without sauce so I can easily take out what I need later.
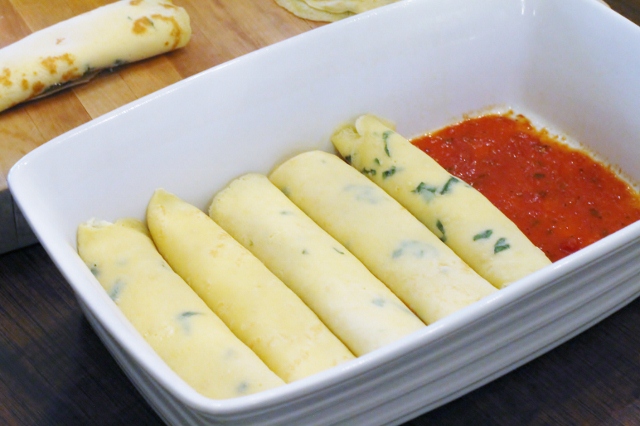 I will place the remaining manicotti in a greased baking pan that has a layer of sauce on the bottom.
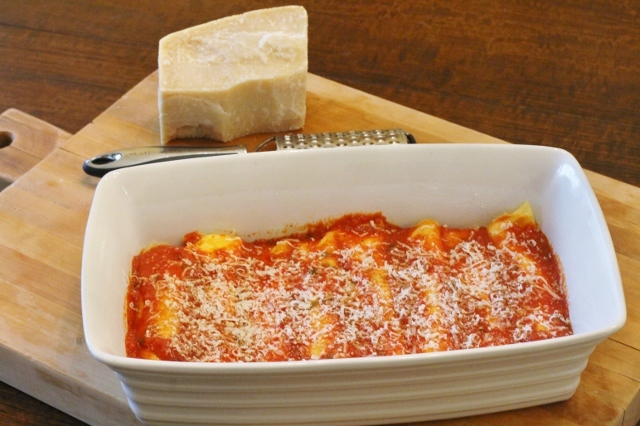
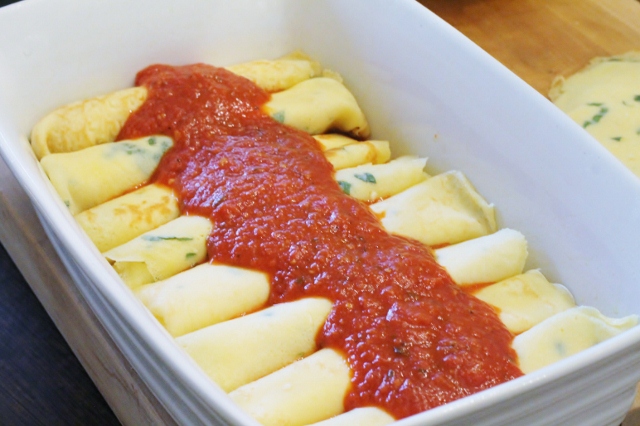 I cover the manicotti with additional sauce and some grated cheese and bake it for about 40 minutes.
 There are so many ways to make this great Italian dish. If you have a favorite recipe or fun idea, I would love to hear about it!
- Basic Crepe Recipe
- 1 1/4 cup flour
- 3 eggs beaten
- 1 1/2 cups milk
- 2 tablespoons melted butter
- pinch of salt
- Cheese Filling for Manicotti
- 1 15 ounce container ricotta cheese
- 2 cups of your favorite shredded Italian cheese ( I use a blend of mozzarella, provolone, parmesan and asiago)
- 2 eggs beaten (for thicker cheese filing use 1 egg)
- salt and pepper
- Italian seasoning (optional)
- Additional Ingredients
- Pasta sauce ( 1 jar or 4 cups of homemade sauce)
- Grated cheese for topping
- Blend all ingredients in mixing bowl beating well. Let batter stand up to an hour for more perfect crepes.
- Pour a thin layer of batter into a heated pan that has been brushed lightly with olive oil and butter.
- Cook over low heat just until batter comes together to form a crepe.
- Flip crepe to cook other side and then carefully lift out of the pan with a spatula and place on a plate.
- Repeat until batter is gone.
- Blend all ingredients together.
- Place a few tablespoons of cheese mixture on top of each crepe and roll.
- Line the bottom of a greased pan with your favorite sauce (I use homemade marinara sauce. If using store bought sauce, you will need approximately 1 large jar for 1 batch of crepes.
- Cover the crepes with sauce and grated cheese (optional).
- Bake at 350 degrees for 30-45 minutes until the crepes are heated through.
Mangia!
Leslie xo
Homemade Granola Recipe
 Granola is a food that is considered to be healthy by some and not so healthy by others. It is made with whole grains, nuts and fruit but can be loaded with fat and artificial sugar. I personally love granola. I am especially fond of the homemade kind you can find at a good bakery or cafe. My most recent discovery was at The Bakers Table in Lancaster, PA. Awesome little bakery, amazing homemade granola. I have the attitude that moderation is key when it comes to granola and I enjoy it in small quantities. My sister, Leigh Ann, shared her recipe for homemade granola with me a few years ago. It's one of the healthier versions I have found that still tastes really good. It's made with molasses which gives it a great flavor and it's light and crunchy making it a perfect topping for fruit or yogurt.
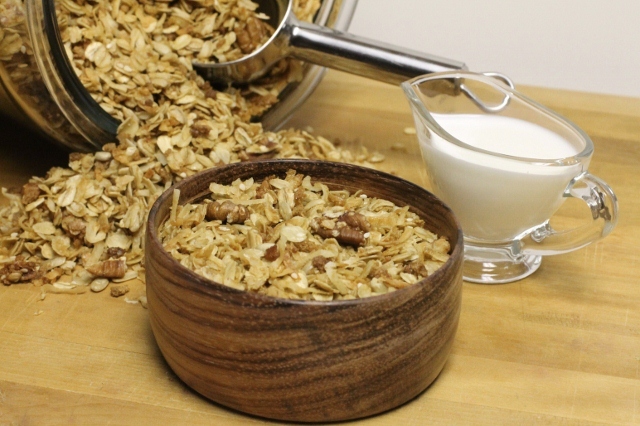
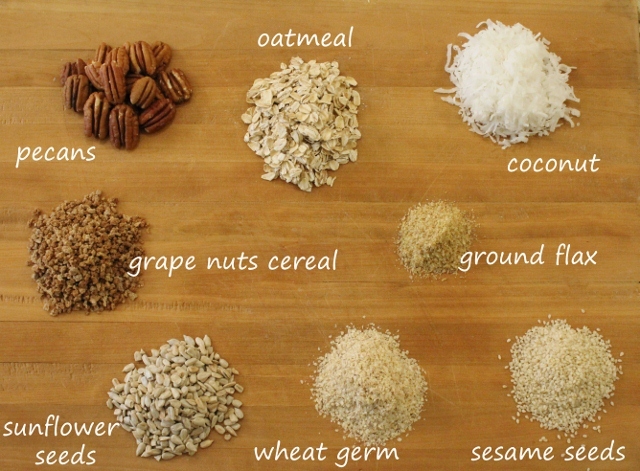 These are the main ingredients that make up the batch of granola I made for this post. What's great about granola, is that you can customize it with ingredients that you prefer. Feel free to use your favorite grains and nuts. This recipe calls for pumpkin seeds. I did not add them this time (because I forgot to!).
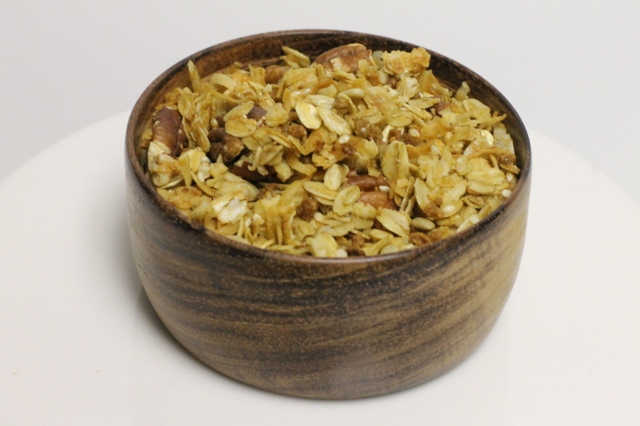
 This recipe makes about 25 cups of granola, which is A LOT! You will need a very large bowl to mix all of the ingredients. I have a huge wooden bowl that I like to use. A roasting pan or baking trays would work too.
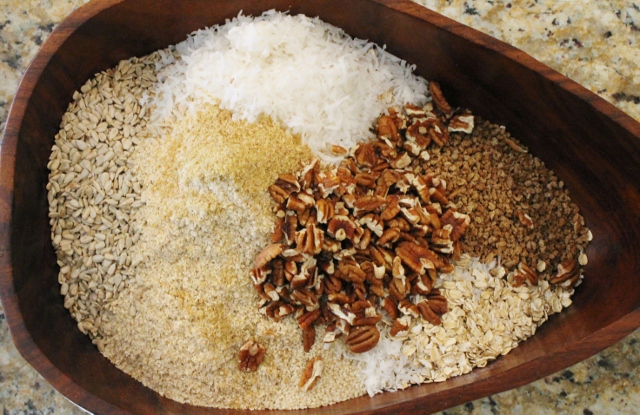
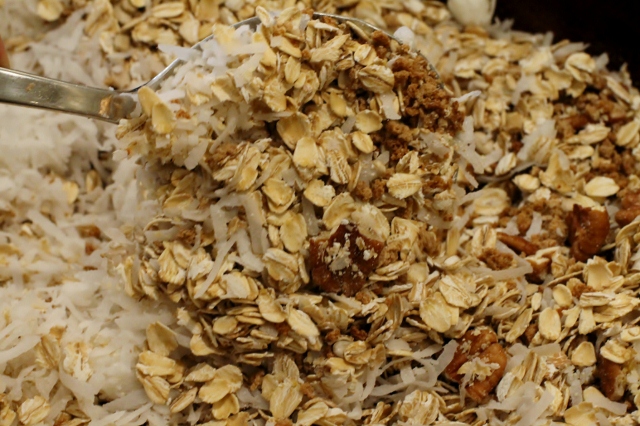 Toss all of your dry ingredients together.
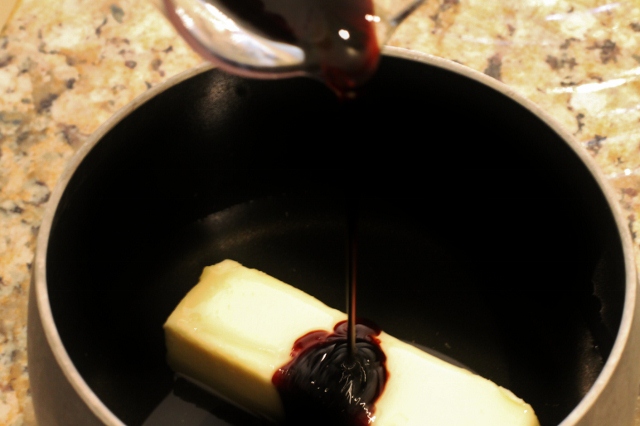 The wet ingredients are blended over low heat before they are added to the granola.
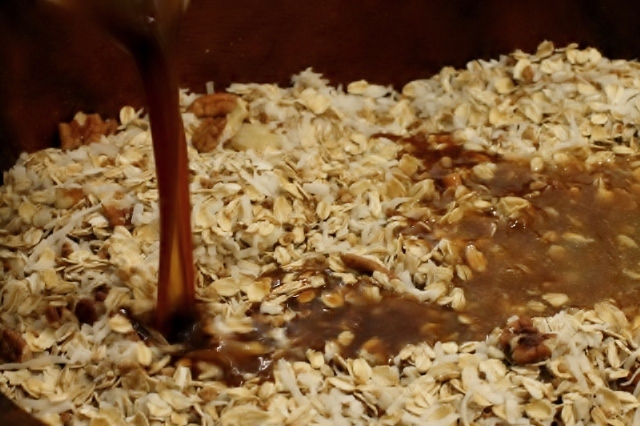 The melted molasses mixture is added to the dry ingredients.
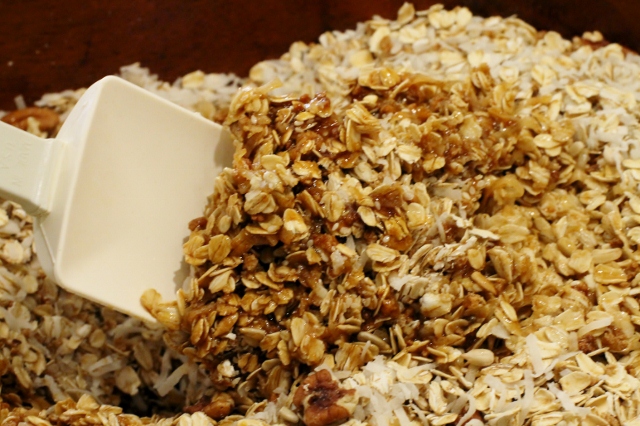 Toss all ingredients until well coated and place on baking sheets.
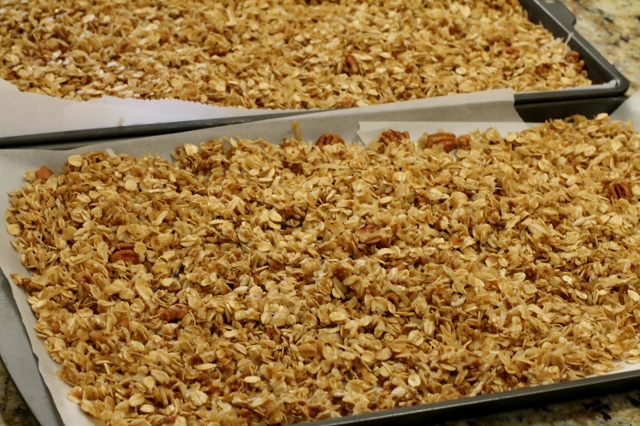 Bake at 325 degrees until granola is golden brown.
As I said earlier, this recipe makes a huge batch of granola so it's a fun thing to do with a buddy. My sister and I used to make it together and share it. She is now living on the West Coast so I either have to ship it to her or share it with my friends! Good thing it will stay fresh in an airtight container for a while!
Enjoy!
Leslie xo
- 3/4 cup canola oil
- 1 stick of butter
- 1/4 cup molasses
- 1 tablespoon vanilla
- 3/4 cup honey
- 1/2 teaspoon salt
- 2 pounds (approximately 12 cups) oats
- 1/2 cup sesame seeds
- 1 cup of your favorite nuts (almonds, pecans,walnuts)
- 2 cups Grapenuts cereal
- 1 cup wheat germ
- 1 pound coconut
- 1 cup sunflower seeds
- 1/2 cup pumpkin seeds
- sprinkle of flax seed (ground or whole seed)
- assorted dried fruit (optional)
- Preheat oven to 325 degrees. Line baking sheets with parchment paper.
- Melt first six ingredients in a pan over medium-low heat.
- Mix remaining dry ingredients in a large mixing bowl.
- Pour melted liquid over the dry ingredients and gently mix until the dry ingredients are evenly coated.
- Spread mixture (in small batches) on baking sheets. Bake, stirring every 5 minutes, for 20 minutes or until golden brown.
- Cool completely.
- Dates or dried fruit can be added after the granola cools.
Photos by Leslie Reese
Small wooden bowl handmade by Michael Reese
Chocolate Chip Cheesecake
Chocolate Covered Christmas ~ Day 7
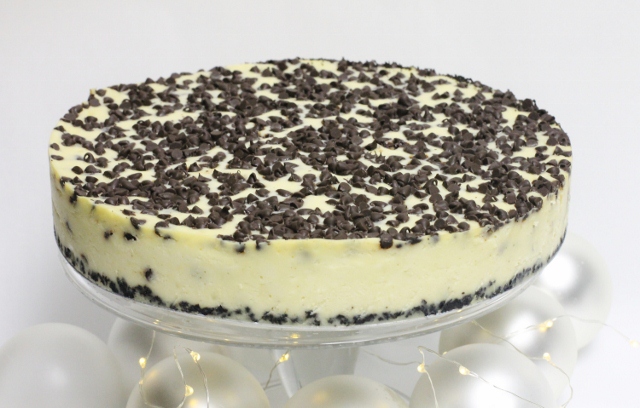 Today I am giving you a recipe that is not as "chocolate" as the ones I have posted so far, but every bit as delicious. This Chocolate Chip Cheesecake recipe is another family favorite and has been around a long time. The Oreo cookie crust is topped with a layer of cheesecake and sprinkled with mini chocolate chips, giving it just a touch of chocolate flavor. It's simple to make which is a plus this time of year! It will slice easier and taste better once it sits in the fridge for a little while so make it ahead of time if you can. Four to six hours is great but a day ahead is even better.
- Crust
- 1 1/2 cups Oreo cookies crushed ( about 20 )
- 1/4 cup melted butter
- Cheesecake
- 3-8 oz packages of cream cheese, softened
- 1- 14 oz can sweetened condensed milk
- 3 eggs
- 2 teaspoons vanilla
- 1 cup mini chocolate chips, divided
- 1 teaspoon flour
- Mix crushed cookies with melted butter. Press into a spring form pan and set aside.
- Preheat oven to 300 degrees.
- Mix cream cheese, milk, eggs and vanilla until well blended.
- In a separate bowl, toss 1/2 cup chocolate chips in 1 teaspoon of flour, Add to cream cheese mixture.
- Pour mixture into pan.
- Sprinkle remaining chocolate chips on top of cheesecake. Do not mix in.
- Bake for 1 hour.
- Once cheesecake is cool, place in refrigerator with pan until ready to serve. Remove outside of spring form pan before cutting.
Happy Baking!
Leslie xo

Dark Chocolate Hot Cocoa
Chocolate Covered Christmas ~ Day 2
 When my kids were little, every Christmas Eve, they would put on their Christmas jammies, grab pillows and blankets and a little travel cup of hot cocoa and we would get in the car and drive around looking at Christmas lights while we listened to 'Twas the Night Before Christmas. I always loved that night! This recipe for Hot Cocoa has been tucked in my recipe book for a long time. It's on a little piece of paper in my daughter Lauren's handwriting. I will never rewrite it. I thought it would be fun to share it for Chocolate Covered Christmas. These days we love dark chocolate so I substituted that for milk chocolate. You can use whatever you prefer.
- 4 cups of whole milk
- 8 ounces of good quality dark, semi-sweet or milk chocolate finely chopped
- 1 tablespoon sugar
- 1 teaspoon vanilla
- Whipped Cream or Marshmallows
- Bring milk to simmer.
- Put chocolate, sugar, and vanilla in a blender.
- Add simmering milk and blend until foamy and chocolate is melted.
- Serve topped with [url href="http://lesliereese.com/?p=2506&/easyrecipe-print/2506-0/" target="_blank"]marshmallows[/url] or whipped cream.
Cheers!
Leslie xo
Gingerbread Church
") About twenty years ago, when my kids were little, I decided to try to make a gingerbread house. I loved to bake and I was pretty crafty so I figured it was worth a shot. I found instructions for a simple gingerbread house in a Martha Stewart Living Holidays book and the rest is history. I loved every step of the process and for years to come, I made a gingerbread house every Christmas. Then life got hectic, the kids got older (I know, shouldn't it be the other way around?) and I sort of fell off the gingerbread wagon. Well, this year I decided to jump back on so I got out my books, pulled the patterns out of the recipe cabinet and went to work. What I realized was, it's not hard to make a gingerbread house but it is time consuming. I forgot that part. I also realized I'm a little rusty. I made a few mistakes (I won't point them out) but I am in love with my gingerbread church and it feels like the good old days when there was one in the house every Christmas.
About twenty years ago, when my kids were little, I decided to try to make a gingerbread house. I loved to bake and I was pretty crafty so I figured it was worth a shot. I found instructions for a simple gingerbread house in a Martha Stewart Living Holidays book and the rest is history. I loved every step of the process and for years to come, I made a gingerbread house every Christmas. Then life got hectic, the kids got older (I know, shouldn't it be the other way around?) and I sort of fell off the gingerbread wagon. Well, this year I decided to jump back on so I got out my books, pulled the patterns out of the recipe cabinet and went to work. What I realized was, it's not hard to make a gingerbread house but it is time consuming. I forgot that part. I also realized I'm a little rusty. I made a few mistakes (I won't point them out) but I am in love with my gingerbread church and it feels like the good old days when there was one in the house every Christmas.
 There are a lot of great resources to get you started. I am partial to books, probably because I like to collect them, but there are plenty of resources online.
") Decide what you want to make and cut out the pattern ahead of time. As you might imagine, this part is time consuming. Once you are done making your gingerbread house, save the pattern. If you ever want to make it again, you will be glad you have it.
Decide what you want to make and cut out the pattern ahead of time. As you might imagine, this part is time consuming. Once you are done making your gingerbread house, save the pattern. If you ever want to make it again, you will be glad you have it.
 When you are ready to get started, make your dough. I have a great Gingerbread Dough Recipe below.
") Roll your dough and cut out your pattern.
Roll your dough and cut out your pattern.
") It's not easy to move a piece of dough this big once you roll it out and cut it so I cut my gingerbread right on the parchment paper it will bake on. I slide a flat edge baking sheet under the paper when I'm done cutting and put it in the oven.
It's not easy to move a piece of dough this big once you roll it out and cut it so I cut my gingerbread right on the parchment paper it will bake on. I slide a flat edge baking sheet under the paper when I'm done cutting and put it in the oven.
") Once the gingerbread is baked, I slide the entire sheet of parchment paper right onto a rack to cool.
Once the gingerbread is baked, I slide the entire sheet of parchment paper right onto a rack to cool.
") To make stained glass windows, I baked the gingerbread 2/3 of the way and then took it out of the oven to fill the windows with crushed sour balls in different colors. I put the pan back in the oven to finish baking and to melt the candy.
To make stained glass windows, I baked the gingerbread 2/3 of the way and then took it out of the oven to fill the windows with crushed sour balls in different colors. I put the pan back in the oven to finish baking and to melt the candy.
") Once all of the pieces were baked, I spread them out on a table. It's easier to put your structure together if you are organized.
Once all of the pieces were baked, I spread them out on a table. It's easier to put your structure together if you are organized.
") Royal Icing is used to "glue" the pieces together. My favorite Royal Icing Recipe is below. I used a wooden board covered in brown paper as a base for the church.
Royal Icing is used to "glue" the pieces together. My favorite Royal Icing Recipe is below. I used a wooden board covered in brown paper as a base for the church.
") I piped icing through a decorating bag with a round tip attached to construct the walls. It makes it easier to place the icing where you want it to go.
I piped icing through a decorating bag with a round tip attached to construct the walls. It makes it easier to place the icing where you want it to go.
") Start by securing one wall and carefully build from there. Royal Icing is thick and drys fast so the walls tend to stand on their own pretty easily.
Start by securing one wall and carefully build from there. Royal Icing is thick and drys fast so the walls tend to stand on their own pretty easily.
 Pipe thick lines of icing on the inside of the house.
") I switched to a star tip to go over the icing on the outside edges. It looks prettier than a straight line.
I switched to a star tip to go over the icing on the outside edges. It looks prettier than a straight line.
 Once the walls were standing and dry, I decorated the outside with the Royal Icing.
") I did this before I put the roof on.
I did this before I put the roof on.
") I added some holiday decorations with colored icing and candy.
I added some holiday decorations with colored icing and candy.
") I decided to make chocolate shingles for the roof. I simply melted chocolate and spread it out on a tray covered in parchment paper. I put it in the freezer for about 15 minutes so the chocolate could harden slightly.
I decided to make chocolate shingles for the roof. I simply melted chocolate and spread it out on a tray covered in parchment paper. I put it in the freezer for about 15 minutes so the chocolate could harden slightly.
 (628x307)") When the chocolate was hard, I cut it into small squares to make shingles and then broke them apart. You have to work fast when you do this because the chocolate will soften as you handle it.
When the chocolate was hard, I cut it into small squares to make shingles and then broke them apart. You have to work fast when you do this because the chocolate will soften as you handle it.
") Starting with the bottom edge and working in rows, I tiled the roof with chocolate shingles. I placed them swirled side up because I like the way it looked.
Starting with the bottom edge and working in rows, I tiled the roof with chocolate shingles. I placed them swirled side up because I like the way it looked.
") I love to light up my gingerbread houses. I placed battery operated LED lights inside the church. Some patterns do not include a hole for lights so if you want to add lights, remember to cut a small hole in the back of the house before you bake it.
I love to light up my gingerbread houses. I placed battery operated LED lights inside the church. Some patterns do not include a hole for lights so if you want to add lights, remember to cut a small hole in the back of the house before you bake it.
 Finally finished!
Happy Holidays!
Leslie xo
- 6 3/4 cups flour
- 1 tablespoon cinnamon
- 1 1/2 teaspoons ginger
- 1/2 teaspoon salt
- 1 1/2 cups light corn syrup*
- 1 1/4 cups packed light brown sugar*
- 1 cup margarine
- Preheat oven to 350 degrees.
- Stir the dry ingredients together in a large mixing bowl.
- Combine corn syrup, brown sugar, and margarine in a 2 quart saucepan. Stir constantly over medium hear until margarine is melted.
- Stir the liquid into the flour mixture in an electric mixing bowl with paddle attachment. Mix on medium to high speed until well blended. Dough will become very stiff.
- Form dough into a ball and cover in plastic wrap.
- Refrigerate until dough is easy to handle**
- Roll dough on parchment paper about 1/8" thick and cut into desired shapes.
- Bake for 10-12 minutes or until golden brown. Check for air bubbles during baking process and prick with toothpick to deflate them ( I CAREFULLY tap them with my finger)
- Slide gingerbread onto large cookie sheet or baking rack to cool, making sure all pieces lie flat.
*Dark corn syrup and dark brown sugar may be substituted and will result in darker dough **Do not refrigerate dough more than a few minutes. You just want to cool it until it is easy to work with. This dough starts out a little sticky but becomes very pliable and is actually easy to work with. You can use a little bit of flour to get it started but after the first roll or two it will roll nicely with out it.
- 3 eggs whites at room temperature
- 1 16 oz box confectioner's sugar, sifted
- 1/8 teaspoon cream of tartar
- Place egg whites in an electric mixing bowl.
- Stir cream of tartar into egg whites.
- Add confectioner's sugar to egg whites and mix on low speed, scraping bowl, until well blended .
- Turn mixer on high and beat until mixture is thick and white and holds stiff peaks about 5 -6 minutes.
- Once the icing is finished you will want to cover it with a damp cloth or plastic wrap as it will dry quickly and form a crust.
Pecans and Pretty Boxes
 The holidays are in full swing and that means there are social events and parties on the calendar. I don't know about you but I am always looking for hostess gifts that are festive but useful too. This year I thought I'd take a simple recipe for Chinese Fried Walnuts, change it up a bit and put the finished product in a handmade holiday gift box that can be used again.
My mother has been making Chinese Fried Walnuts for years. I have memories of her frying them in the kitchen during the holidays and we would sneak a few when we walked by because they were so good. I love fried walnuts but I love pecans even more so I decided to switch out the walnuts for pecans this time to try something new. They turned out great. Feel free to use walnuts though, if you prefer. They are delicious too!
 Take about a pound of raw, shelled nuts (I am using pecans) and put them into a pot of boiling water.
 Boil for one minute.
 Drain the nuts and quickly rinse them in hot water.
 Toss nuts in a cup of sugar.
 Fry nuts in oil until they are light brown 3-5 minutes.
 Carefully scoop nuts out of the oil and drain.
 Cool nuts on parchment paper, then break apart. Store in an airtight container.
 I wanted to give my nuts as hostess gifts so I placed them in a festive box. These pretty patterned gift boxes were actually purchased for the guests to use as take home containers at the candy bar at my daughters wedding. We simply hot glued an acrylic snow flake ornament (purchased at Michael's Craft Store) to the top of each box. We had some left over so I decided to get them out and use them for gifts this year. They are perfect for all types of small items and they can even be used as a decoration. It's a simple thing that makes presenting the gift a little more fun!
Enjoy!
Leslie xo
- 1 lb pecans (or walnuts)
- 1 cup sugar
- 1 cup vegetable oil
- salt to taste
- Bring 6 cups of water to a boil in a medium saucepan.
- Add nuts and boil for one minute.
- Drain nuts in a colander and quickly rinse with hot water.
- Toss nuts with sugar.
- Heat oil in a large frying pan over medium heat.
- Add nuts to oil and fry until light brown, about 3-5 minutes.
- Carefully remove nuts from hot oil with a slotted or mesh spoon and drain in a colander over saucepan.
- Spoon nuts onto parchment paper to cool.
- When nuts are completely cooled, sprinkle with salt to taste and break apart.
If you are placing nuts in a gift box or container that is not airtight, place them in a plastic bag first so they stay fresh.
Fall Sangria
 This post is going to be short but sweet! Thanksgiving is only days away. Soon most of us will be gathering with family and friends to enjoy good food and great company. It’s an awesome weekend that can also be very busy. There are so many things to think about and lots of food to prepare. So when it comes to cocktails, I’m keeping it simple. I found a great recipe for a Fall Sangria on Pinterest a couple of weeks ago. It’s a little different than the Sangria recipes I shared this summer. It has the taste of fall with apple cider, bourbon and cinnamon. I made it for a party that I was having and it was amazing so I shared the original link on my Facebook page. I decided to share it here on the blog too in case you missed it. It’s perfect because it can be made in a large batch ahead of time and most people like it. So easy! Oh and if you want to jazz it up a bit for the holidays, just dress up the glasses like I did with cinnamon sticks tied with lemon and orange peels. All you need is a lemon zester. A simple trick that makes a huge difference!
- 2 oranges, cut into small pieces
- 1 lemon, cut into small pieces
- 2 apples, cut into small pieces
- 1-2 cup bourbon
- ½ cup triple sec
- ¼ cup simple syrup
- 2-3 cinnamon sticks
- 2 bottles Sauvignon Blanc
- 3 cups apple cider
- Combine all ingredients except the wine and apple cider in a container and allow to marinate at least a day.
- A few hours before serving, combine mixture with 2 bottles of Sauvignon Blanc and 3 cups apple cider in a punch bowl or larger container and adjust to taste.
- Garnish with chopped apples, cinnamon sticks or citrus peels (optional)
- Makes enough for a small party or a medium-sized punch bowl.
*the original recipe includes 3-4 teaspoons of hot sauce which I omitted. Feel free to add that if you want the extra kick!
Pine Nut-Orange Biscotti Recipe
") The cold weather is moving in, the fireplace is burning and the holidays are weeks away. In my house, that means it's time to start baking! Soon enough we'll be baking things like gingerbread, Christmas cookies and nut roll. I can't wait and I have some fun things to share with you in the coming weeks, but for now, I thought it would be fun to share a recipe for a cookie that has become a favorite in my family. I found this recipe for Pine Nut-Orange Biscotti in one of my Williams-Sonoma cookbooks and after making it one time, it moved to the top of our "favorite cookie" list. They are perfect with a cup of coffee or tea or with a glass of after-dinner wine. "Biscotti" means twice baked so there are two steps in this baking process but they are well worth the extra time, I promise.
The cold weather is moving in, the fireplace is burning and the holidays are weeks away. In my house, that means it's time to start baking! Soon enough we'll be baking things like gingerbread, Christmas cookies and nut roll. I can't wait and I have some fun things to share with you in the coming weeks, but for now, I thought it would be fun to share a recipe for a cookie that has become a favorite in my family. I found this recipe for Pine Nut-Orange Biscotti in one of my Williams-Sonoma cookbooks and after making it one time, it moved to the top of our "favorite cookie" list. They are perfect with a cup of coffee or tea or with a glass of after-dinner wine. "Biscotti" means twice baked so there are two steps in this baking process but they are well worth the extra time, I promise.
 There are two cups of pine nuts in this recipe. Toasting them in the oven really brings out their flavor and is one of the reasons these cookies are so delicious. I started buying large bags of pine nuts at Costco because it's less expensive than buying them in small quantities at the grocery store.
 One third of the pine nuts in the recipe are chopped in a food processor before they are added to the dough. I think the combination of whole and chopped nuts gives the biscotti a nice texture.
 The zest of a whole orange is also added to the dough giving it a light citrus flavor.
 The dough is very thick once it's mixed. It's sticky too, so you'll want to make sure you use a floured surface when you work with it.
 You'll divide the dough into four equal parts to form four separate logs on cookie sheets lined with parchment paper.
 The logs are baked until they are firm to the touch but not real brown on the bottom, about thirty minutes. They are only half baked at this point.
 Immediately after baking, I carefully transfer the logs to a wooden board to cut them. Since they are not fully baked, I place a long metal cake spatula under each log when I transfer it to the board so it doesn't break.
 The logs are cut into slices and placed back on the cookie sheets, cut sides down.You'll notice that the dough in the middle of the biscotti is still soft. They will need to bake about twenty more minutes.
 Once the biscotti are done baking, they will be firm to the touch. They can be stored in an airtight container for up to two weeks. Perfect during a busy time of year when you are likely to have last minute guests or you need a quick hostess gift.
Enjoy!
Leslie xo
- 2 cups pine nuts
- 3 large eggs
- 1 1/2 cups sugar
- 6 tablespoons unsalted butter, melted and cooled
- grated zest of one orange
- 3 cups of all-purpose flour
- 1/8 teaspoon salt
- Preheat oven to 325 degrees.
- Spread pine nuts on baking sheet and toast in oven, shaking every 2-3 minutes until nuts are golden brown, about 8 minutes.
- Lay nuts on plate or board to cool.
- Put one-third of the cooled nuts in a food processor to finely chop,
- Raise oven temperature to 350 degrees.
- In a large bowl, mix eggs and sugar until blended. Stir in butter until combined.
- Add chopped nuts, and orange zest. Mix well.
- Add flour and salt. Mix well.
- Add whole pine nuts and mix to distribute nuts evenly. Dough will be stiff.
- Place dough on floured surface and divide into four equal portions.
- Using floured hands, form each portion into a log that is approximately 9-10" long, 2 1/2" wide and 1/2" thick and place on cookie sheets lined with parchment paper. * I form my logs right on the cookie sheets
- Bake the logs until they are firm to the touch, making sure bottoms do not get too brown, about 30 minutes.
- Remove from oven and using a spatula transfer logs to a cutting board. Allow to cool just slightly.
- Using a serrated knife, cut logs into 1/2" slices.
- Place slices, cut side down, back onto cookie sheets and bake until they are slightly brown and firm to the touch,about 20 minutes.
- Transfer biscotti to a wire rack and let cool completely.
- Store in an airtight container for up to to two weeks.
Photos by Leslie Reese
Cheers to Halloween!
 Halloween is a fun time of year. Costumes, candy, parties... It's a great time to be a kid. It can also be a fun time for adults. Dressing up in costumes and throwing parties is something we never outgrow. It's a great time for everyone to get silly. I'm always up for a party and once in a while I'll put on a costume but what I love most, in all honesty, is coming up with the food and drinks. It's a chance to put a creative spin on Halloween treats. This year I decided to dress up some homemade caramel corn and pair it with a spooky drink to create an adult version of Trick-or-Treating.
I made White Chocolate Caramel Corn with Cashews from Martha Stewart Living. It's an upgrade from traditional caramel corn and worth every second of the time it takes to make it. The recipe is easy to follow and believe me, it gets gobbled up quickly so consider making two batches for a large crowd. I'll show you the steps I took so you have a visual. The complete recipe follows.
White Chocolate Caramel Corn with Cashews
 Some of the main ingredients are white chocolate, brown sugar, chopped cashews and popcorn. I used Pop-Secret Sea Salt microwave popcorn instead of popping corn on the stove. I didn't add as much salt at the end. It turned out just fine.
 Toss the nuts and the popcorn in a large bowl and set it aside.
 You're going to make the homemade caramel on the stove. You will need a candy thermometer.
 The caramel is done when the thermometer reaches 248 degrees F. You will add baking soda as soon as you remove the saucepan from the heat. The caramel will become light and airy.
") I thought it would be a sticky mess but it slides right out and onto the popcorn. Easy!
I thought it would be a sticky mess but it slides right out and onto the popcorn. Easy!
 I sprayed my spatula with cooking spray before tossing the popcorn. It kept the caramel from sticking to it.
 Spread the caramel corn onto baking sheets covered with parchment and bake in the oven on low heat.
 After the caramel corn is baked and is completely cooled, drizzle with melted white chocolate.
 Refrigerate the caramel corn until the chocolate hardens.
 Serve or store in airtight containers. I made individual serving cups by wrapping parchment paper around a glass and securing it with a piece of raffia (remove the glass after you tie with raffia).
Liquefied Ghost Martini
 Don't let the ghost fool you! This silly little drink is "adults only" with vodka mixed into the vanilla and cream concoction. Take it easy, because it only looks innocent!
Happy Halloween!
Leslie xo
- 12 cups popped popcorn
- 1 1/2 cups chopped cashews
- 1 stick plus 2 tablespoons of unsalted butter
- 1/2 cup light corn syrup
- 1 1/4 cups packed light brown sugar
- 1/4 teaspoon baking soda
- 5 ounces white chocolate, chopped
- Preheat oven to 250 degrees.
- Mix popcorn and nuts in a large bowl. Melt butter in a saucepan over medium heat. Stir in corn syrup, sugar, and 1/2 teaspoon salt, and cook until sugar dissolves, stirring once or twice. Raise heat to high, and bring to a boil (do not stir). Boil, without stirring, until a candy thermometer registers 248 degrees, 2 to 4 minutes. Remove from heat, and stir in baking soda.
- Pour caramel over popcorn mixture, stirring to coat thoroughly. Transfer to baking sheets lined with parchment paper, spreading in a single layer. Bake 45 minutes, stirring twice. Test doneness by removing a few pieces of popcorn from oven; if they crisp within 1 minute, popcorn is ready. Remove from oven, and immediately sprinkle with remaining salt. Let cool completely.
- Place chocolate in a heatproof bowl set over a pan of barely simmering water. Stir until melted and completely smooth. Fill a small resealable plastic bag with chocolate, and snip a tiny hole in 1 corner. Drizzle chocolate over caramel corn. Refrigerate until chocolate is set, about 10 minutes.
- Break apart and serve. Store in an airtight container for up to one week.
- Ingredients
- 2 oz. vodka
- 1 oz. vanilla simple syrup
- 1 oz. cream
- 2 oz. club soda
- Marshmallow ghost (optional)
- Mix vanilla simple syrup, cream, vodka and soda.
- Serve in a martini glass.
- Slice marshmallow ghost on bottom half and place on martini glass as garnish.
- Cheers!
Nut Free Basil Pesto
 We had our first freeze warning in Central Pennsylvania this past weekend and it was a subtle reminder that summer is over and winter is just around the corner. As you may know, I have several different herb plants growing on my patio outside. I love cooking with them but because of the climate, I can only enjoy using my own supply during the warmer months. My basil plant was full of leaves and looked so healthy but I knew its days were numbered so I figured it was a good time to bring it inside and make some pesto.
 Pesto is such an easy thing to make and there are so many ways to make it. I like to keep it simple and use just six ingredients; basil, Parmesan Cheese, olive oil, salt, pepper and garlic. I have a child with a tree nut and peanut allergy so I do not use pine nuts in my pesto. The taste is delicious without them and it actually keeps the cost down because pine nuts are expensive.
 I toss everything but the olive oil into my food processor to combine it. Then I slowly add the olive oil until all of the ingredients are incorporated and the pesto is thick and somewhat smooth, sort of like a course ground mustard consistency.
 I like to freeze my pesto so that we can enjoy it long after the basil plants are gone. I use a 1 1/4" cookie scoop to place large tablespoon sized balls of pesto onto a baking sheet lined with wax paper. You can use an ice cube tray to make individual cubes of pesto too but this way there is one less thing to wash!
 I pop the tray into the freezer until the pesto is firm enough to pick up, about 20 minutes.
 I peel the pesto off of the baking sheet, place it in a Ziploc bag and store it in the freezer. Now whenever I want to add a little flavor to my recipes I can just reach in and grab as much as I need.
") I love making pesto because it tastes good and it’s easy to do but there is a little part of me that enjoys feeling like I just saved a little bit of summer too.
I love making pesto because it tastes good and it’s easy to do but there is a little part of me that enjoys feeling like I just saved a little bit of summer too.
Enjoy!
Leslie xo
- 4 cups packed basil leaves
- 2 large garlic cloves
- 1 cup freshly grated Parmesan cheese
- A few grinds of fresh ground black pepper (approximately 1/2 tsp)
- A few pinches of salt (1/2 to 3/4 tsp)
- About 1 cup extra-virgin olive oil
- In a blender or food processor pulse basil, garlic, cheese, salt and pepper to combine.
- Slowly add olive oil with food processor running until mixture forms a smooth and thick consistency.
- Scoop or spoon very full tablespoon sized amounts of pesto onto a tray lined with wax paper.
- Set tray in freezer until pesto is firm enough to pull off of wax paper.
- Place pesto scoops in a Ziploc bag or plastic container and store in freezer.
Williamsburg Orange Cake
 When it comes to cooking and baking, we all head to the internet to search for great recipes. Some days, I literally have my computer on my kitchen counter so I can read a recipe while I’m baking. I have some great cookbooks and I love to use them, but they are not always the first place I go for a new recipe. So in a world where Food Network and Pinterest are the source for so many of our recipes, I thought it might be fun to bake a cake the old fashioned way, with a cookbook.
 This Betty Crocker’s Cookbook that I found deep in my cabinet is the first cookbook I ever owned. Originally published in 1978, this book was the New and Revised Edition that was printed in 1981. I loved flipping through it and was amazed at how much things have changed in 30 years. The photos are vintage and the recipes, classic.
 I decided to make a Williamsburg Orange Cake. I baked this cake years ago for a bridal shower I was hosting. It's a moist, delicious cake that is similar to carrot cake but has a light orange flavor. It's a perfect fall dessert and something you don't see often, which is why I like it.
 Orange zest is the key ingredient in this recipe. Just a tablespoon gives the cake a wonderful, fresh flavor.
 I was in the mood to make a layer cake so I used two 9" cake pans. My layers were not very tall. You could easily use three 8" cake pans for a taller stacked cake or a 13 x 9 pan if you want something that is quick to frost and easy to transport.
 The Williamsburg Frosting is a perfect topping for this cake. It's light and full of flavor with both orange juice and orange zest mixed in.
 I like to put my frosting in a decorating bag so I can control where it goes a little easier.
 I put a small dot of frosting on top of my cake stand to keep the layers from sliding.
 I alternate between the decorating bag and a spreader to frost the entire cake.
 A quick frost all over and a few orange curls on top to finish the cake.
 Amazing texture and flavor. Apparently some things never change...even 30 years later!
 Enjoy!
Leslie xo
- Cake
- 2 1/2 cups all-purpose flour
- 1 1/2 cups sugar
- 1 1/2 teaspoons baking soda
- 3/4 teaspoon salt
- 1 1/2 cups buttermilk
- 3/4 cup butter
- 3 large eggs
- 1 1/2 teaspoons vanilla
- 1 cup golden raisins, cut up
- 1/2 cup finely chopped nuts - I used pecans but you can use your favorite nuts
- 1 tablespoon grated orange peel
- Williamsburg Frosting
- 1/2 cup butter, softened
- 4 1/2 cups Confectioner's sugar
- 4 tablespoons orange juice
- 1 tablespoon grated orange peel
- Preheat oven to 350 degrees.
- Grease and flour a 13 x 9 pan or two 9 inch round cake pans.
- Beat butter, sugar and eggs until blended.
- Add buttermilk and vanilla. Mix until blended.
- Sift together flour, salt and baking soda. Add to sugar mixture and blend on low speed for 30 seconds. Beat on high speed 3 minutes, scraping bowl occasionally.
- Add raisins, nuts and orange peel and mix until combined.
- Pour into pans.
- Bake until wooden pick comes out clean, 13 x 9 pan - 40-45 minutes, layers - 30-35 minutes.
- Cool then frost with Williamsburg Frosting.
- Whip butter and powdered sugar together until fluffy.
- Add orange peel and slowly add orange juice until frosting reaches desired consistency.
- Refrigerate frosted cake.
Simple Dessert Bar
") This past weekend I had the opportunity to help my daughter, Elizabeth, host a bridal shower in our home for her best friend, Brittany. It was an intimate party with a simple but elegant theme. We decided to make use of the space we had and created a dessert bar right on the window sill in our dining room. The result was a pretty display that was easy to put together, out of the way and fun for the guests. We made it completely self-serve and included a selection of miniature desserts so that we could offer a nice variety without going overboard since this was a small party.
This past weekend I had the opportunity to help my daughter, Elizabeth, host a bridal shower in our home for her best friend, Brittany. It was an intimate party with a simple but elegant theme. We decided to make use of the space we had and created a dessert bar right on the window sill in our dining room. The result was a pretty display that was easy to put together, out of the way and fun for the guests. We made it completely self-serve and included a selection of miniature desserts so that we could offer a nice variety without going overboard since this was a small party.
The decorations were simple as well. Elizabeth made three large flowers out of white tissue paper and we placed them on top of apothecary jars that had the lids removed. Very inexpensive! The desserts were placed on two of the dessert stands that we made ourselves and a glass cake plate. Napkins, plates and a serving spatula were placed around the stands. The guests loved the display and were able to mingle with their dessert and coffee in a relaxed atmosphere. I love how something so simple can feel so elegant.
 These Apple Pie Bites were adapted from a recipe that Elizabeth found on Pinterest. Not only were they adorable, they were delicious! Perfect for a dessert bar!
 Brownie Pops. Probably the easiest dessert you could ever make! Elizabeth and Brittany share a love for Ghirardelli brownies so it was only fitting that they were part of this display. We stepped them up a notch by cutting them into petite squares and adding a stick!
 These Cheesecake Pops were a hit and quite literally addictive! Made with a frozen cheesecake from Costco and dipped into melted chocolate, they couldn't have been easier to put together.
 Celebrating should be fun, not complicated! Here are the recipes we chose for our Simple Dessert Bar.
Enjoy!
Leslie xo
- Apple Pies
- 1/2 cup sugar
- 2 teaspoons cinnamon
- 1 package refrigerated pie crust
- 3 tablespoons melted butter, divided
- 2 medium tart apples cut into wedges
- Glaze
- 1- 1 lb box of Confectioner's sugar
- 1/3 cup butter softened
- 1/4 cup milk
- 1 teaspoon vanilla
- Preheat oven to 425 degrees.
- Combine sugar and cinnamon in a small bowl. Set aside 1 tablespoon.
- Unroll pie crust onto floured surface and brush with 2 tablespoons of melted butter. Sprinkle with remaining cinnamon sugar.
- Cut pie crust into 1 inch strips. Wrap one strip around one apple slice with the sugared side in. Continue with remaining dough and apples.
- Brush dough with melted butter and sprinkle with cinnamon sugar.
- Place apples on parchment lined baking sheet and bake for 15 minutes or until pastry is golden brown.
- Serve warm topped with glaze.
- Combine butter, milk and vanilla in a bowl. Slowly add Confectioner's sugar until all ingredients are well incorporated.
- Place glaze in a pastry bag fitted with a round decorating tip and pipe onto baked apples. You can also put your glaze in a plastic bag and cut the corner to pipe your icing.
- 1 box Ghirardelli Brownie mix
- Ingredients listed on box
- White lollipop or cake pop sticks
- Bake brownies according to package directions using a square 8x8 or 9x9 pan.
- Set aside to cool.
- Once brownies are cool, cut into small 1 1/2 " squares.
- Place a stick into each brownie, pressing sides in slightly to hold if necessary.
What's nice about this recipe is that you can make as many cheesecake pops as you need. Servings will vary depending on the size of the cheesecake you start with and what size you make your pops.
- 1 frozen cheesecake
- 2-3 containers of Baker's Dipping Chocolate (milk chocolate, heat & dip)
- White lollipop or cake pop sticks
- Remove cheesecake from freezer and let it sit for a few minutes until it is soft enough to work with but not completely thawed.
- Using a small cookie scoop, scoop cheesecake and roll into balls. Place on a parchment lined cookie sheet.
- Insert a stick into each cheesecake ball. Place tray in freezer for at least an hour or until firm.
- When you are ready to dip the cheesecake, melt chocolate according to package directions.
- One at a time, dip balls into chocolate, tapping gently to remove excess and place back on cookie sheet.
- Place pops in refrigerator until ready to serve.
Photos by Leslie Reese
Here's what's coming up...
You can put any content in here.