


Féte en Blanc Hershey
Cheers to the success of our first ever Féte en Blanc Hershey event! It was a fabulous night celebrating summer with our families, friends and neighbors. Want to join us for our 2020 event? Head over to the Féte Hershey website to find out more! It’s definitely the Sweetest Dinner Party of the Summer. Please join us!

Avocado Smoothie Recipe
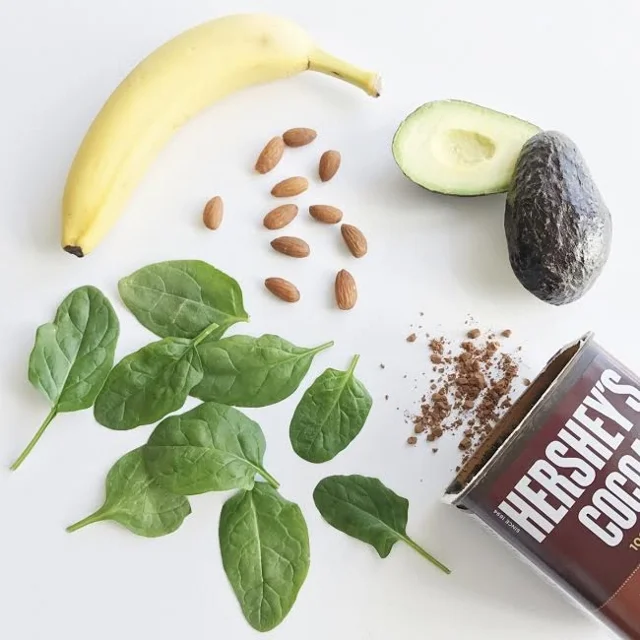
Whether you need a healthy breakfast option or a quick solution for that snack or meal on the go this Avocado Smoothie is the perfect fix. It's packed full of healthy fats, fiber and flavor so it's good one to keep on hand for those days when you want to keep it clean. Feel free to change it up and make it your own. If the cocoa powder is too bitter you can cut it back to a teaspoon or leave it out. I love the flavor it adds and think its perfectly balanced with the flavor of the banana. Either way, change it up and make it your own!
Avocado Smoothie Recipe
2 handfuls spinach
1 Tablespoon cocoa powder
1 banana
1/2 avocado
Ice
Blend and enjoy!
Leslie xo

30 Days Back to Me

Do you ever find yourself, every so often, wondering what your life is all about? You reach a point where you start re-examining your purpose because you feel just a little off center? I do...
2016 was a crazy year for me, a literal roller coaster ride of changes. Most of them were awesome, but just when I was feeling head in the clouds high, the 2016 ride came to an abrupt end. When the holidays were over I found myself feeling unbalanced thinking what am I going to do with you 2017? What do you want from me this year? And that's when I decided to take the time to figure it out. I gave myself 30 days to get my s*** together and get back on track.
BEST. DECISION. EVER.
I decided to focus on getting my mind, body and spirit in order and re-balance my life. The result was a clearer mind, healthy weight loss and a stronger faith. I feel better than ever so I decided to share the things I did with you. Keep in mind, everybody's journey is different. These are the things that helped get me back on track. The important thing is that you take time to be still and listen to what your body, mind and spirit need. If you do, you might be amazed at what happens.

FAITH
First things first. One of the things I realized when things seemed out of sync was that I had not been focused on my faith. These days there is so much noise pulling us away from what's important. We feel the need to stay "busy" and we're constantly checking our phones so we don't miss anything. We all do it. But do we ever take time to simply be still and get quiet? I took some time to unplug from things like email and social media and decided to plug in to a higher power and it made an unbelievable difference in my life. Now when things don't feel right I let go and let God and oh what a difference it has made. I start my day with focused prayer and set daily intentions for my life. I do that before I turn on the TV, check my social media or connect to family and friends. Whatever you believe, wherever you are in your life's journey, take some time to stop and get connected to a higher power and you will see a wonderful shift in your life.
NUTRITION
One of the other things that felt out of balance was my health. I have no problem admitting that I am now in my 50's. I do the best I can to take care of myself and I am really trying to embrace this stage of life. BUT, I am realizing that the older I get the harder it is to stay on track. As we age our health becomes more about how we feel and not just about how we look. I wanted to feel better inside and out so one of the things I did was work to make my body stronger. Now, instead of hitting the snooze button I get up and get to the gym first thing in the morning. Once you make it a habit you realize it's a great way to start the day.
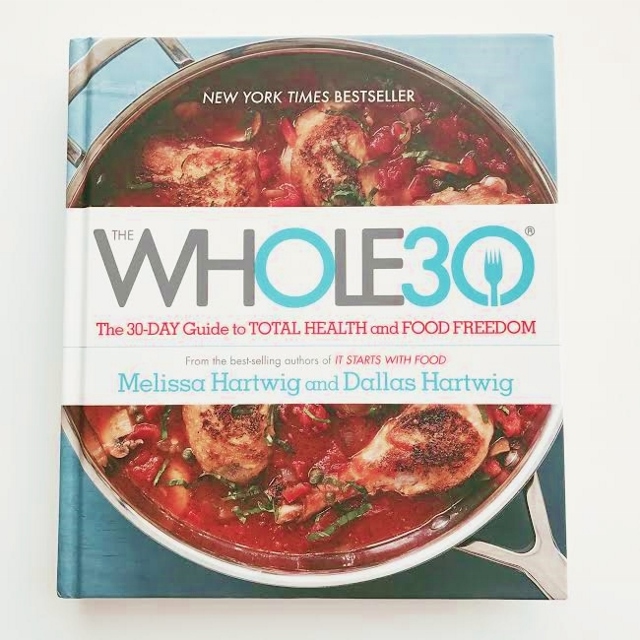
I also decided to try the Whole30 program and it was one of the best things I have ever done. It was quite a challenge (especially because I am a girl who loves a happy hour cocktail!) but I made the commitment and I am SO happy I did. The result was an 8 lb weight loss, a clear and focused mind, better sleep and the joint pain I had been experiencing is gone. And although I plan to occasionally indulge in the foods I love, I have tamed my sugar dragon for good. Whole30 is a way of life, not a diet. You don't need powders, pills and packaged food to see amazing results. It's clean eating, period, and it has changed my life.

MINDFULNESS
"Mindfulness is the basic human ability to be fully present, aware of where we are and what we’re doing, and not overly reactive or overwhelmed by what’s going on around us."
Mindfulness is a powerful thing. I had never really taken the time to understand or practice mindfulness or meditation until recently. When you become still and embrace the here and now it can be a game changer in how you go about your every day. At the end of last year I was struggling with not feeling very focused and on New Year's Eve my daughter actually said " Mom, you really should meditate". Wise words. I downloaded the Meditation Studio App on my phone and I am quite hooked. There are a variety of series and collections with different instructors and styles of meditation. You'll find meditations for stress, sleep and anxiety to happiness, performance and confidence so you can choose just what you need for how you feel at any given time. The time frames range from 3 minutes to 30 minutes so you don't have to have a lot of time. And you will be surprised what a difference a 3 minute meditation will do for your mind, body and spirit. Learn to be still.

GRATITUDE
Gratitude is another very powerful piece to the puzzle of life. Gratitude changes everything. When we learn to see the good in things we are happier, less self centered, more productive and much kinder. Gratitude does not just mean saying thank you for a gift or a kind word someone gives you. It's those things too but it also means appreciating the things that might not seem like good things at first. It's saying thank you for the struggles in your life because without them you might not be where you are. How many times have you looked back and thought wow, I am so much better off or I am so glad that happened that way... (insert girl with her hand in the air here). Think about it... So when something doesn't go the way you think it should or you don't get what you thought you needed or wanted just have faith and be grateful. Because chances are, you are being led to something far greater than you could have imagined.
This 30 day journey taught me that when you stay true to yourself, take a step back and give yourself time to regroup everything starts to make sense again. And when you come back to center you will find that you are so much more equipped to live the life you imagined. And that's also when you'll realize that just maybe you are right where you are supposed to be. You simply needed to be still to realize it.
So don't ever settle for anything less than the extraordinary life you were meant to live. It's in every single one of us. Take some time for you, get quiet and listen to your inner self so you can be balanced, be happy and be at peace.
Cheers to all of the good things happening in 2017!
Leslie xo
Little Spoon Cafe - Philadelphia

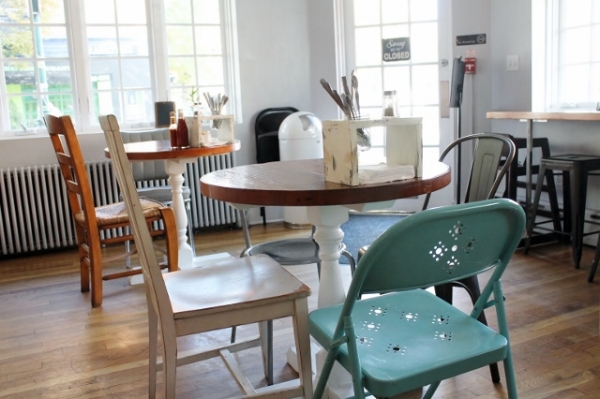
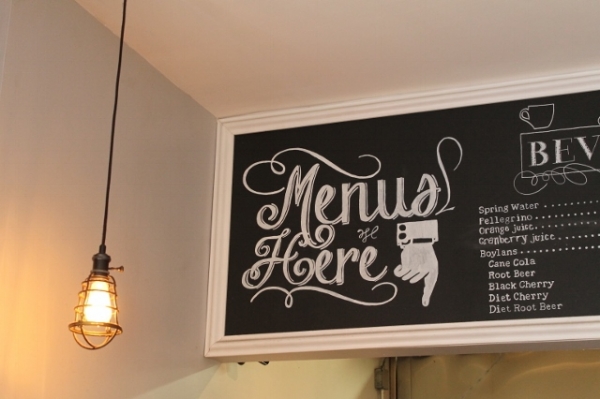
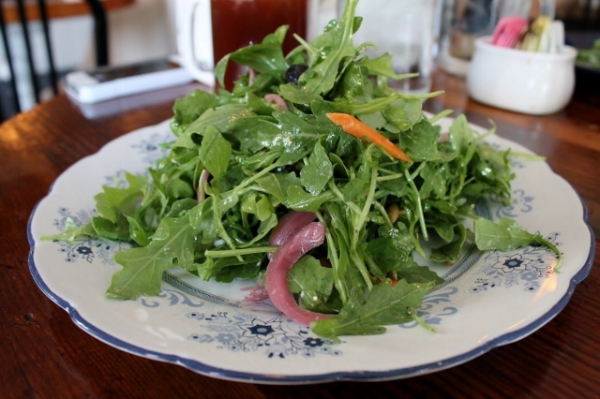
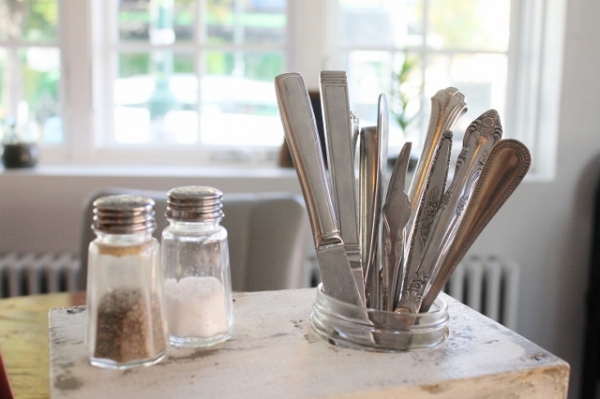
On a recent trip to Philadelphia my daughter and I stumbled upon a fun little restaurant while wandering down South Street. Little Spoon Café is my favorite kind of place for a quick bite or a cup of coffee. Literally tucked into the corner of 15th and South Streets this cute little cafe had me swooning from a block away. As soon as I noticed the hanging spoon sign and pretty blue awnings lining the windows I knew I had to go inside. The cozy space is scattered with mismatched chairs, vintage tableware and eclectic décor giving the café a comfortable and friendly vibe. The food is fresh and delicious and the fact that my salad was served on vintage china had me giddy {it’s those little things, remember?}, not to mention the extremely friendly staff that made us feel right at home. So the next time you find yourself in the South Street neighborhood make sure you stop by Little Spoon Café. You’ll be glad you did!

"Once a year go someplace you've never been before." Dalai Lama
Have a wonderful day!
Leslie xo
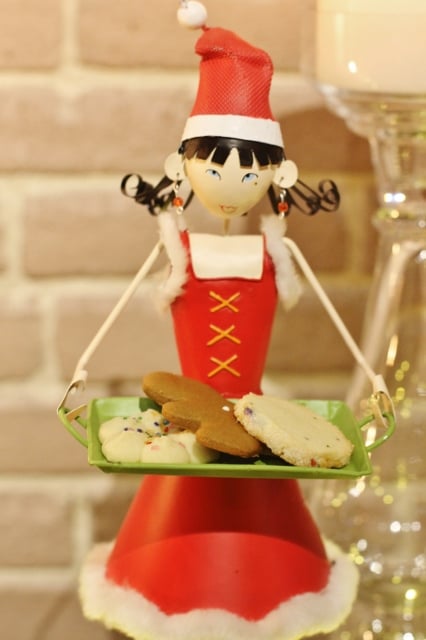
A Christmas Tradition

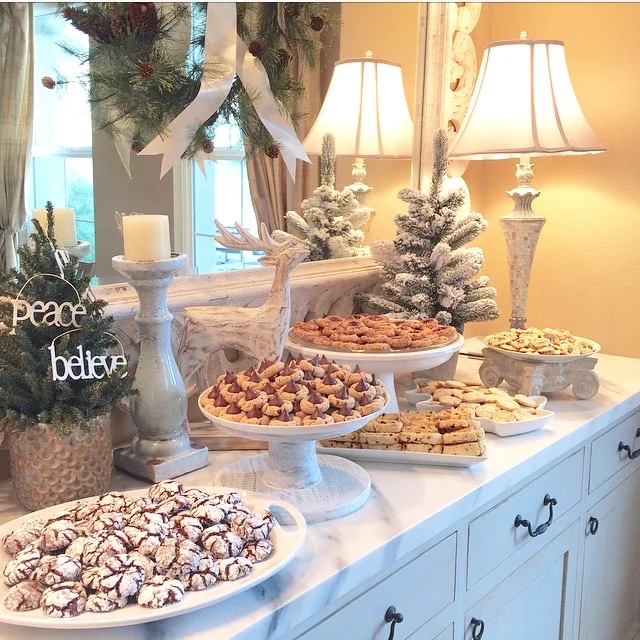
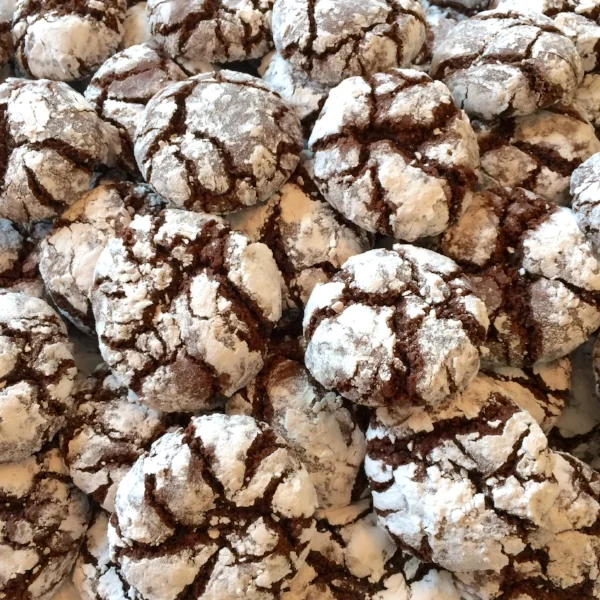
The 2016 Christmas Cookie Baking trip has come to an end! This year marks 25 years since my twin sister and I started getting together for what has become a wonderful holiday tradition. Over the years our time together has gone from a focused 3 day baking storm to a treasured retreat that includes more catching up over coffee, walks along the beach, seaside dinners and conversations about life. We still bake lots of cookies but our focus is now, more than ever, about the opportunity to be with family and the precious time we spend together. I hope you are all enjoying each and every moment in this festive season. Here are some of my favorite pictures and memories from this years trip to San Diego.
Happiest of holidays to you and yours!
Leslie xo


Philadelphia's Magical Gardens
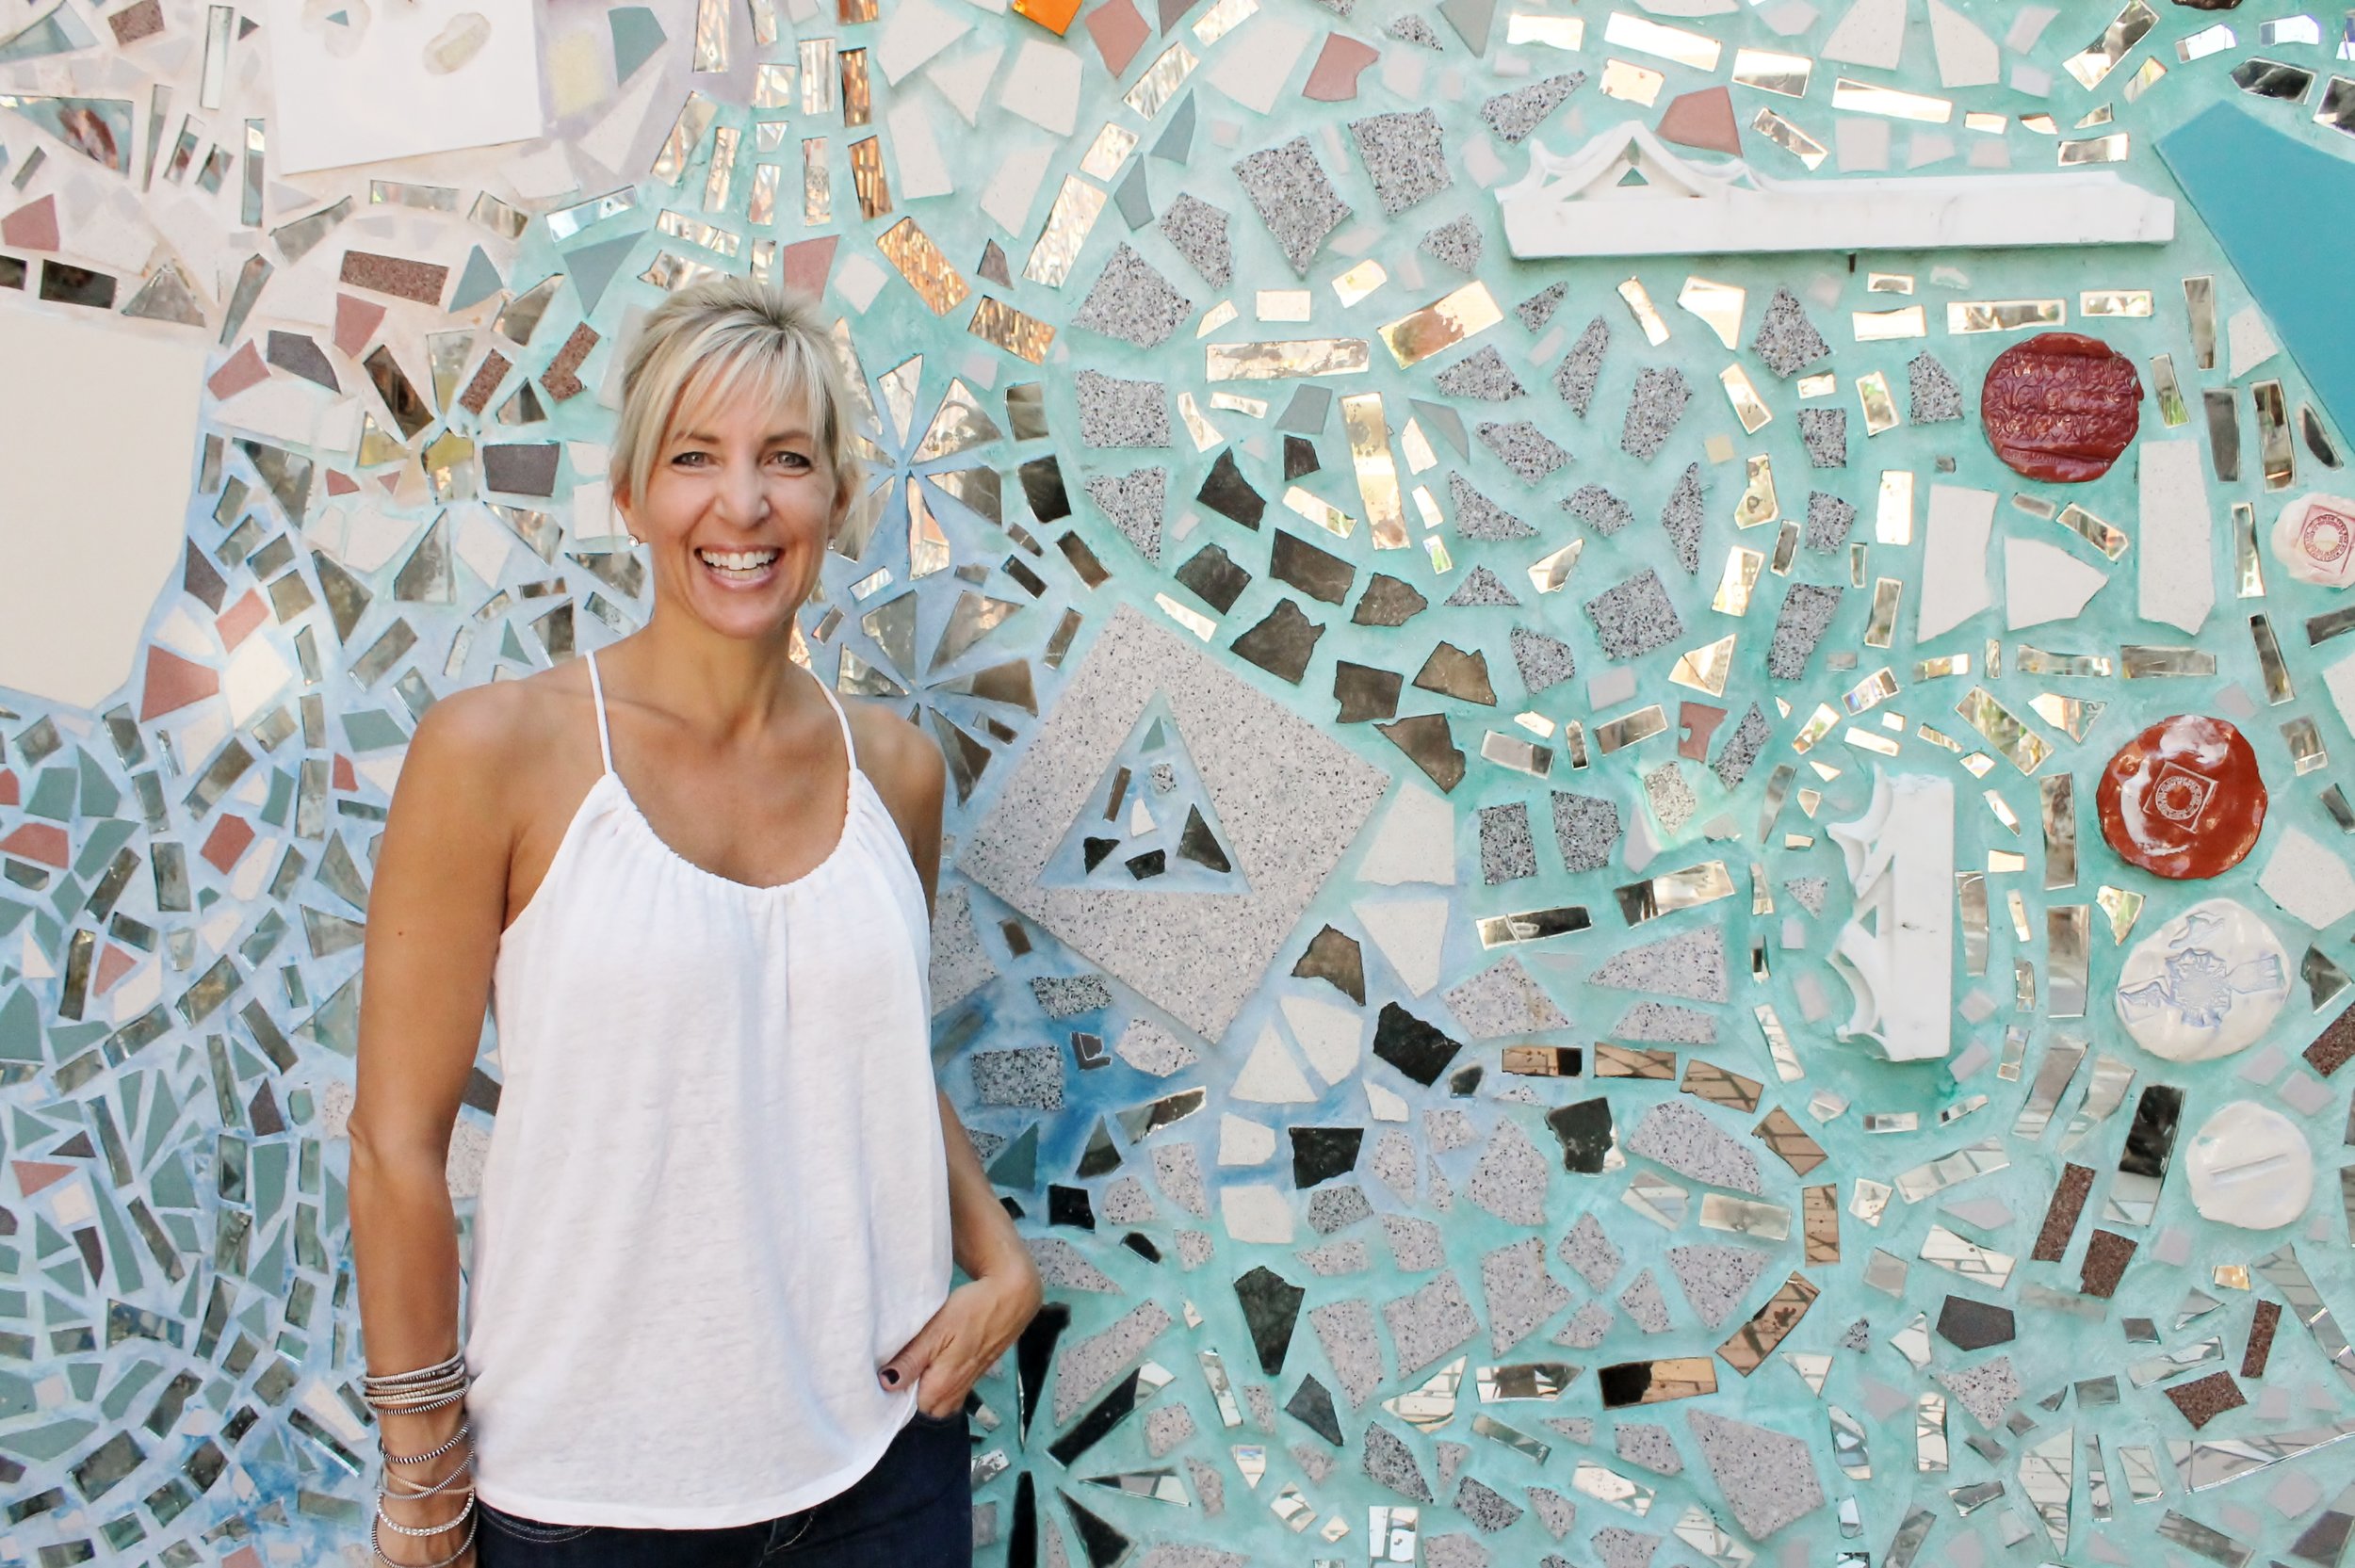

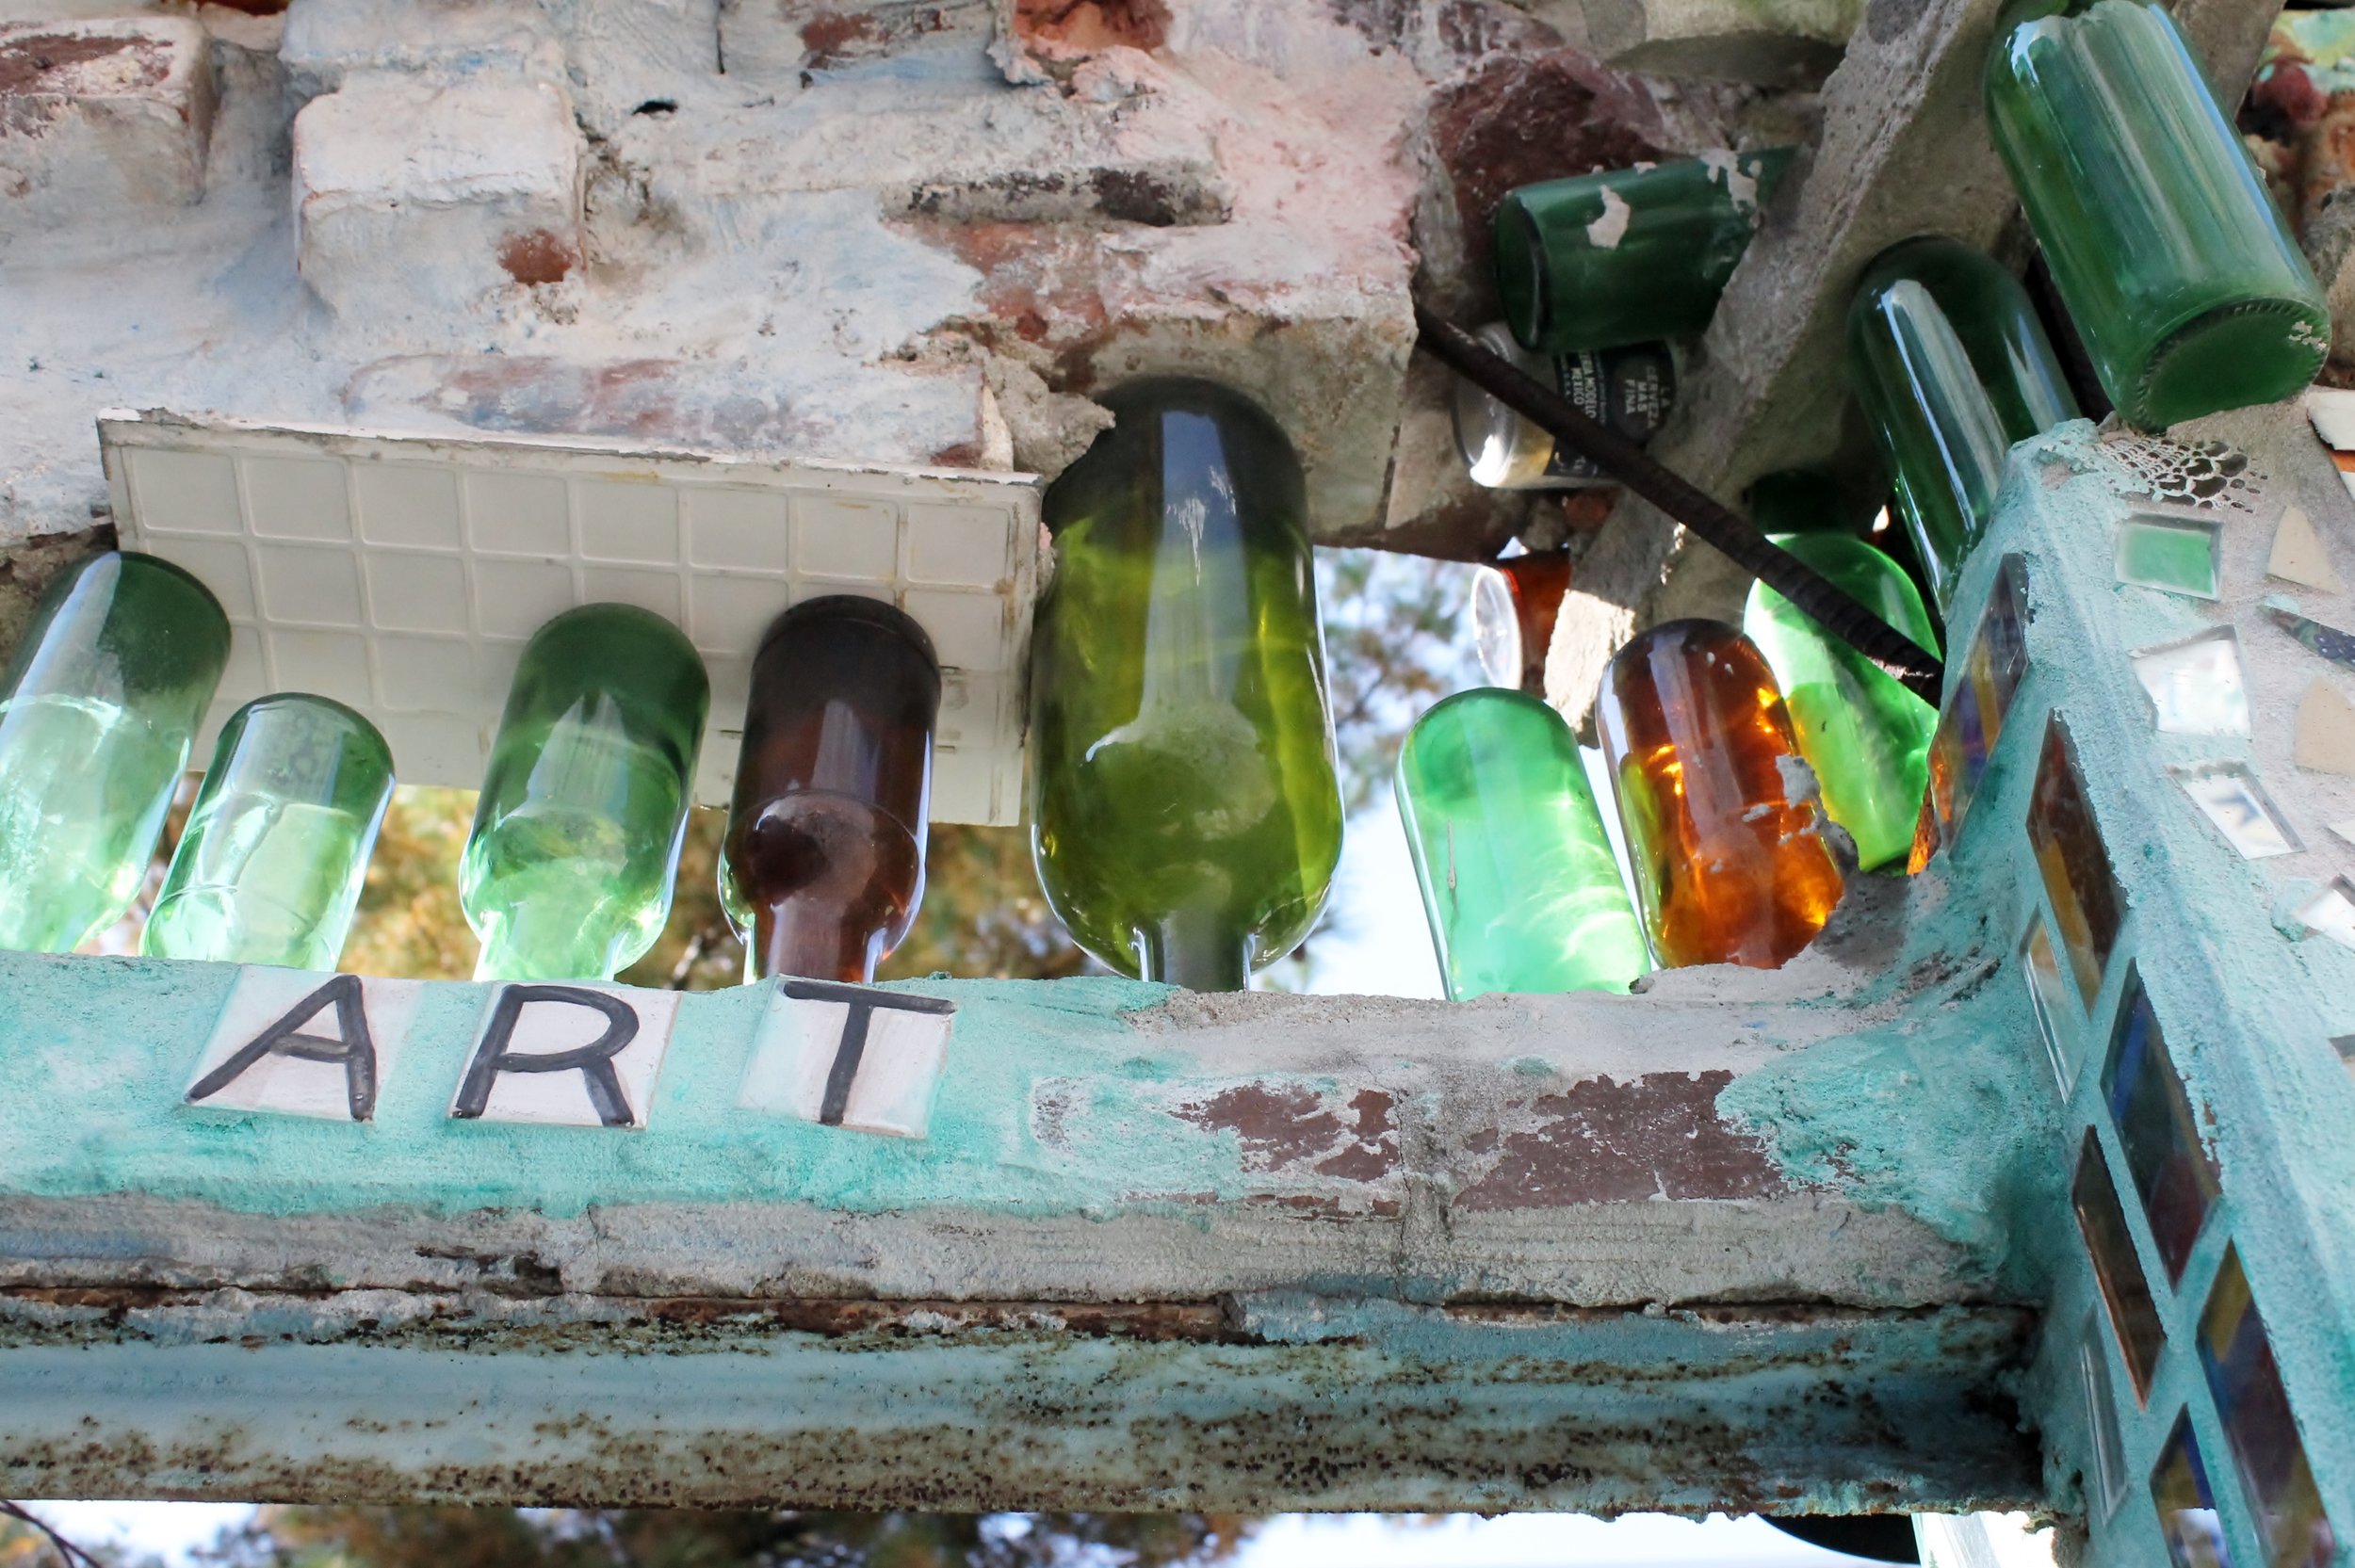

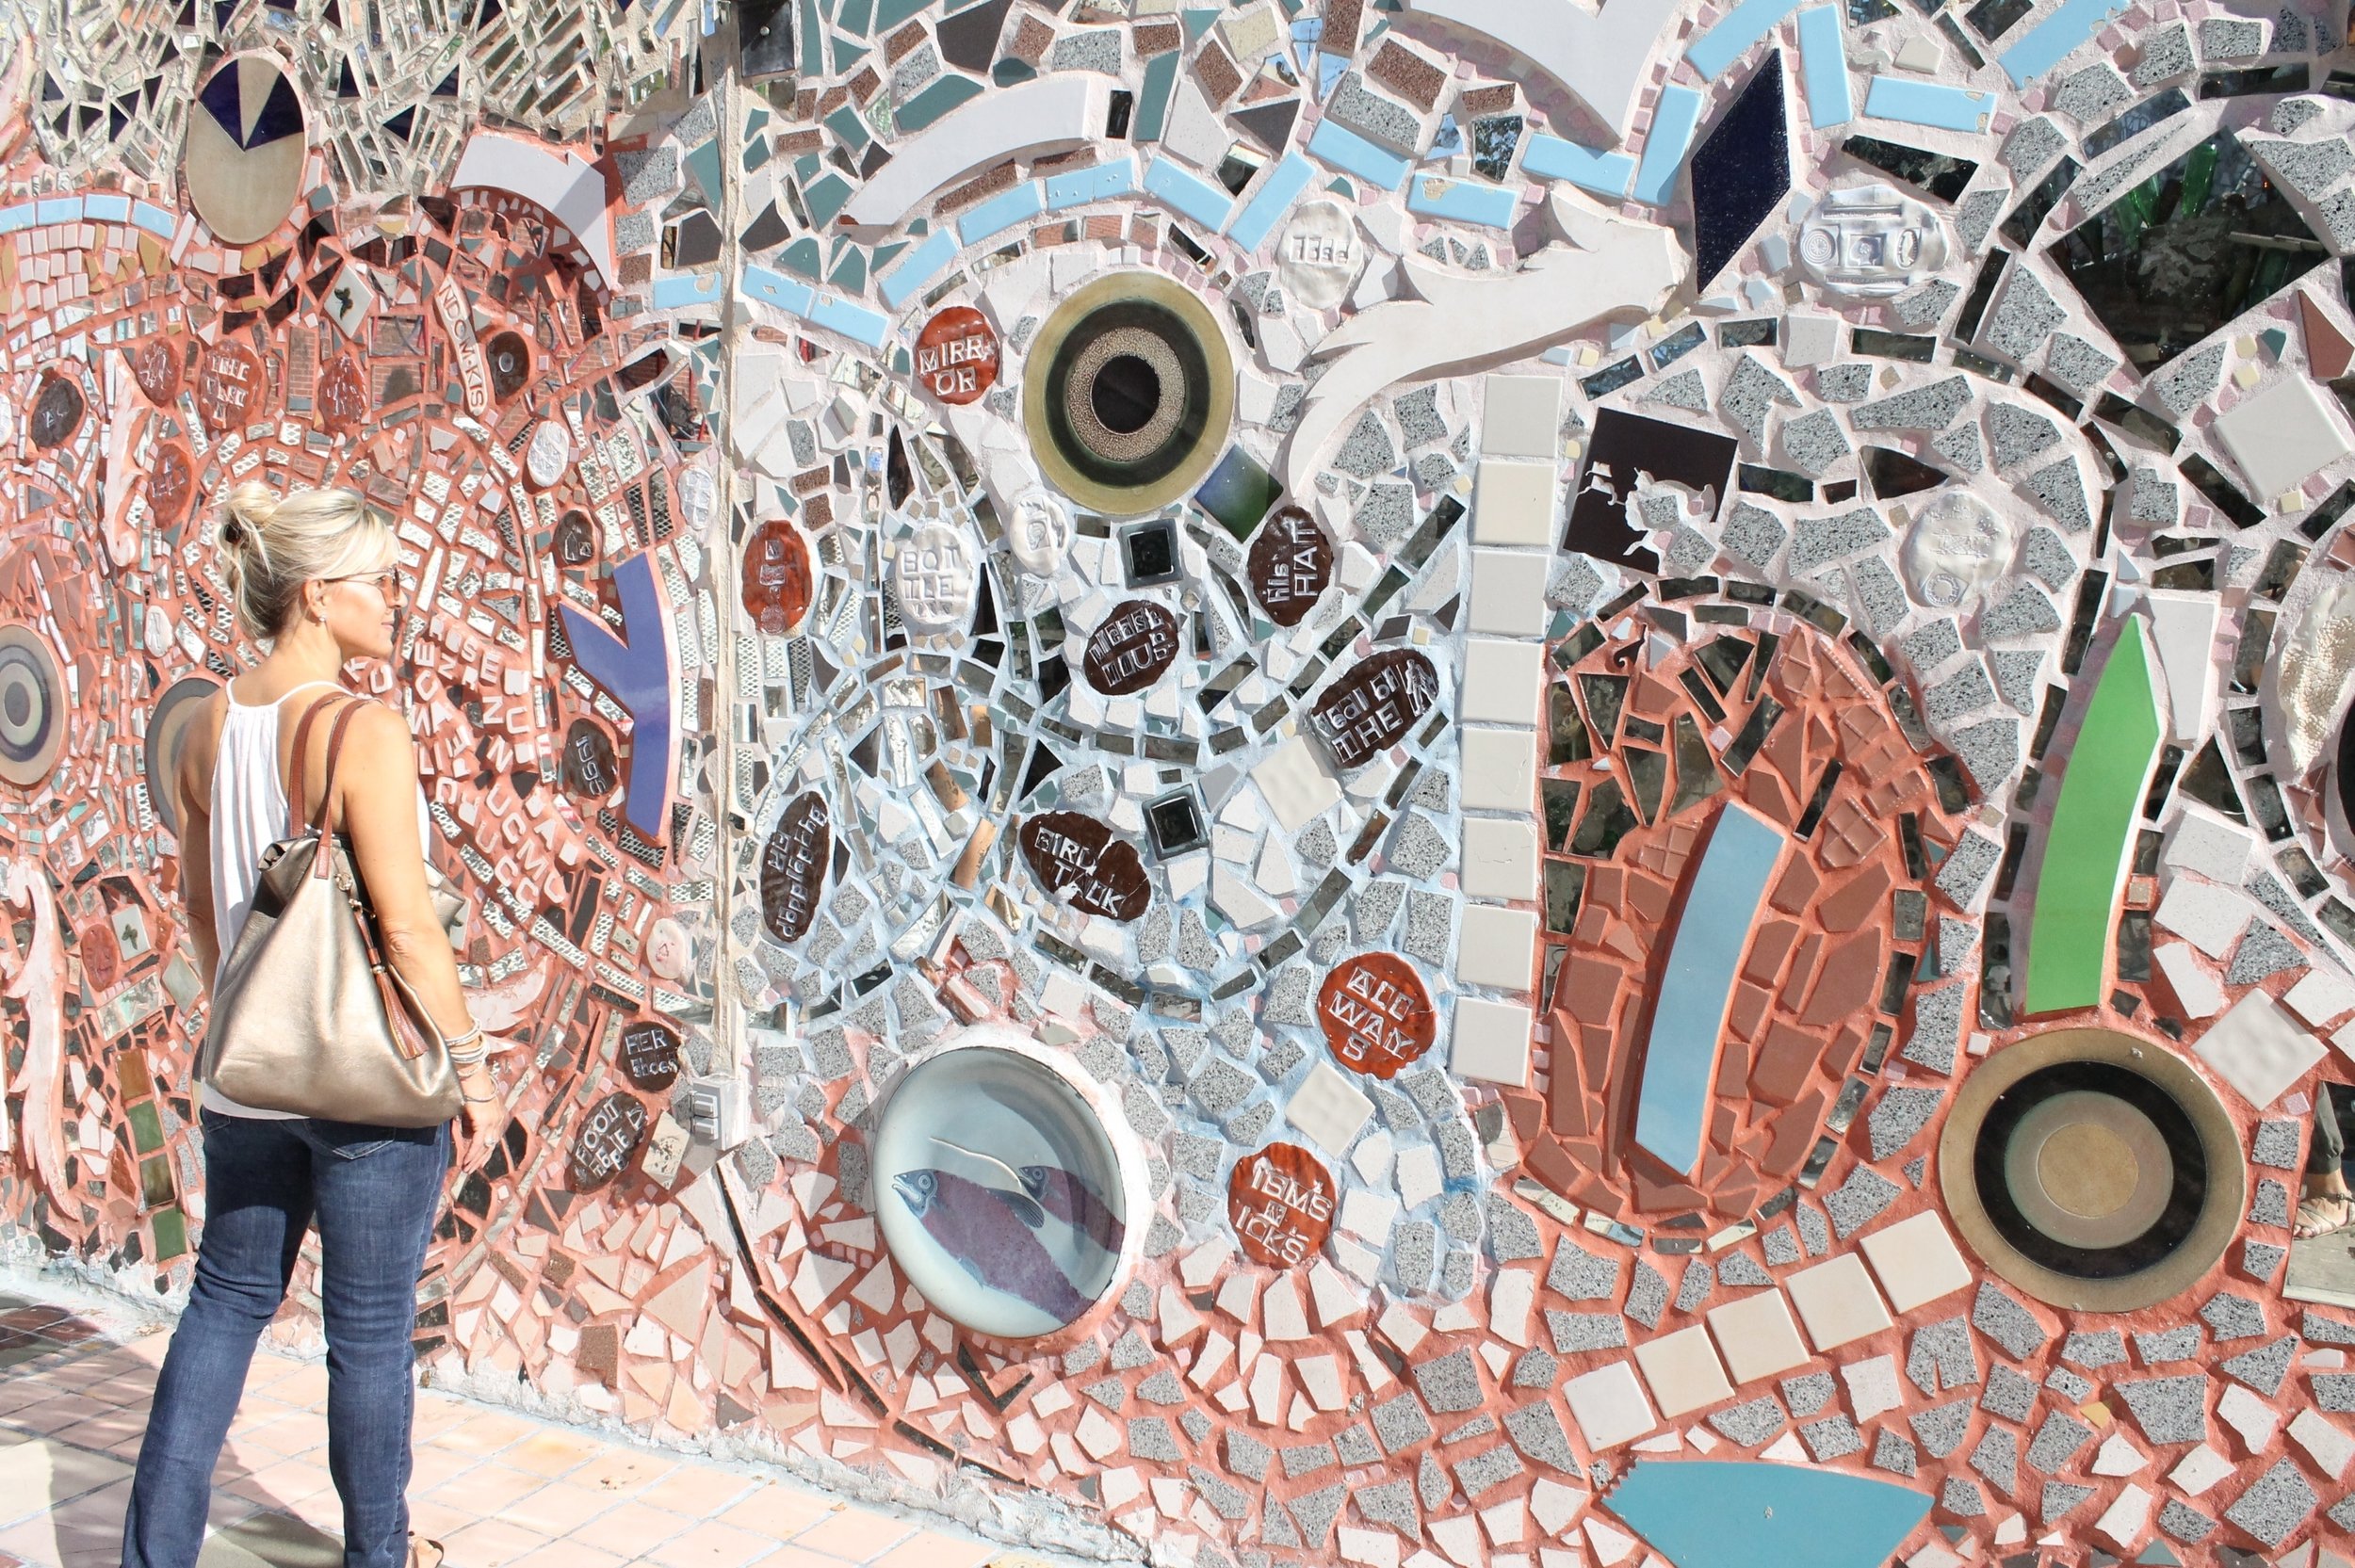
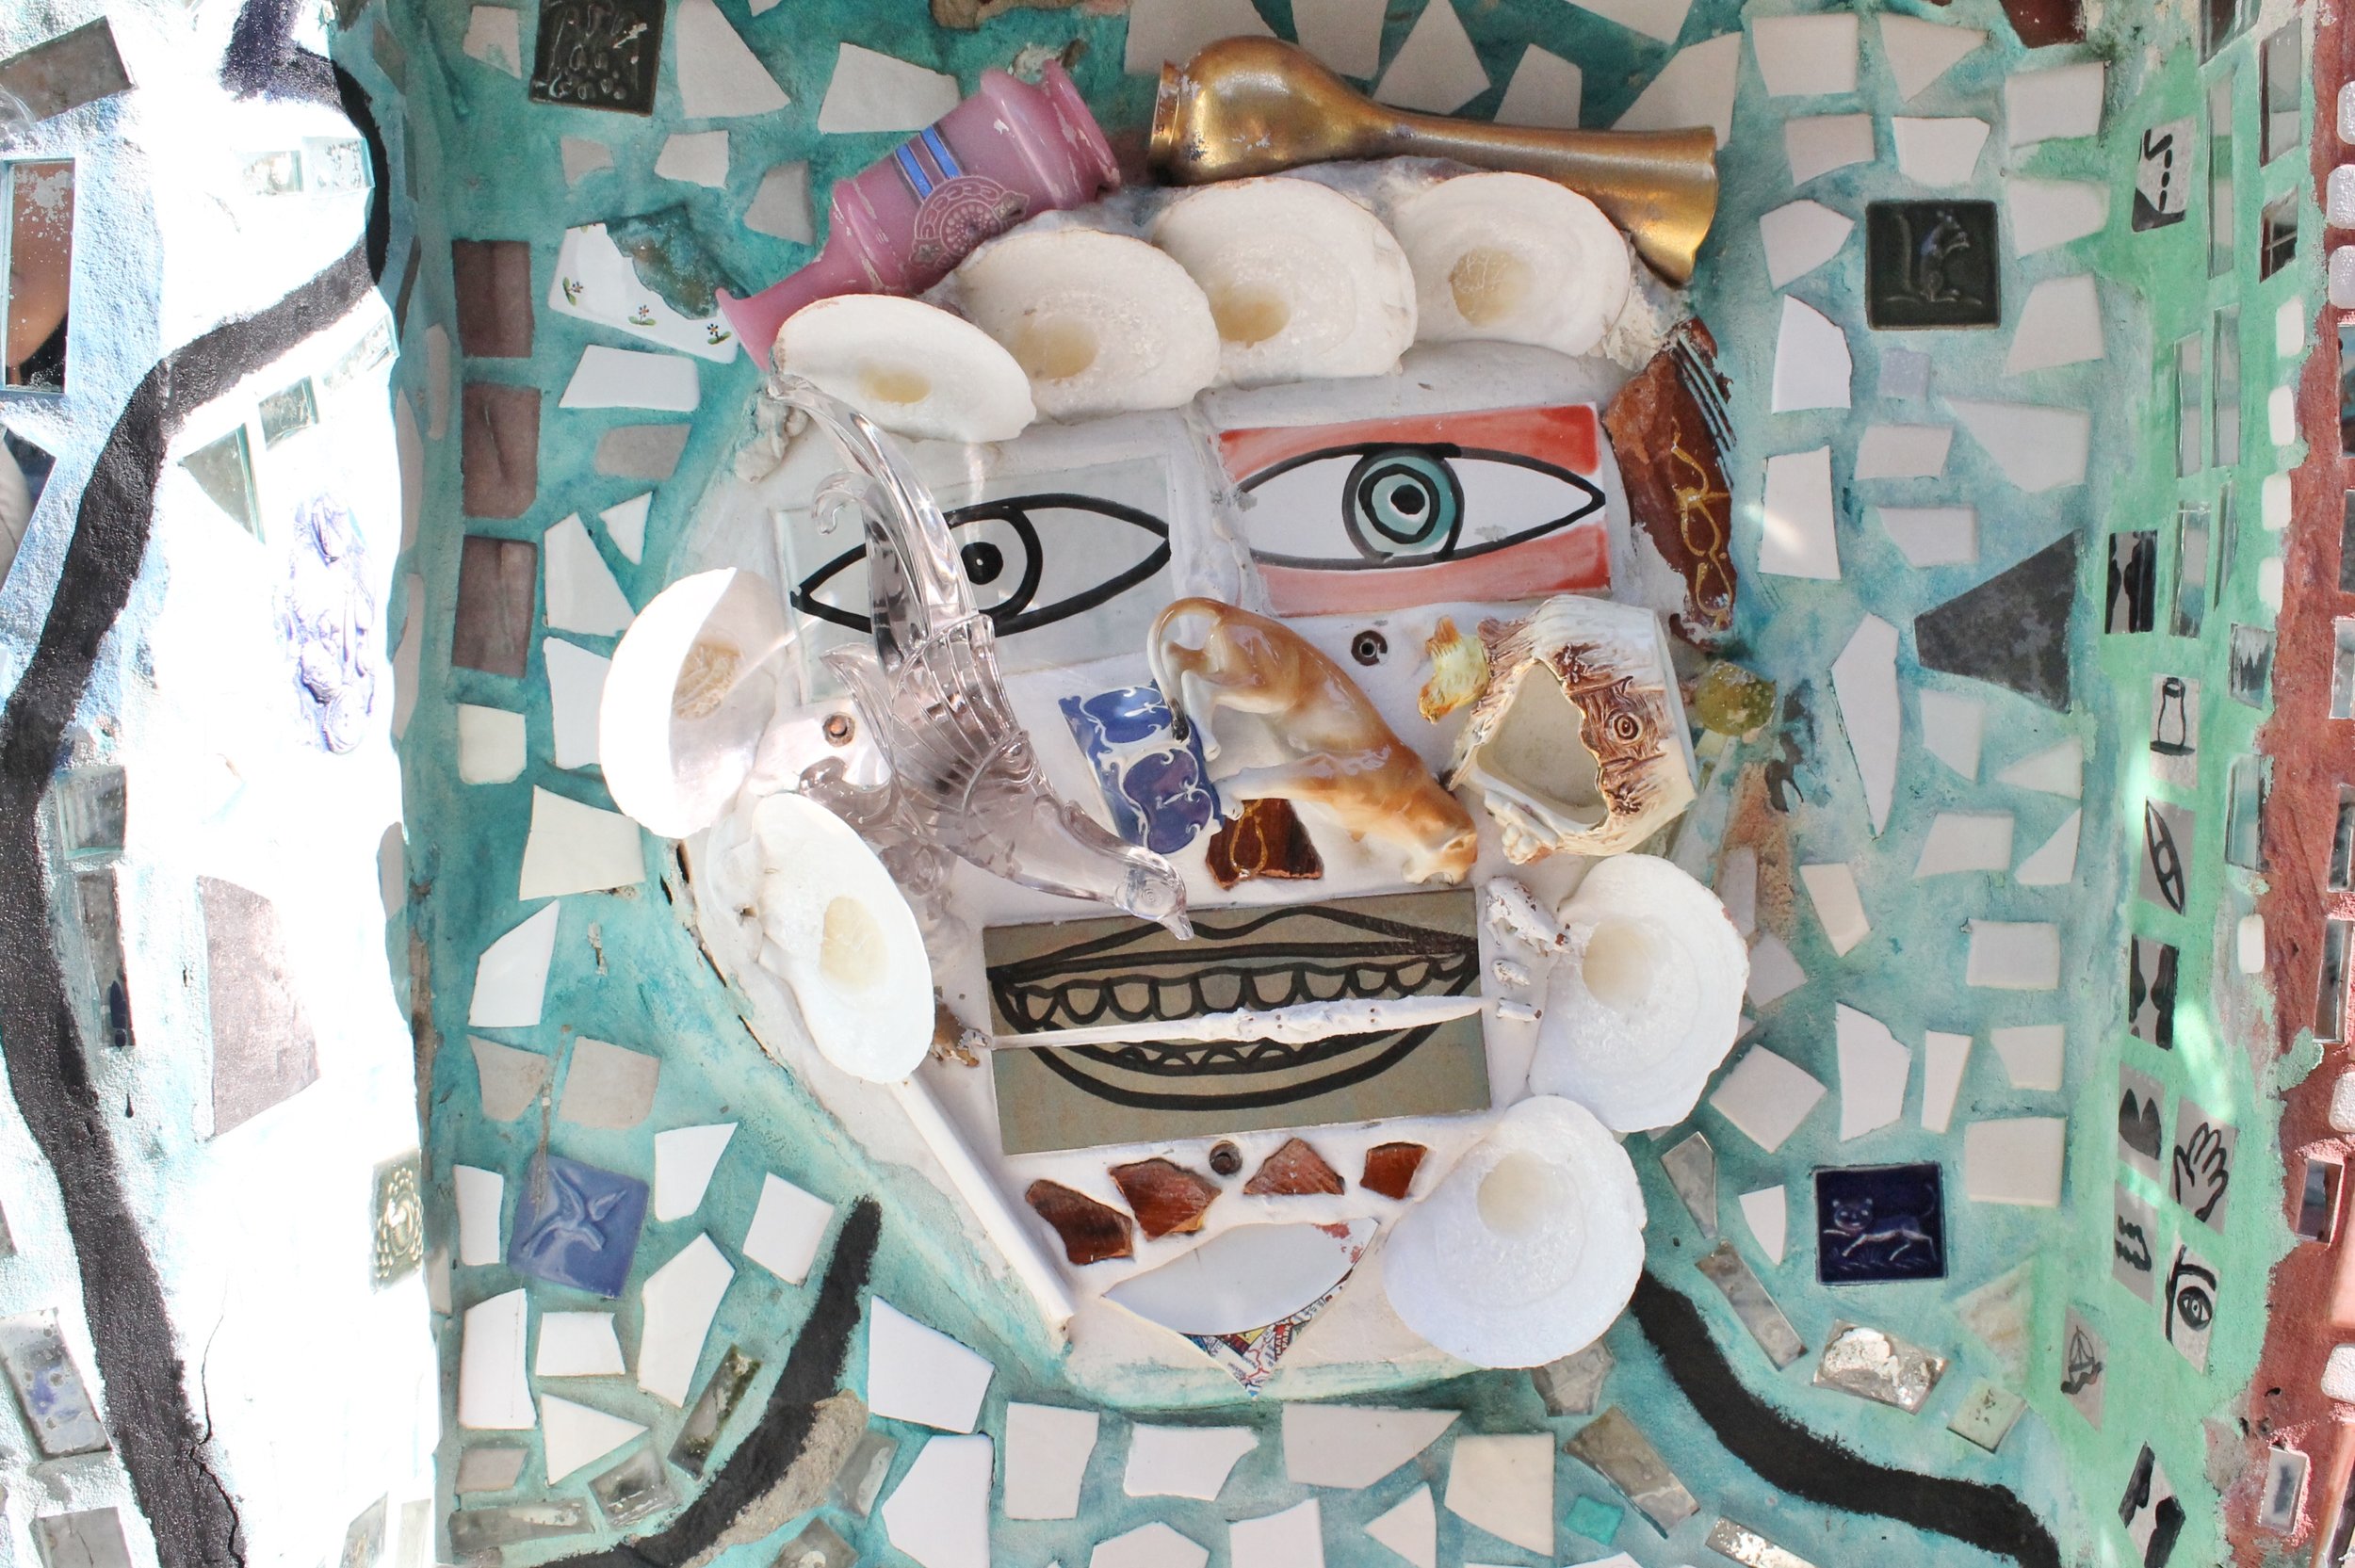
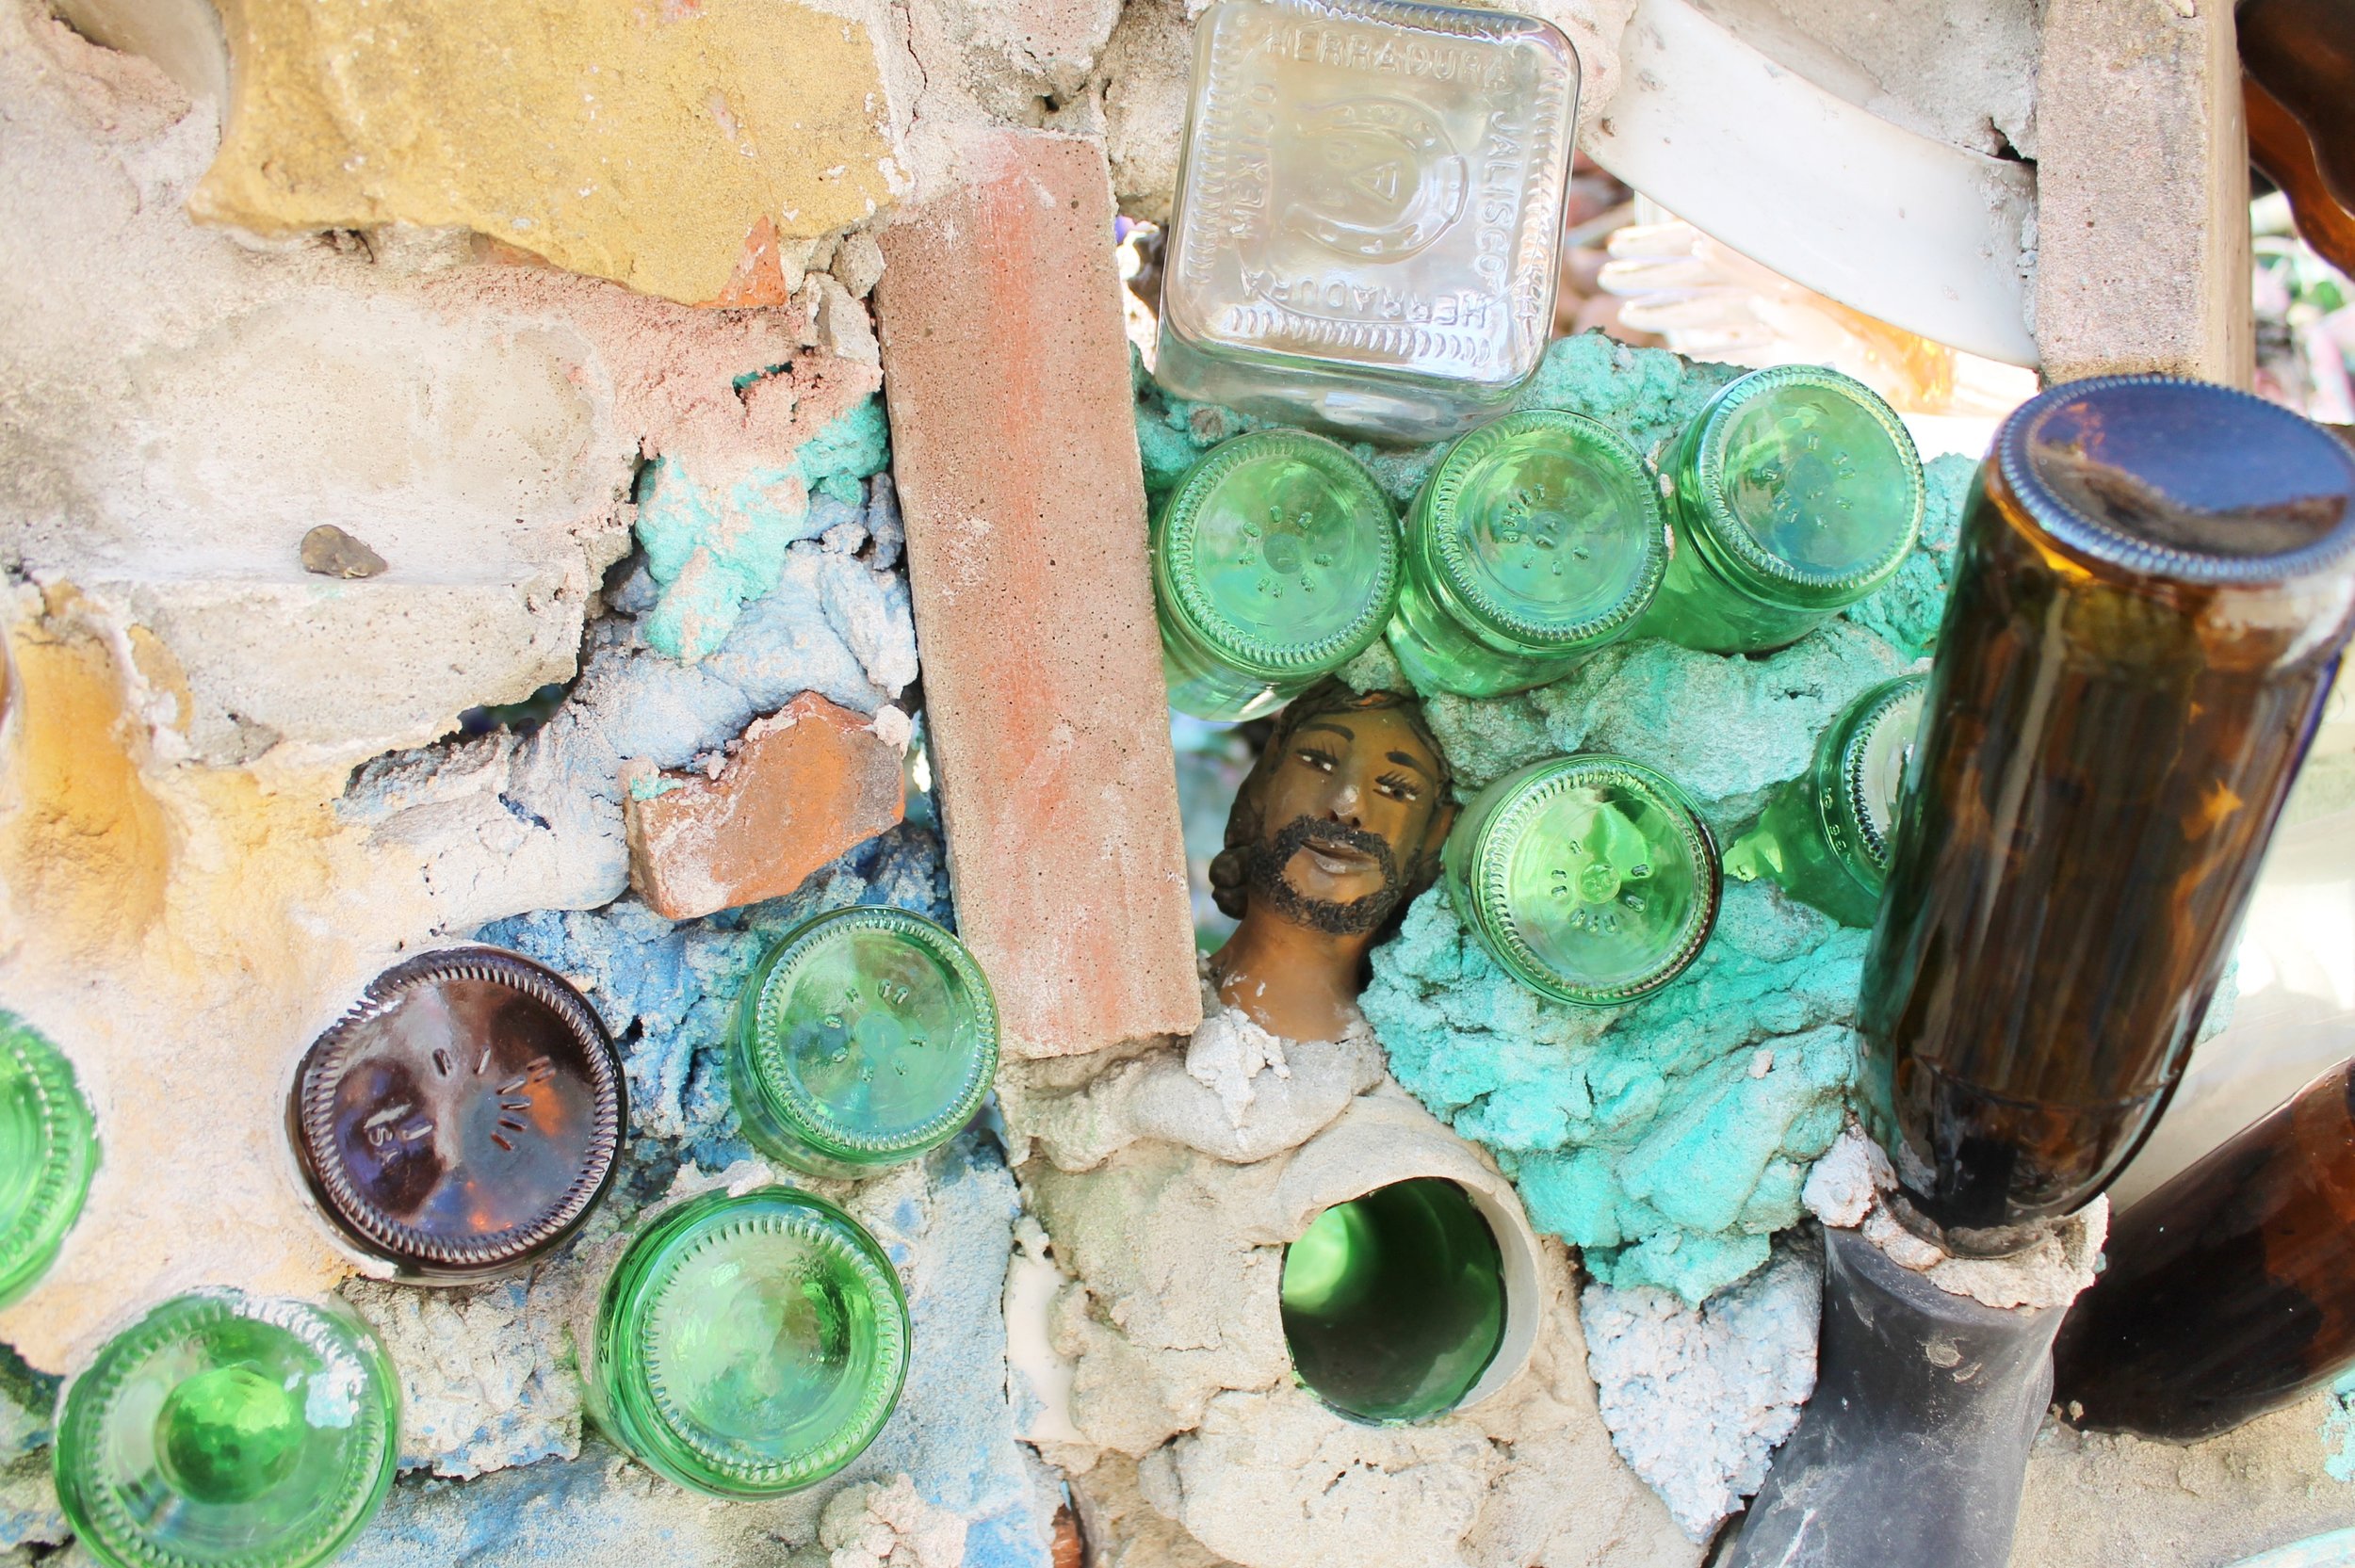


A few weeks ago I wandered down to the city of Philadelphia to visit my youngest daughter Lynsie. She moved there a few years ago and ever since then it's been one of my favorite places to explore. Each time I go we find new and interesting things to do. This particular visit took place on a perfect Indian summer day {the kind that makes you want to stay outside all day!} so we ventured down to South Street to check out Philadelphia's Magical Gardens. This absolutely fascinating museum, which spans half a block on South Street, was created by award-winning mosaic mural artist Isaiah Zagar. The beautiful mosaics covering the walls, floors and ceilings of the indoor and outdoor galleries and installations are made from a collection of found objects ranging from bicycle wheels, dishes and colorful ceramic pieces to glass bottles and mirrors. It is truly awe inspiring and an amazing sight to behold. We wandered around not knowing where to look first. Every inch of the place seemed to have a story so we took our time and slowly strolled through what is a truly unique attraction. The $10 ticket was well worth the price and you are welcome to go in and out all day so you can take a lunch or shopping break. I guarantee when you go back in you will see things you hadn't noticed before. A definite must see if you enjoy Philly and plan to be in the South Street area! So when you can, take a day, be spontaneous and have some fun!
For more information check out Philadelphia's Magical Gardens.
Enjoy!
Leslie xo
Brownie & Chocolate Chip Cookies

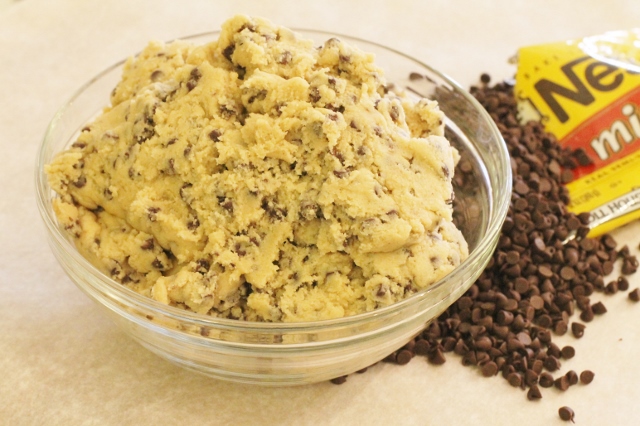
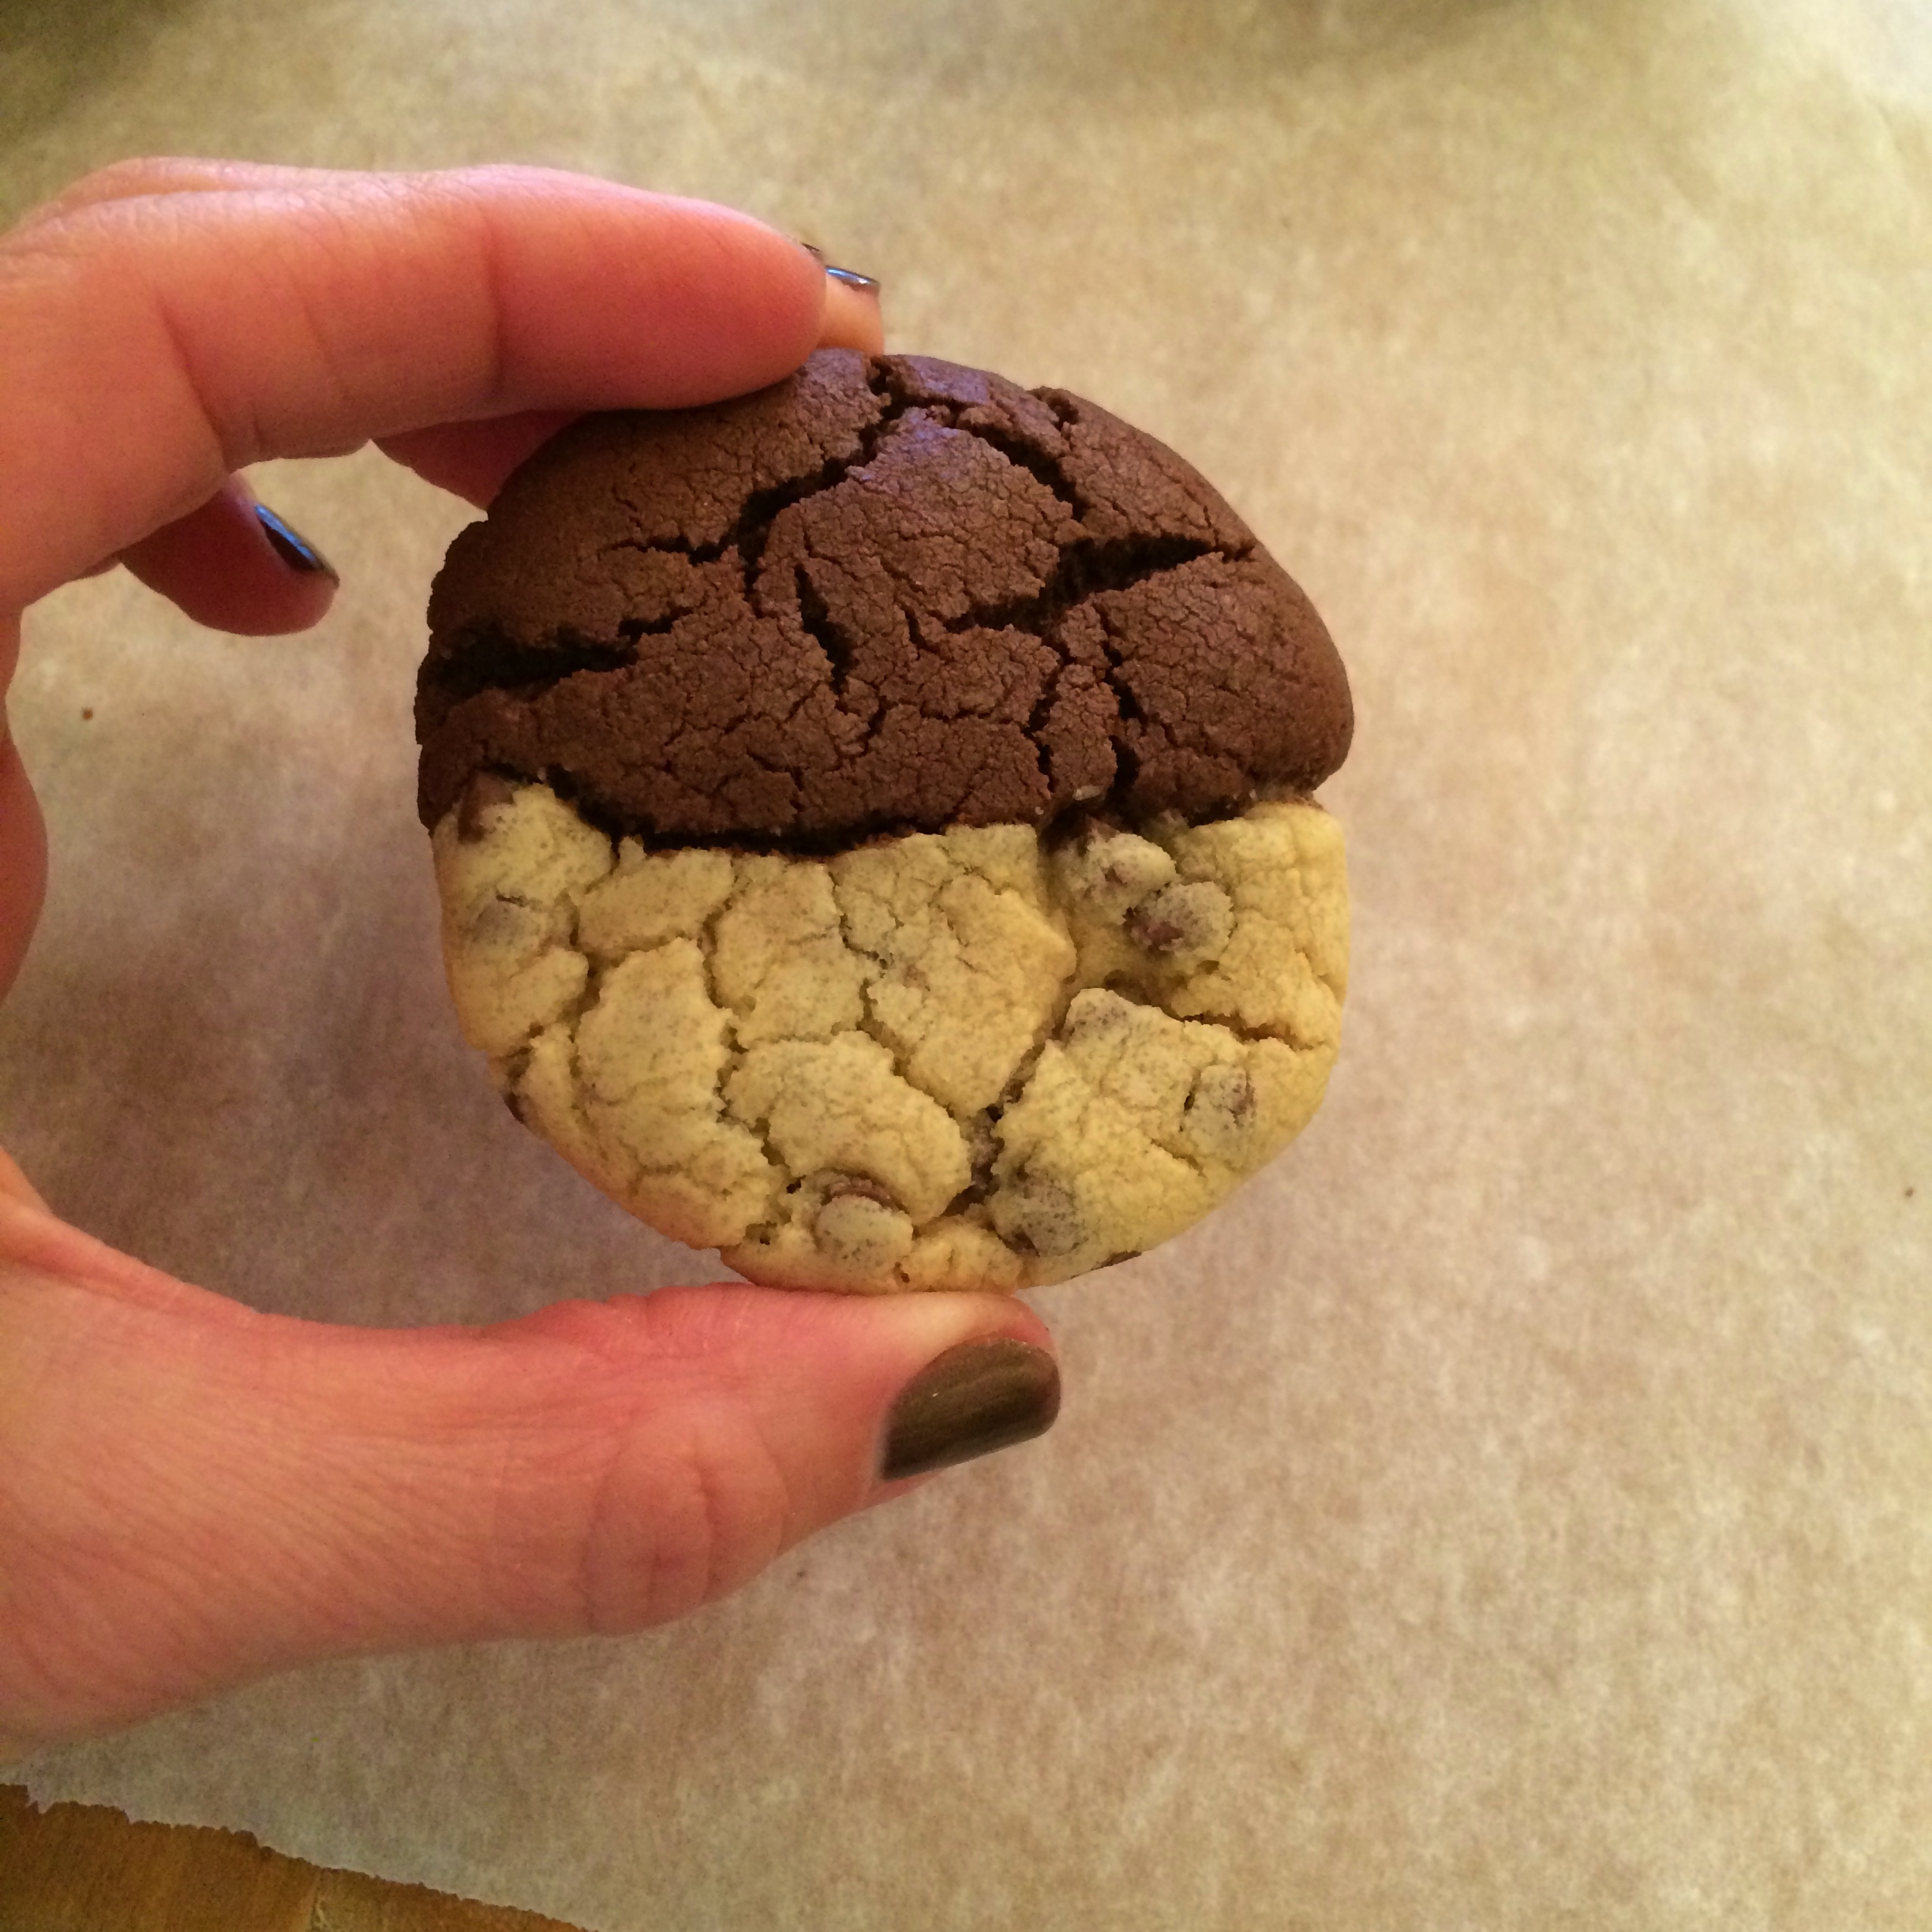

Now that my nest is empty I don't spend nearly as much time in the kitchen as I used to. I'm much more on the go not to mention the fact that having baked goods staring at you every night is nothing but trouble. I have really missed baking though so I decided to get out my mixer and head over to my Pinterest boards to find something new to bake. It was a tough decision (I wanted to make everything!) but I chose these Brownie and Chocolate Chip Cookies because they are a wonderful combination of two of my favorite sweets! They are simple to make and really delicious so I had to share! Oh and don't let the cracks fool you. These cookies weren't the least bit dry, quite the opposite in fact. Give them a try and you'll see.
Enjoy!
Leslie xo
Recipe
Brownie Cookie Dough Batter
10 tablespoons butter, softened
2/3 cup lightly packed brown sugar
2/3 cup granulated sugar
1 large egg
1 large egg yolk
1 teaspoon vanilla extract
1 1/4 cups plus 3 tablespoons flour
1/2 cup unsweetened natural cocoa powder
1 teaspoon baking soda
1/4 teaspoon salt
Chocolate Chip Cookie Dough Batter
10 tablespoons butter, softened
2/3 cup granulated sugar
2/3 cup light brown sugar
1 teaspoon vanilla
1 large egg
1 large egg yolk
2 cups plus 2 tablespoons allpurpose flour
1 teaspoon baking soda
1/4 teaspoon salt
1 1/4 cup mini chocolate chips
Directions
1. Preheat the oven to 350 degrees F. Line baking sheets parchment paper.
Set aside.
2. For the brownie cookie batter, in a medium bowl with a handheld electric mixer (or in the bowl of
an electric stand mixer), beat the butter, granulated sugar and brown sugar together until
smooth and creamy, 1-2 minutes. Add the egg, yolk and vanilla and beat the mixture for 2-3
minutes until light in color.
3. In a separate small bowl, whisk together the flour, cocoa, soda and salt. Add the dry ingredients to the batter and mix until combined. Cover and refrigerate while making the chocolate chip cookie batter.
4. For the chocolate chip cookie batter, in the bowl of an electric stand mixer or with a handheld electric mixer, cream together the butter, granulated sugar, and brown sugar until smooth, 1-2 minutes.
5. Blend in the egg, egg yolk and vanilla, mixing for 2-3 minutes until the batter is very light in color. In a separate small bowl (you can use the same one as the brownie batter dry ingredients), whisk together the flour, baking soda, and salt. Add the dry ingredients to the batter with the chocolate chips and mix until no dry streaks remain and the chocolate chips are evenly distributed.
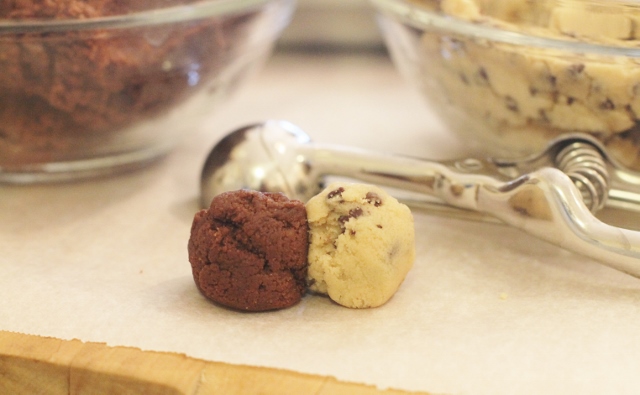
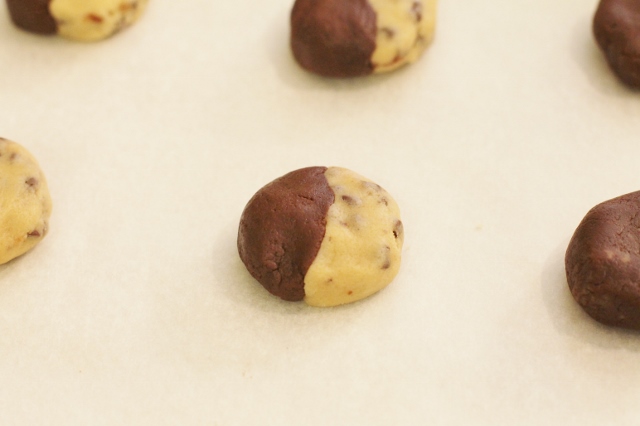
6. Portion both sets of dough into about 4 dozen equal pieces; they will be small teaspoon sized balls.
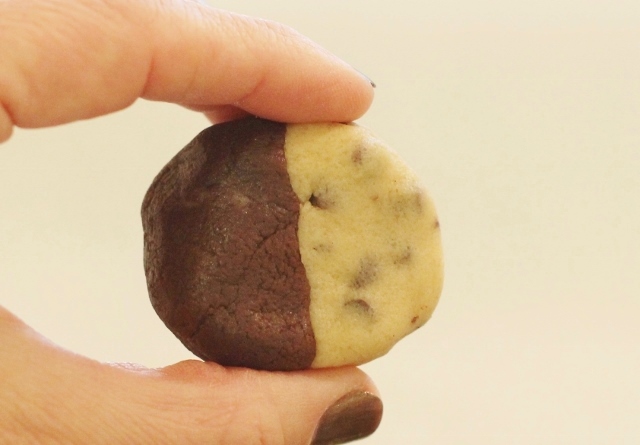
7. Take one chocolate chip cookie ball and one brownie batter ball, press them together and use your hands to gently form into a cookie shape, flattening and turning to smooth the edges and form a slightly flat but still thick cookie shape; they'll spread out while baking.
8. Bake the cookies on the prepared baking sheets for 8-10 minutes. Don't overbake or they will be dry and crunchy, under bake just slightly for a soft, chewy texture. It's ok if the chocolate side crackles just a bit. Remove from the oven and let the cookies cool on the pan for 1-2 minutes before scooping onto a cooling rack to cool completely.
Enjoy!

Cookies & Cocktails at The Mill
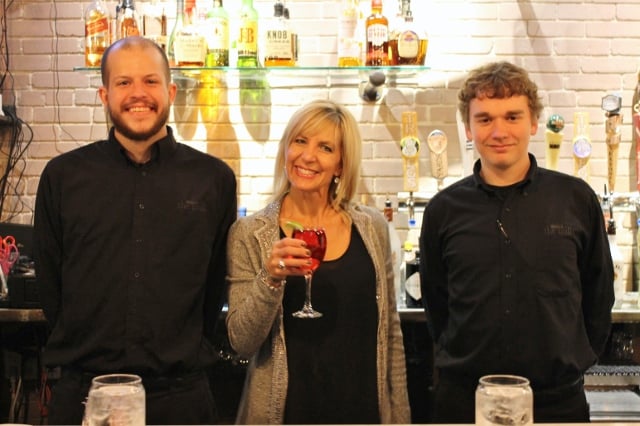
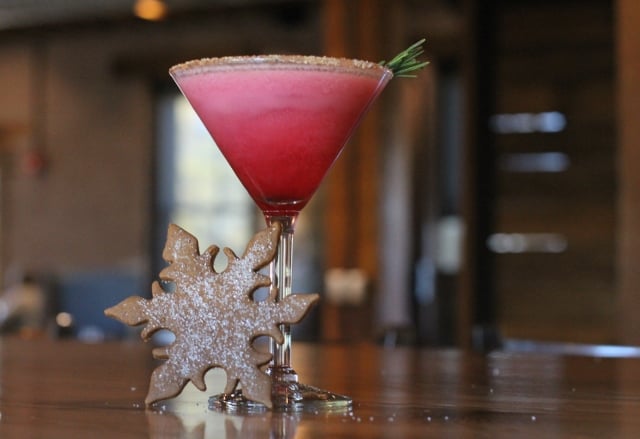
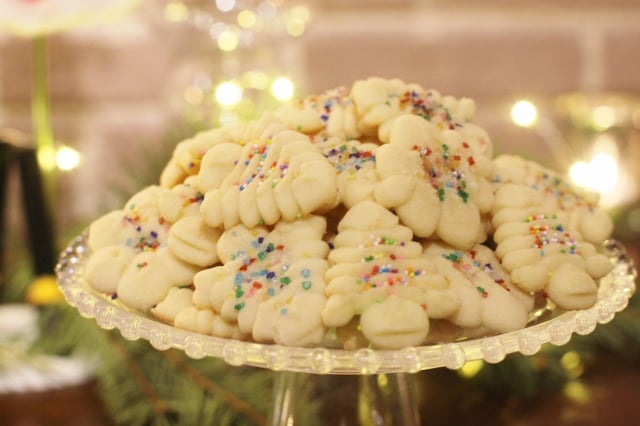
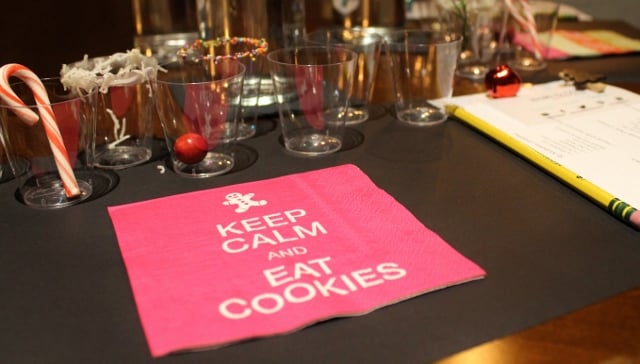


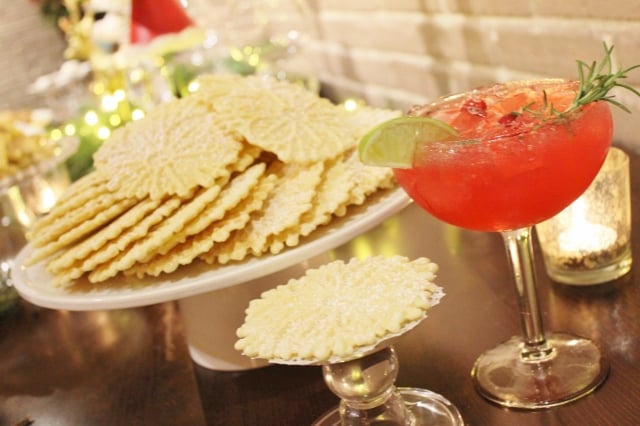
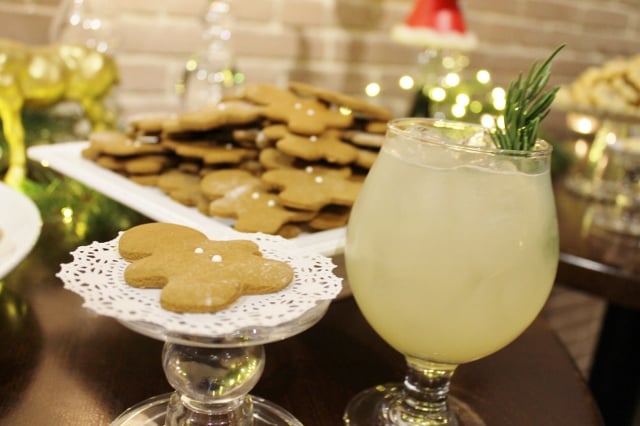

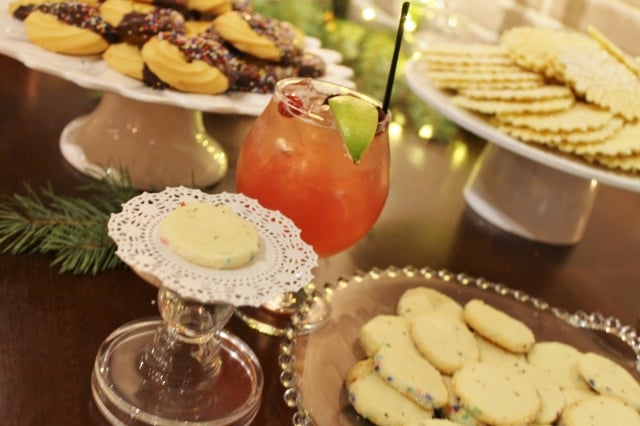
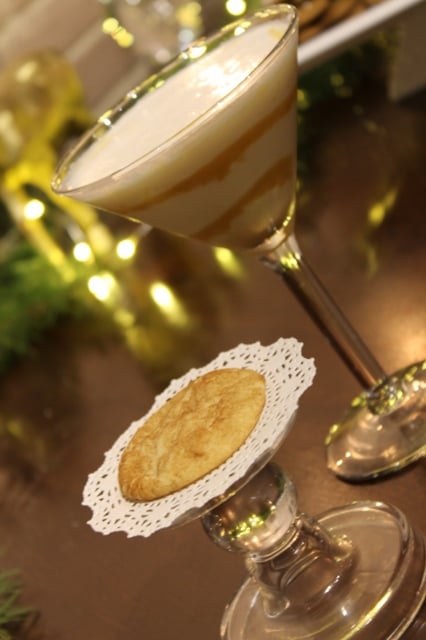
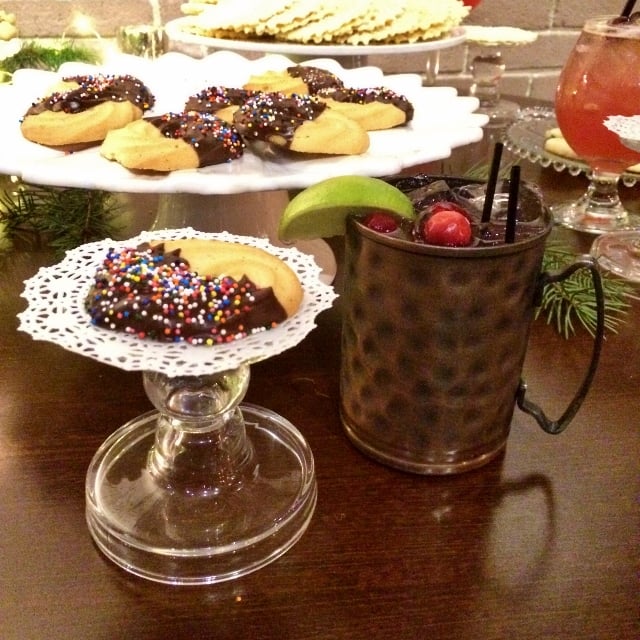
One of the highlights of the 2015 holiday season was our Cookies & Cocktails workshop that took place on December 9th at The Mill in Hershey. It was a festive evening filled with sweet treats, tasty spirits and plenty of holiday cheer. Guests took over the third floor bar at one of my favorite restaurants to enjoy a sampling of freshly baked Christmas Cookies that were carefully paired with a selection of hand crafted signature cocktails. The bartenders stirred and shook each drink while Mill host, Candy Mellinger explained the process and the inspiration behind each one. The Mill uses fresh ingredients, premium spirits and original recipes which is why their cocktails are nothing short of fabulous! One of my favorite combinations was the Yule Mule paired with an Italian chocolate dipped butter cookie. Amazing!
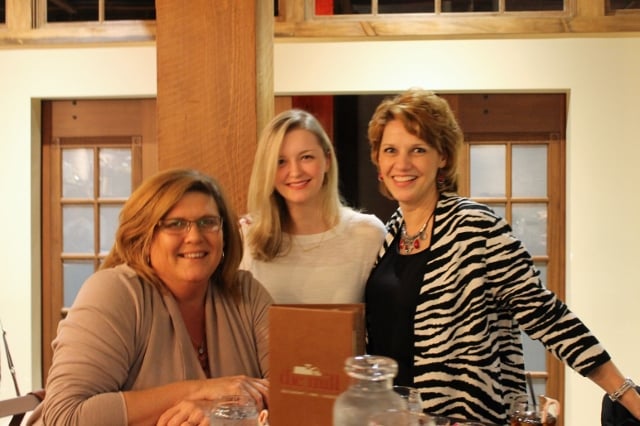
The guests in attendance were so much fun and the vibe was light and cheerful! Everyone had a great time sampling, mingling and celebrating the season. They took home mixology tips and tricks, recipes and bags of cookies to continue the party at home. It was a very merry workshop! I can't wait to do it again next year!
Pop-Up Fall Dinner Party
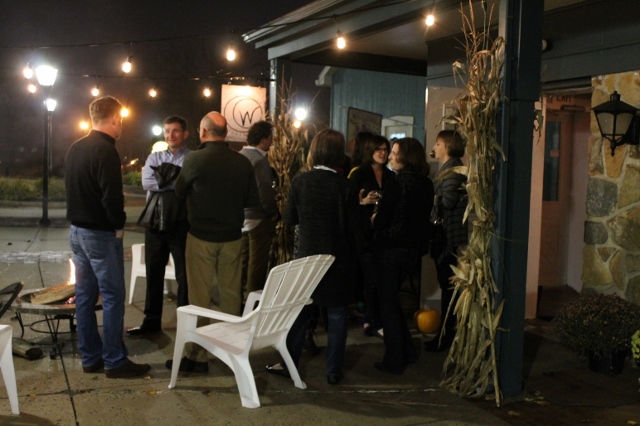
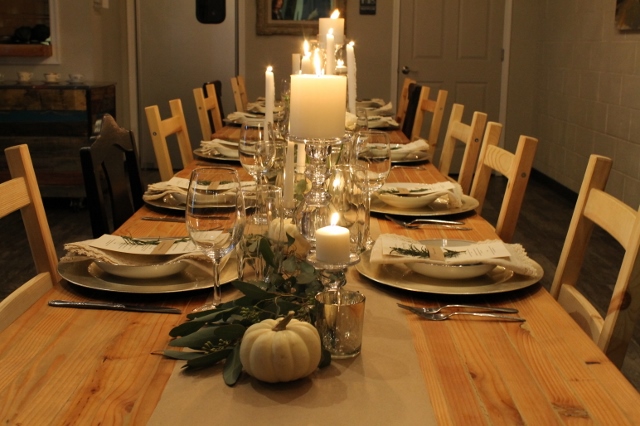
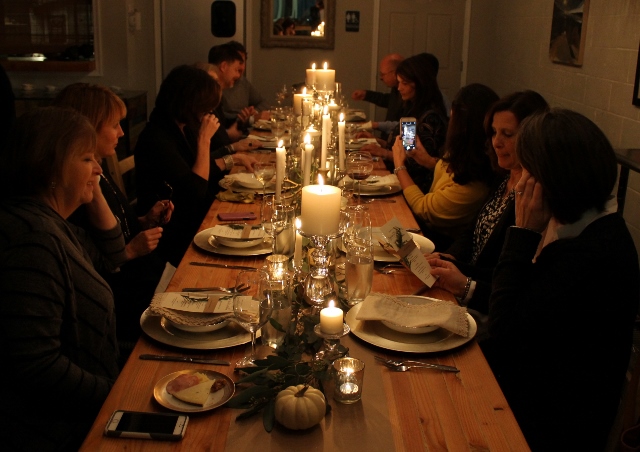
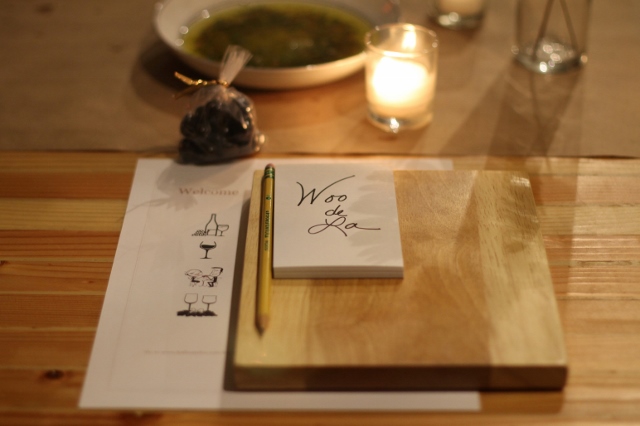
We launched our first Leslie & Co Pop-Up Party on November 19th and wow was it fabulous! The theme for this surprise event was an intimate fall dinner party. It was held at Woo de La Kitchen in Hershey, a family owned restaurant and catering company specializing in farm to table cooking.
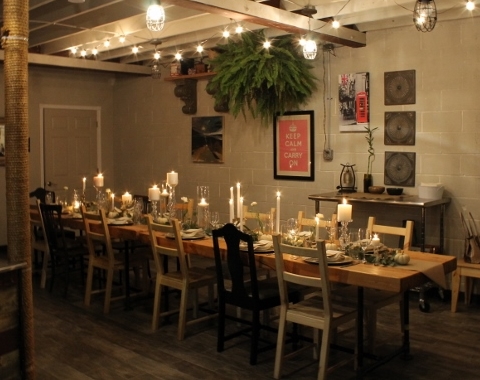
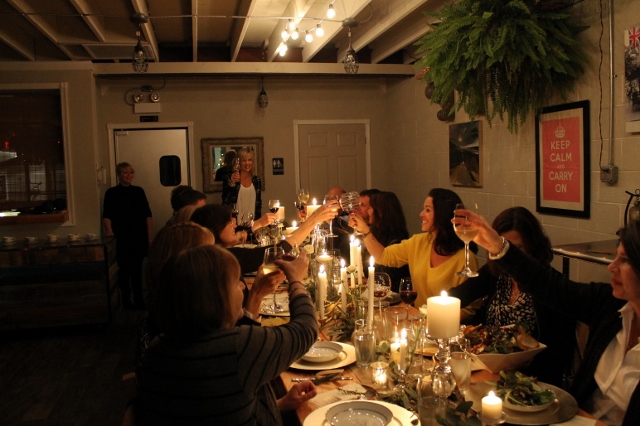
The guests knew very little about the event when they signed up and just a few days before the party, the location was announced. When the guests arrived they were welcomed with a glass of wine from Cassel Vineyards in Hershey, a glowing fire and delicious hors d'oeuvres prepared by the Woo team. The vibe was laid back with live music from Suzi Brown and weather warm enough for outdoor mingling.
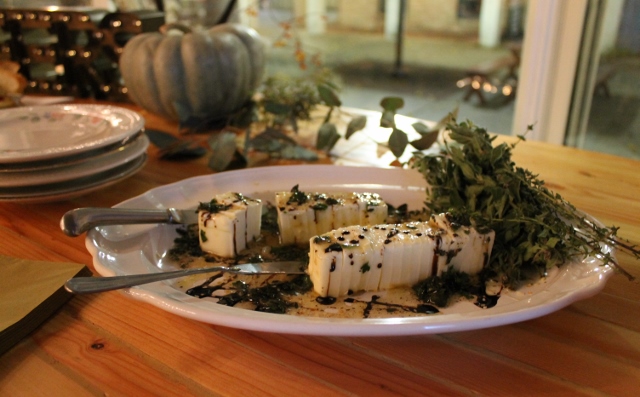
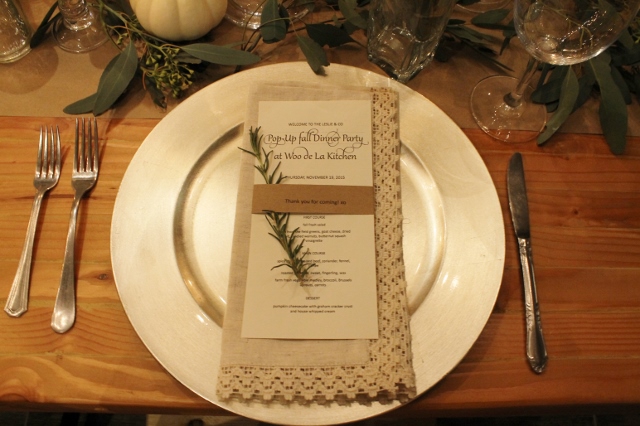
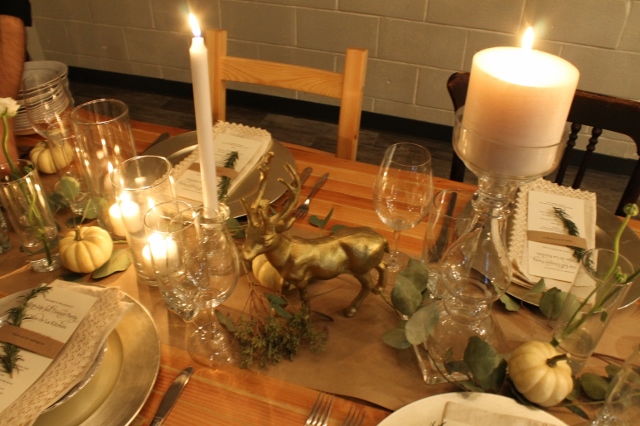
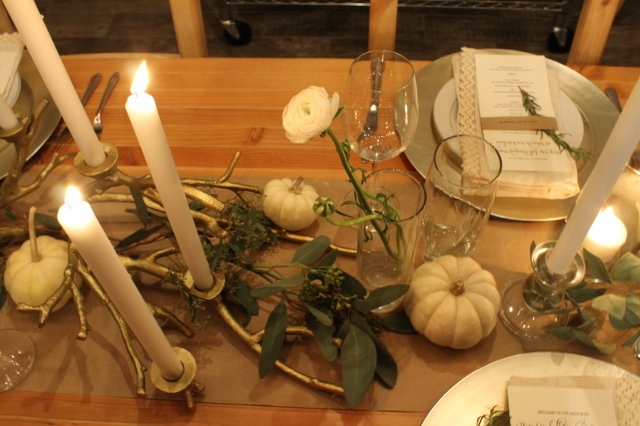
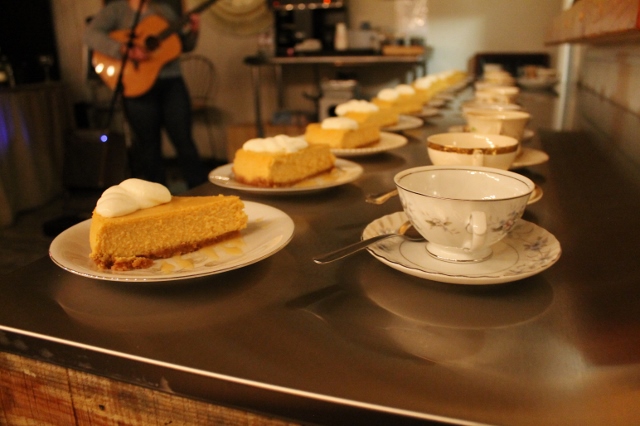
Guests moved inside for dinner and were seated at a long candle lit table that was decorated with clear glass and gilded accents, beautiful mismatched vintage china and an array of fall pumpkins and greens. The salad course was served family style and was followed by a fabulous entree of filet, roasted fall vegetables and potatoes. Chef Jordan explained each course to our guests as it was served. The meal ended with coffee and a heavenly pumpkin cheesecake served with fresh cream and homemade caramel sauce. It was the perfect ending to an outstanding evening, a truly magical night.
Cheeseboard Styling Workshop / November 4th


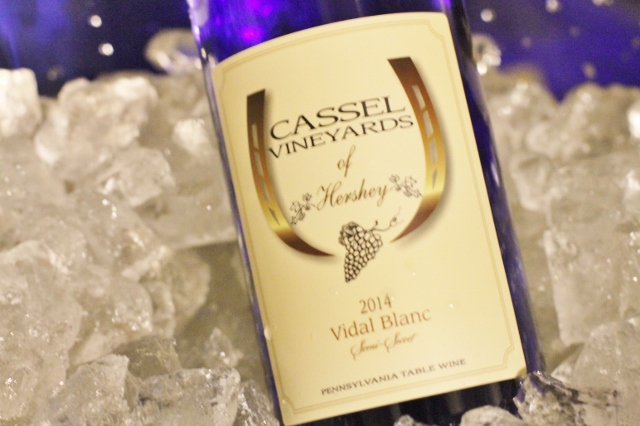
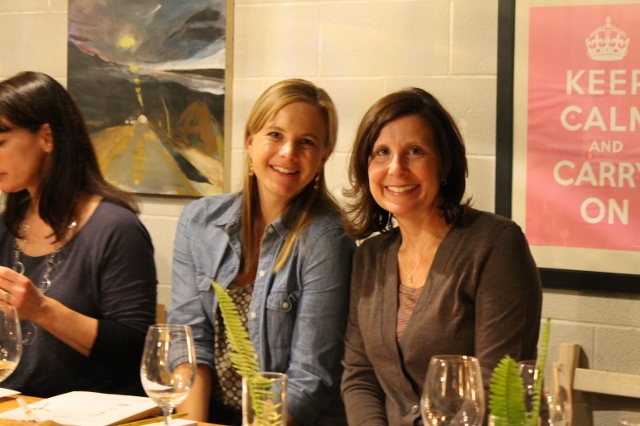
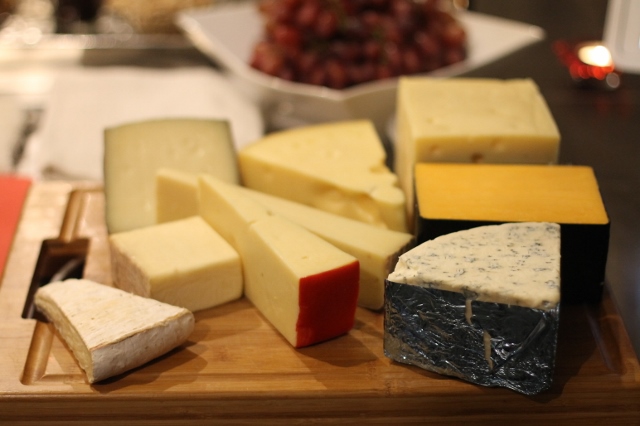

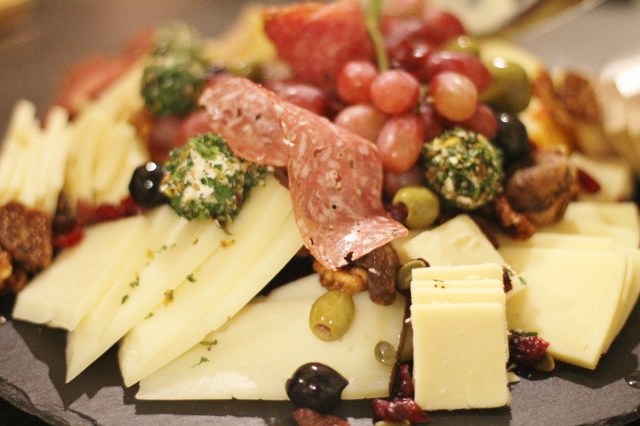
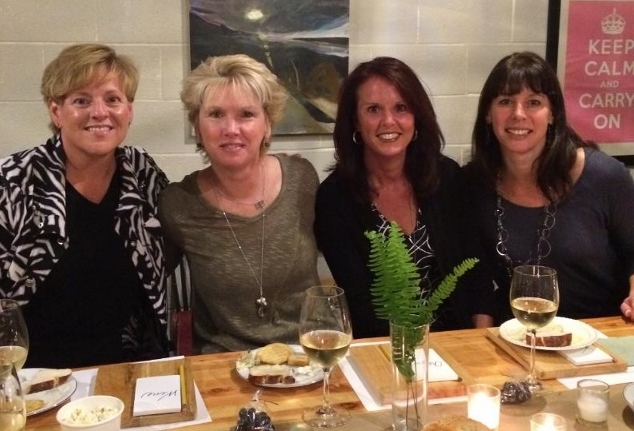
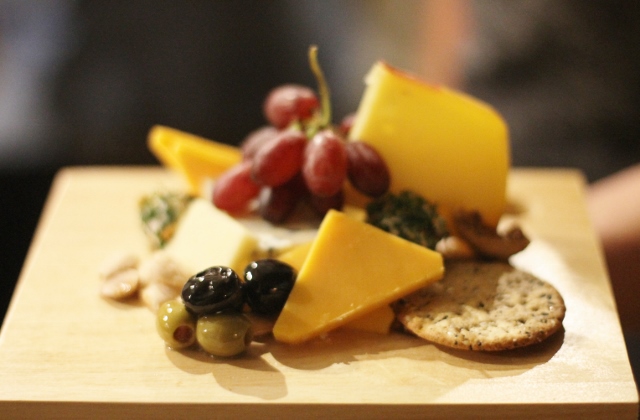

On November 4th we hosted a Cheeseboard Styling Workshop at Woo de La Kitchen in Hershey. It was a fabulous evening of wine tasting, cheese sampling and a fantastic education by Chef Jordan on how to style a perfect cheeseboard. Upon arrival guests were greeted with a glass of wine from Cassel Vineyards and a fantastic spread of hors d'oeuvres prepared by Woo de La Kitchen. Once the guests had a chance to mingle they gathered around the table for the workshop. Chef Jordan gave a hands on lesson in styling as he constructed a beautiful cheeseboard for entertaining. As he assembled the board, Jordan taught our guests valuable tips on selecting cheeses, pairing them with wines and other party foods and how to save money by shopping in the right places. Guests had the opportunity to try different cheeses and wines to decide what might go well together. At the end of the workshop the guests assembled their own mini cheeseboards to enjoy at home.
This workshop was such a hit that I fully expect to repeat it in the new year. Keep and eye on the event calendar for a list of what's coming up!
Happy styling!
Leslie xo
Coconut Ginger Trail Mix
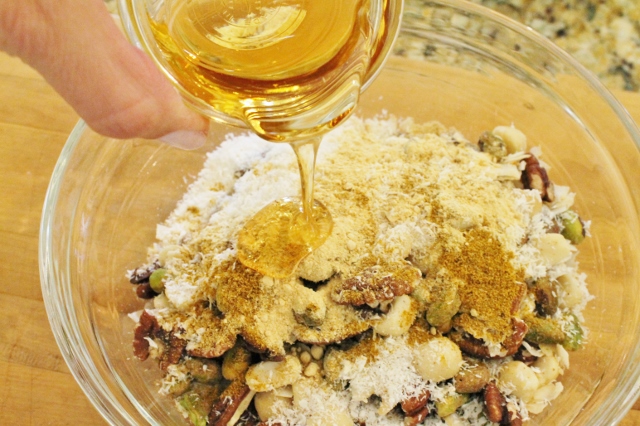
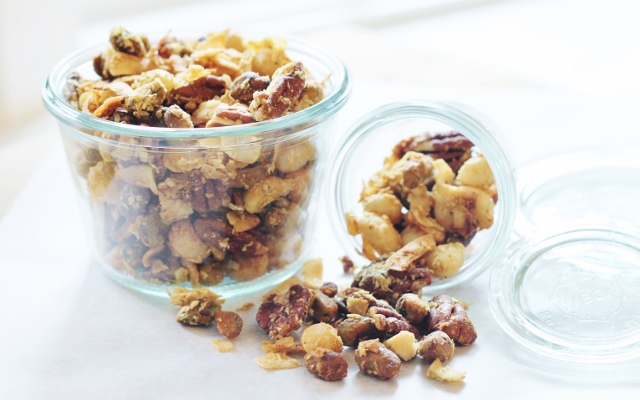 I''m a huge fan of trail mix. I guess it's the combination of flavors and textures along with the never ending variety of ingredients that keeps me interested. It's an easy grab and go snack and when life gets busy, easy is good. I recently found this recipe over at Tasting Table. I love the idea of blending toasted nuts with coconut and ginger and when you toss it with agave nectar and egg whites you've got a really tasty and nutritionally balanced snack. If you're not a fan of curry, which is also tossed in, you can experiment with your favorite spices. That's the fun thing about trail mix, anything goes! Happy Friday!

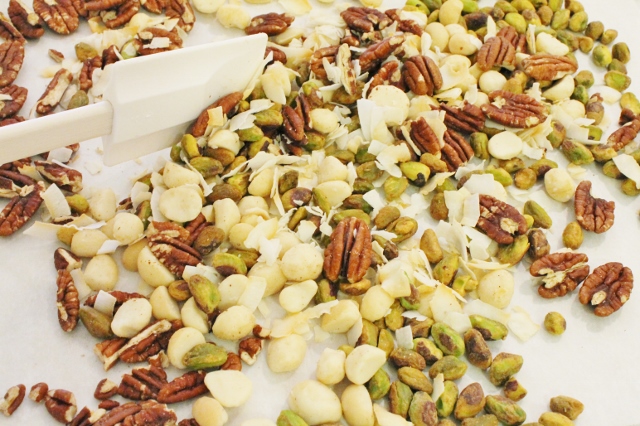

- 3/4 cup raw pistachios
- 1/4 cup finely shredded unsweetened coconut
- 1/4 cup large-flake unsweetened coconut
- 3/4 cup raw pecan halves
- 3/4 cup macadamia nuts
- 1/4 teaspoon curry powder
- 3/4 teaspoon ground ginger
- 1 1/2 tablespoons agave nectar
- 1 large egg white
- Pinch of sea salt
- Preheat oven to 350 degrees
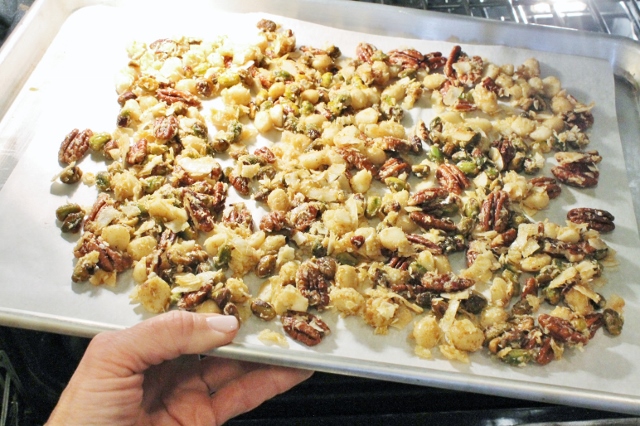
- Place nuts on a parchment lined baking sheet and bake until lightly toasted, about 3-4 minutes.
- Add coconut and bake until lightly toasted, about 2 minutes.
- Transfer nuts and coconut to a heat safe bowl and using rubber spatula stir in spices, agave nectar and egg white.
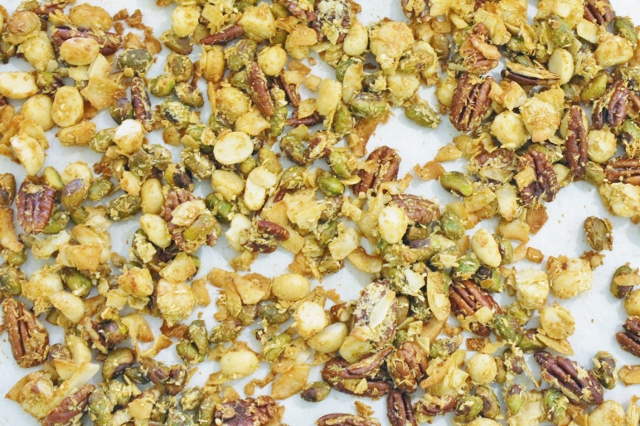
- Return mixture to baking sheet and bake until golden brown, about 10 minutes.
- Set baking sheet on a wire rack to cool completely. Once cooled, sprinkle mixture with sea salt.
- Serve at room temperature.
- Store in an airtight container.
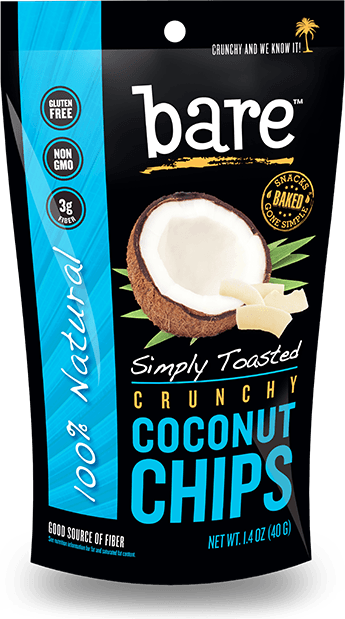 If you love the taste of coconut try adding some Coconut Chips from BARE SNACKS. Bare products are all natural, gluten free and non GMO project verified. Just toss your favorite flavor into the baked trail mix to take your snack to a tastier level! BARE SNACKS are also great right out of the bag for a quick and easy snack!
I've got a hiking trip coming up and even though it's just a day trip I will most likely be tucking some trail mix into my bag that day. So whether you're going on a hike, sitting at the kids soccer games, or just have a busy work schedule, trail mix is always a good idea!
Have a fantastic weekend,
Leslie xo
Rustic Chic Baby Shower
 This past weekend our family celebrated something wonderful {well, we've actually been celebrating for months but on Sunday we went all out}! My daughter Elizabeth and her husband Jon are expecting their first baby in January. Her sisters and I couldn't wait to plan the shower. In fact, the minute we found out they were expecting we were on it. It's who we are. Planning parties is my favorite thing to do and my daughters are right there with me. It was a beautiful shower and a fabulous day so we wanted to share it with you.
 We chose a unique location at Historic Acres of Hershey. The venue was once a working farmland and is home to an Antique Mall that has been in existence for over 20 years. The Coop was the perfect setting for our Rustic Chic themed baby shower.
 The bright yellow doors were a wonderful welcome into this adorable building. The antique wood floors, exposed wood beams and scattered chandeliers had me at hello.
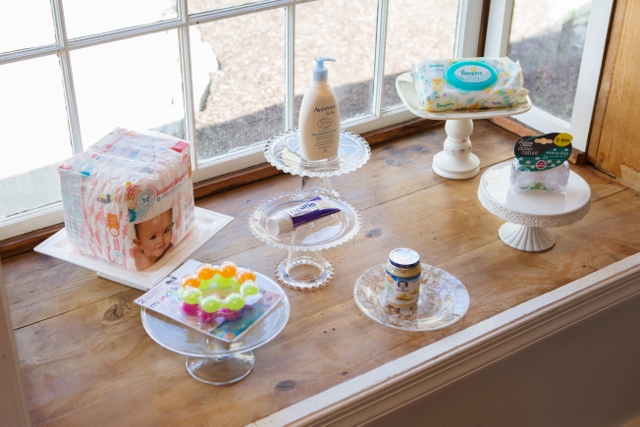
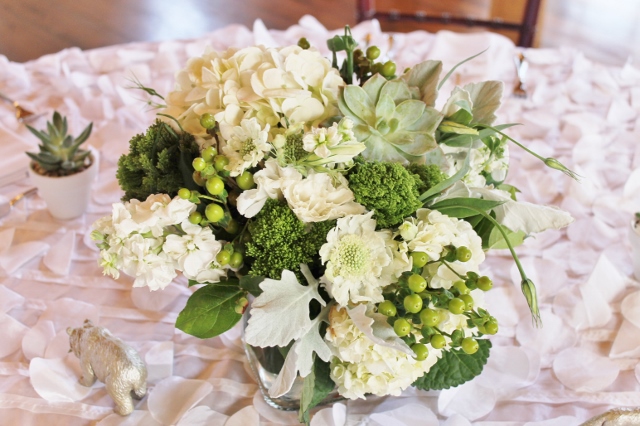 Elizabeth and Jon live in Alaska (I know, let's not go there) so we wanted to keep the theme clean, fresh and earthy to mirror the life they are living. The gender of the baby had not been revealed so we decided to keep the decor all white with touches of green. The tables were covered with Staccato linens and topped with beautiful fresh flower arrangements that included succulents, a personal favorite.
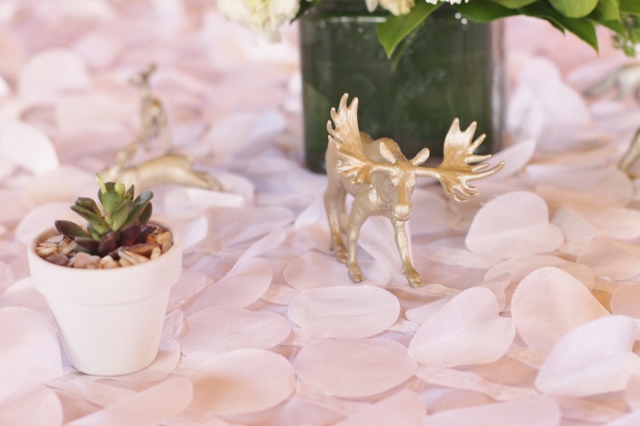 We added a non-traditional touch by placing gilded woodland animals (reminiscent of Alaska) around the tables along with potted succulent favors for the guests.
 A sweets table was a must and all white was the theme here as well. Pretty little paper bags were placed on the table so guests could take home their treats.
 This simple white cake was the highlight of the dessert table. I think we all fell in love with the adorable handmade bear topper that Kyrsten of Kyrsten's Sweet Designs created especially for Elizabeth.
 A clothesline full of onesies added the baby element to the shower and was the focal point over the buffet.
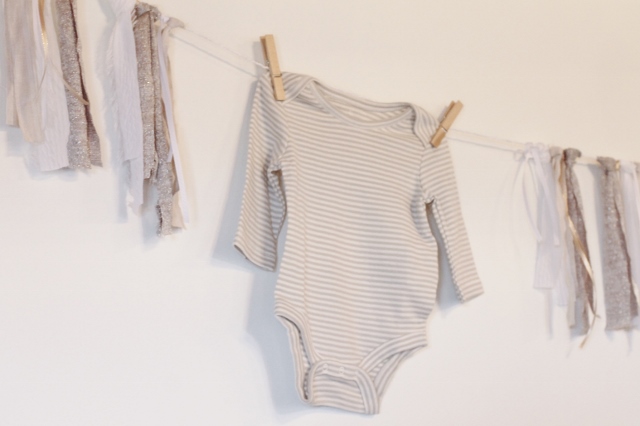 In order to stick with a simple, clean look we opted for neutral colored baby clothes and added handmade fabric tassels to the onesie garland. I'm in love with this look!
 Pink or blue drink stirrers were a fun way for guests to share their opinion on whether the baby was a boy or girl.... most people chose blue!
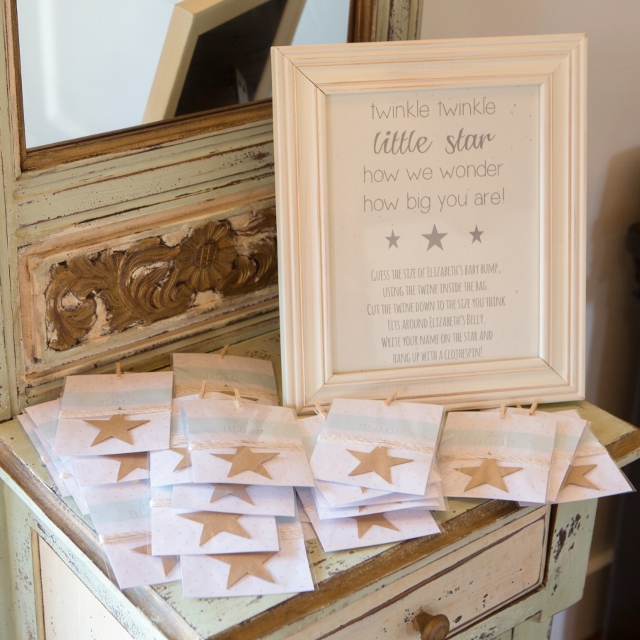 Shower games seem silly at times but offering them as an option creates an element of fun and sparks conversation. This game gave the guests a chance to guess how big Elizabeth's baby bump was. It was a huge hit!
 The Price is Right guessing game was a hit as well, mostly with moms who know all too well what it costs to shop for a baby!
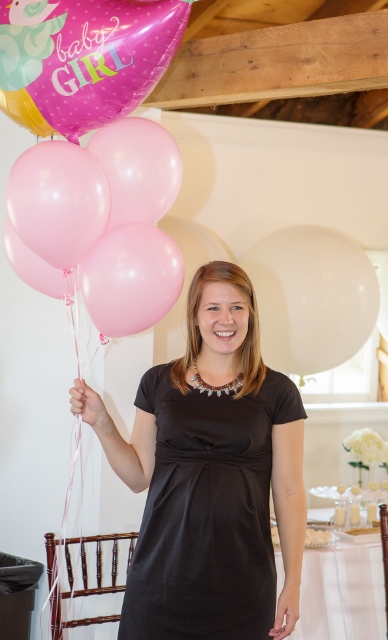 The absolute most favorite moment and highlight of the day was when Elizabeth surprised her guests as she opened a huge package (supposedly from Jon) that released pink helium balloons revealing that their little bundle was indeed a girl. Words just cannot express the joy that filled that room. It was truly one of the most exciting things I have ever witnessed. I had the privilege of helping with the surprise so to have the opportunity to sit back and watch the reaction was awesome!
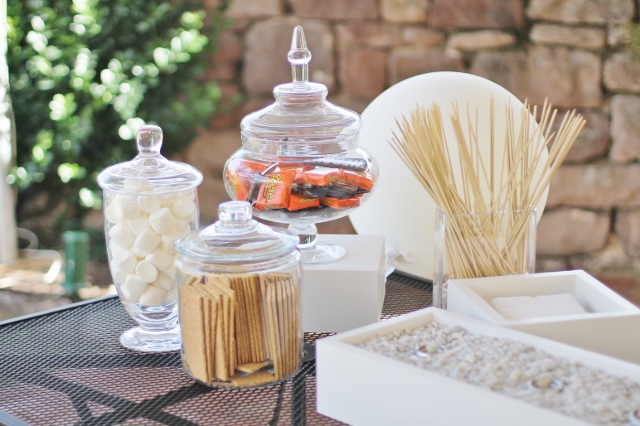 Elizabeth loves s'mores so we decided to set up a s'more bar for the guests outside on the patio.
 We got the men in the family involved and asked Elizabeth's dad and brother Michael to create a table top version of a fire pit to keep things simple. It was a huge hit with no mess and easy clean up!
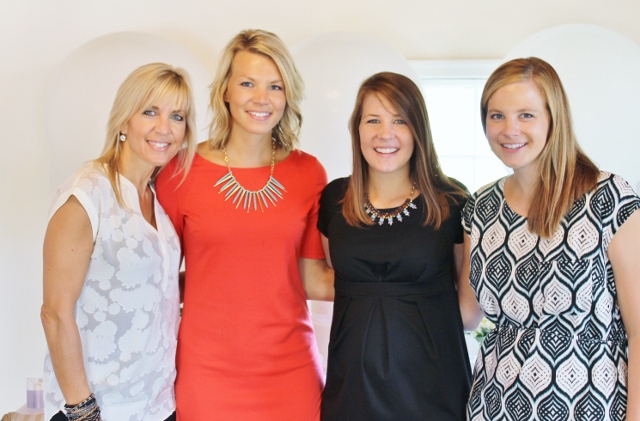 It was a fabulous day and these girls made it happen. I am truly blessed to not only have 3 amazing daughters (and a very talented son) but to have the most wonderful family and friends to share these special moments. Life is so much better when you are giving so find what makes you happy and share it with someone.
Celebrate the little things and find the joy in everything. It's what makes life so worthwhile!
Enjoy the day,
Leslie xo
Photo Credit- Doug Reese, Leslie Reese
*A special thanks to Doug Reese Photo for the use of his photos.
Favorite Things
Emerson Turns ONE! Hello! Yes, it's me! I'm actually posting something! And yes, it's been months...too many months but hey, better late than never right? I figured it doesn't need to be all or nothing and as inconsistent as it is, I refuse to give up the blog! So, if I have something to share and if I can find the time, you will see a post! Look at it as a little surprise in your day!
So while we're on the subject of surprises and celebrations, I thought I would share a very special first birthday party with you. My sweet little granddaughter Emerson turned one in May and her very creative mommy planned a party to remember! You know I absolutely love parties and this one was as cute as they get! It was a celebration fit for a little princess with pretty flowers, pink and gold accents, girly party food and a chandelier....because every birthday girl needs her own chandelier! I'm sharing some of my favorite photos from the day. Happy Friday!
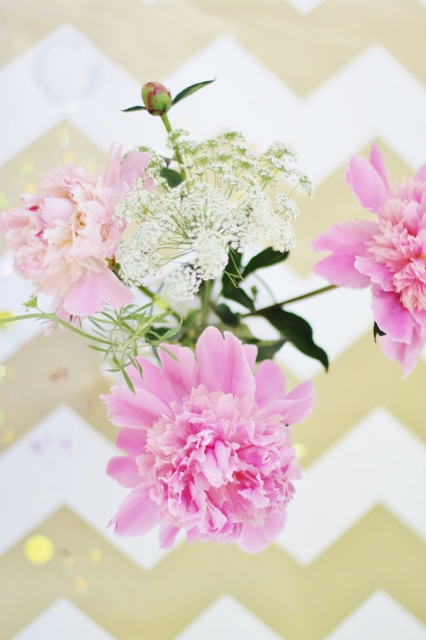 Pretty tables topped with Gold Chevron, a sprinkle of Metallic Confetti and Pink Peonies.
 Satin Ribbon in shades of Pink and Gold Glitter tied loosely around Emerson's birthday chair.
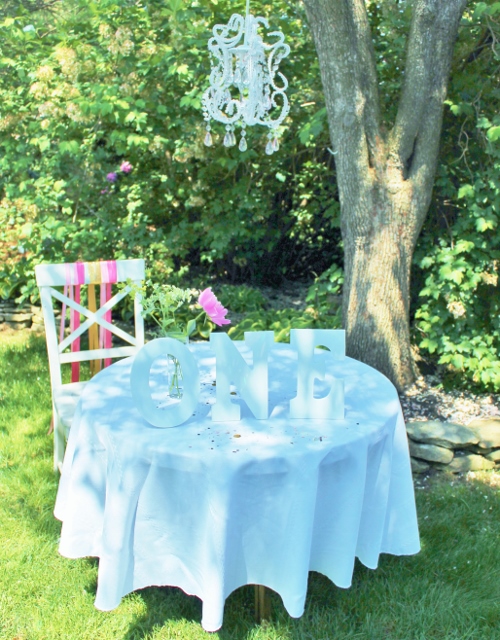 Wooden letters O N E and a petite chandelier to decorate the birthday table.
 Pink Lemonade and Strawberry flavored water station.
 Gold Stripe and Pink Polka Dot straws.
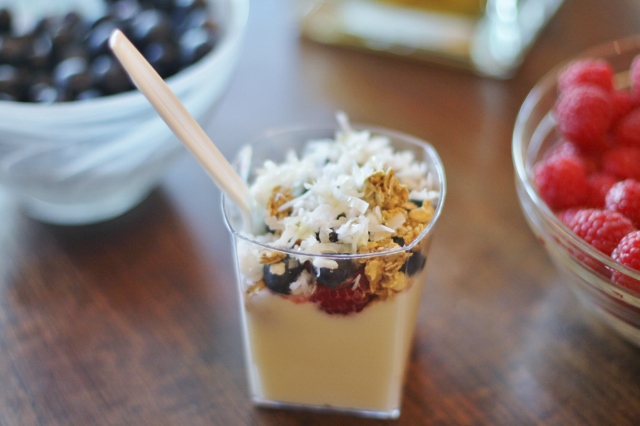 The food was designed around small bites. The Yogurt Bar was my personal favorite.
 Mini Smoothie Shots topped with Raspberries.
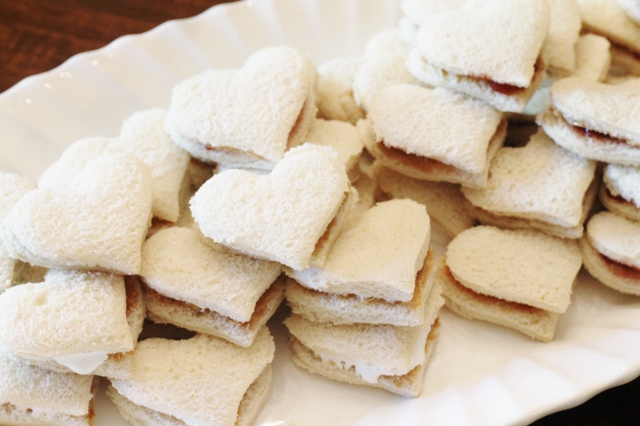 Heart shaped Peanut Butter & Jelly/Marshmallow Sandwiches ~ A birthday girl favorite.
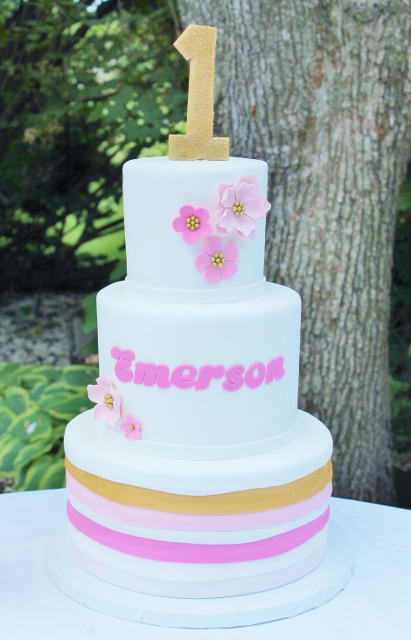 A Pink and Gold Birthday Cake by Kyrsten's Sweet Designs ~ Perfection!
 Of course Emerson had her very own cake!
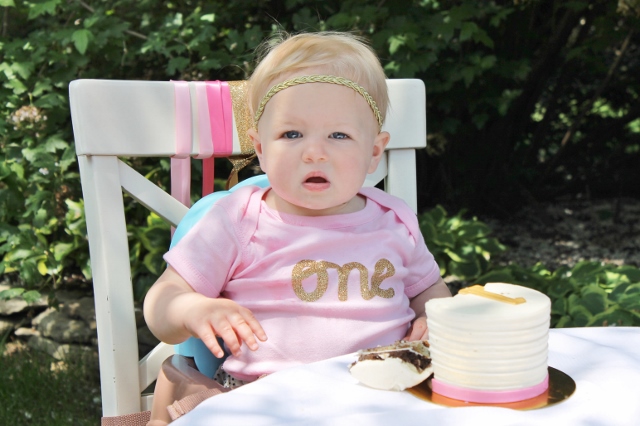 This very serious Birthday Girl was rather cautious with her cake. If you could only see her view! There was quite a crowd watching her (should have captured that pic!).
 Pink Chevron and Gold Goody Bags ~ Filled with candy of course.
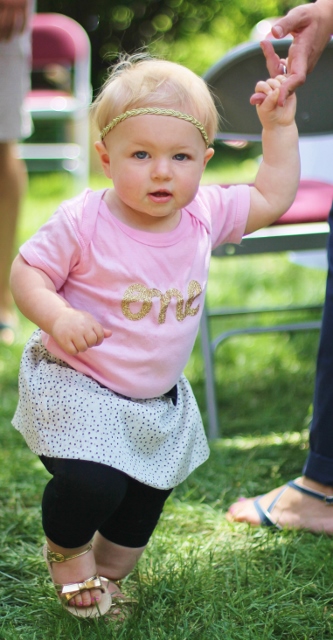 A truly special day for a happy little birthday girl!
What a wonderful time we all had! It was so much fun to watch the wonder in Emerson's eyes as we ooohhhed and ahhhhed over her first birthday celebration. This is a great life and I'm happy to be living it! And I am especially grateful to have the opportunity to be a part of these fun times! I hope you are all having a beautiful summer and enjoying the special times that are happening now with your family and friends! Have a wonderful weekend!
Leslie xo
Simple Macrame Bracelet DIY
 For many of us, it would be very easy to complain about this long, cold winter that seems to be never ending. But, if you try to find the good, you might say one of the advantages to being stuck inside is having the opportunity to work on projects. Of course we have choices... organizing random things and cleaning out closets or dabbling in a little DIY. This week I chose DIY.
The other day I was in the mood to play around with some of my jewelry supplies. I wanted to do something simple that didn't take a lot of time so I decided to whip up a few bracelets, macrame style. And when I say, whip up, I mean it. Macrame is a simple project that anyone can do, including kids! Perfect for a rainy, or in my case, snowy day!
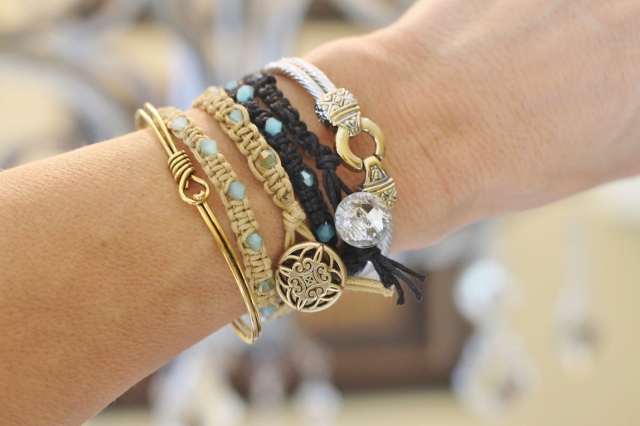
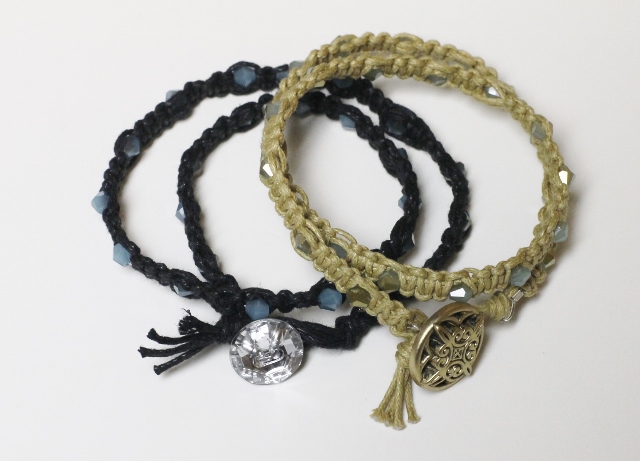
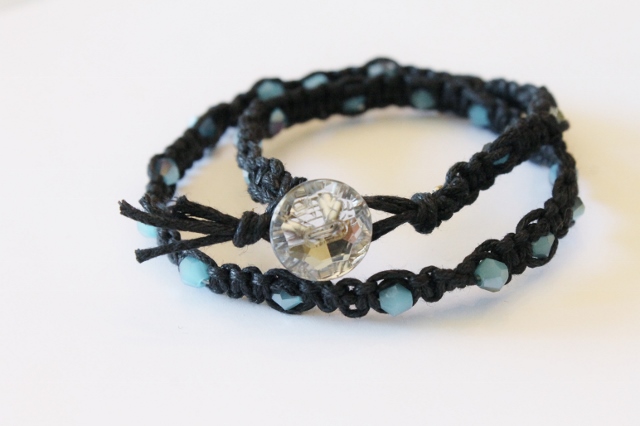 I love unique jewelry, especially bracelets that can be stacked together. This project is a very inexpensive way to add to your arm party! I don't really have a specific method for this because I just sat down and started playing but I'll give you a very simple overview of what I did.
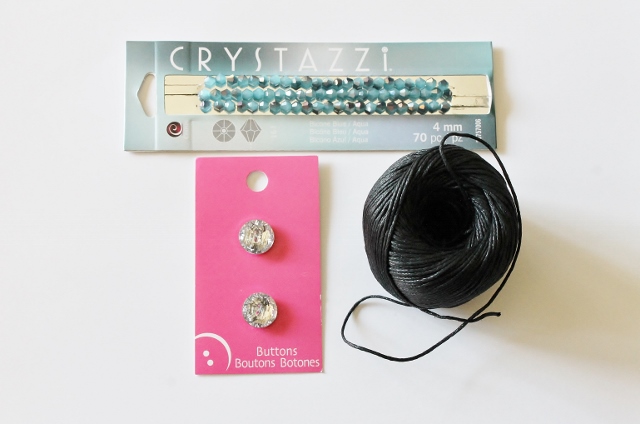 I started with just a few supplies: skinny waxed cotton cord, small crystal beads and some crystal buttons for the toggle clasp.
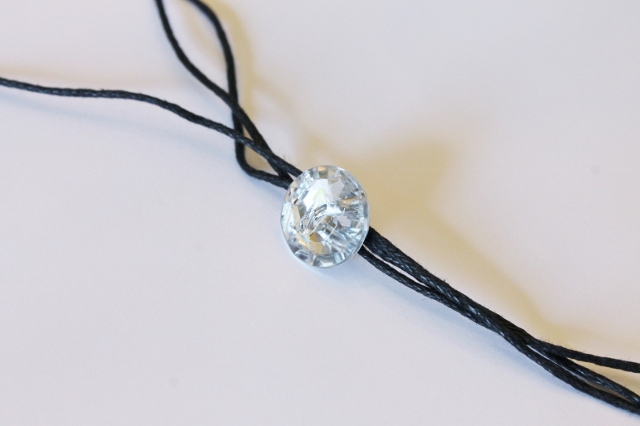 I threaded 4 very long strands of cord (more than double the length of the actual bracelet I was making) through the back of the button. The type of button I chose had a wire loop on the back which made threading easy. Standard buttons won't work.
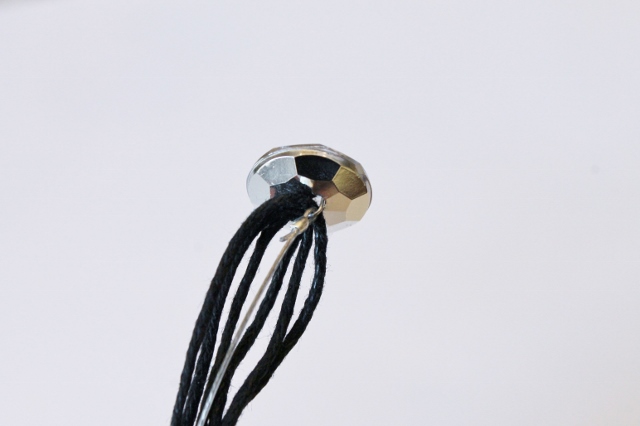 I wanted to use small beads that could not be strung onto this cord so I added a piece of jewelry wire to the button. To keep it simple use beads that are large enough to thread onto the cord.
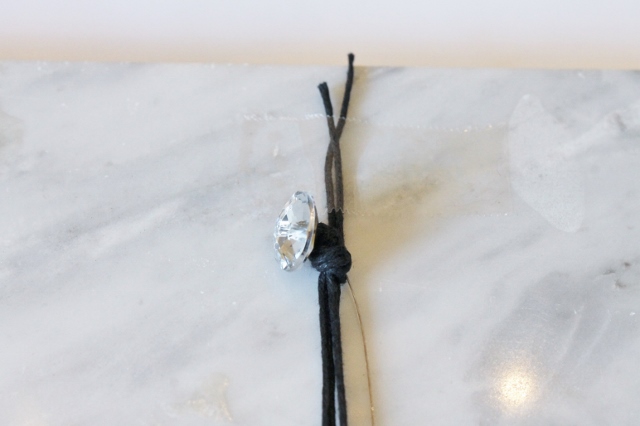
I tied a knot at the end of the cord right under the button. Instead of cutting the excess cord, I taped it to a work surface to make knotting and beading easier.
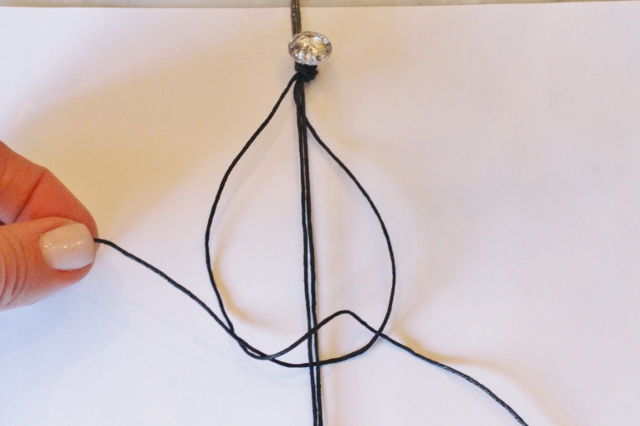 I began to tie square macrame knots alternately with the outside strands of cord. The middle strands stay stationary through the entire process.
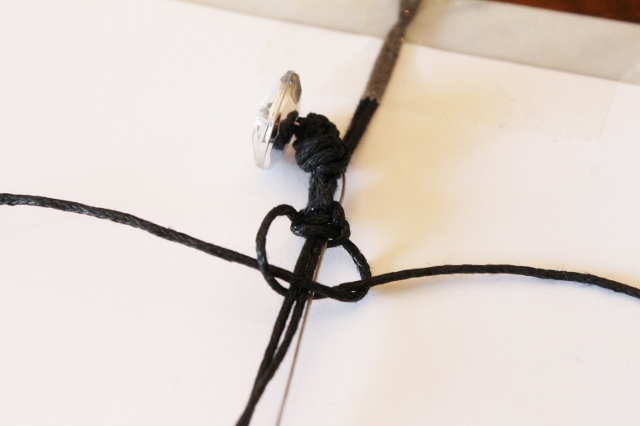
 After several knots were tied I added a bead. I tied the next knot right around the bead. If you are not using jewelry wire you will thread your beads onto the middle strands of cord.
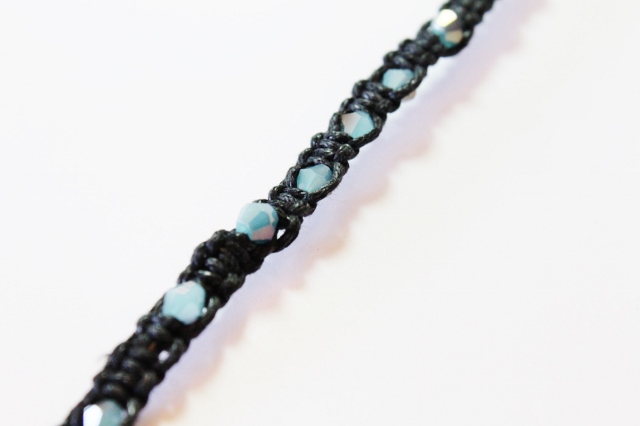 I didn't count knots or beads so there is no rhyme or reason to these particular bracelets. You can always make patterns and count knots if you prefer a more uniform look. I was going for a less structured piece.
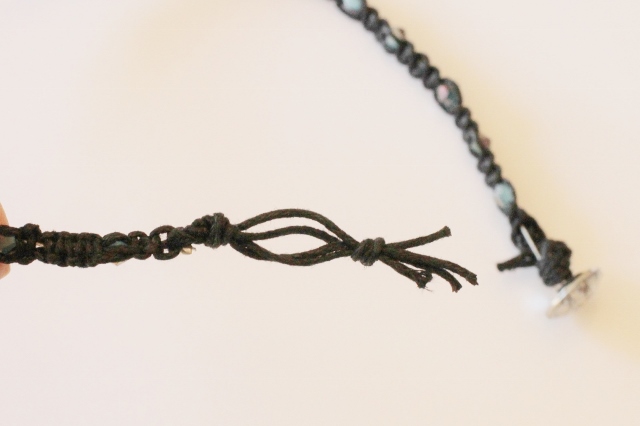 Once the bracelet was the length I wanted, I created a loop at the end of the cord that would fit over the button to close the bracelet.
That's it! It really is easy but if you find these steps hard to follow and you need more help, you can find plenty of tutorials on Macrame on Pinterest or the internet! Try your own technique to make a more personalized piece. You really can't go wrong!
Have a wonderful weekend!
Leslie xo
Happy Valentine's Day!
 Today is Valentine's Day and it's a special day for so many reasons. Sure it's about flowers, candy and cards and we all look forward to sharing those things with the people we love but it's also a day to feel grateful and pay it forward. Do something you might not usually do. There are so many things to be happy about and so many little ways to show people you care. Whether it's your family, a friend or even better, a stranger you've never met. Take the time to do something special. Put a smile on someone's face. Do someone a favor. It will make the day that much better! My little Valentine to you is a simple recipe for sugar cookies that I have actually shared before. It's not just a recipe, it's a tradition. I have been making these cookies for special holidays since my kids were tiny. My mother made them for me and my sisters. It's the tradition that's special, not the recipe (although it's a really good one!). Happy Friday! Happy Valentine's Day! Have a fabulous weekend!
Valentine's Day Sugar Cookie Recipe
Leslie xo
Homemade Vanilla Coffee Syrup
 If you have been following me here for a while (or on social media) you've probably noticed a couple of things about me. First of all, I am a coffee lover (addict), and second, I have one heck of a sweet tooth. I make no apologies for either one. I believe in that whole "everything in moderation" thing. It's what keeps me from getting out of control. So as much as I occasionally indulge in the things I love, I do what I can to balance it all and make better choices whenever possible. One of the changes I recently made was to my morning coffee routine. I love a good latte in the morning and a flavored one is even better. I decided that using an artificial sweetener in my cup every morning might not be a good thing so I created my own vanilla flavored coffee syrup. It still has sugar in it but it's a healthier version which is definitely a better option. It's a simple 3 ingredient recipe that can be used in many different ways. I'm keeping mine by the coffee!
 The first thing I did was trade regular processed sugar for Zulka Morena Pure Cane Sugar. Zulka is a NON-GMO product. It's never refined and has a great flavor.
 I used equal parts Zulka and water to make a simple syrup (this batch was 3 cups of each). I cooked it over medium/high heat for about 10-15 minutes until it was well blended and a little syrupy.
 While the syrup was heating I sliced 2 vanilla beans lengthwise and scraped out the inside.
 I removed the syrup from the heat and added the scraped vanilla bean and pods. I stirred it well and let it cool.
 Once the syrup was cool I poured the entire contents, beans included, into a bottle.
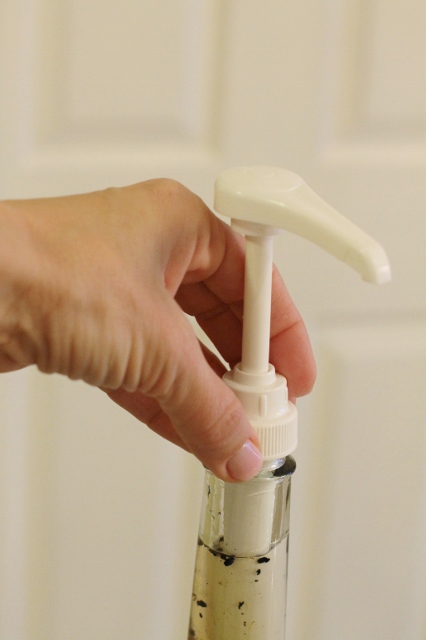 I added a pump that I bought in a kitchen store.
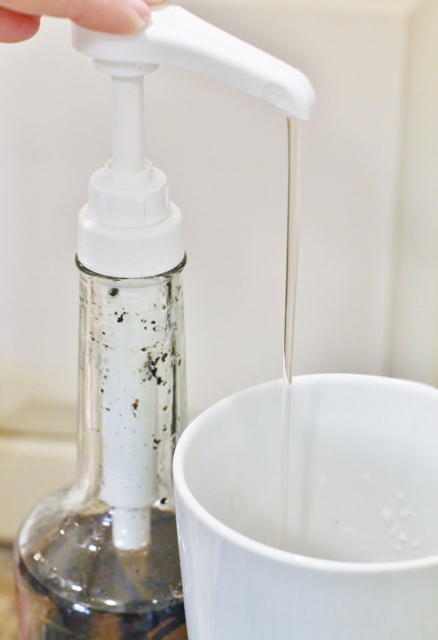 The flavor is so rich you really don't need much to make a great latte!
 Heaven!
Some days I really think I would really benefit from a complete sugar detox (who knows, you may read about that soon!) but for now I am all about making small changes while still enjoying some of the little things that make me happy. And vanilla lattes make me happy! What are some of the "little things" that make you happy?
Have a wonderful weekend!
Leslie xo
Read More about Zulka Morena Sugar
Find my Peanut Butter Sandwich Cookies and other great recipes on Zulka.com
Homemade Boursin Cheese Recipe

Last summer I became a huge fan of Boursin cheese. My rock star cousin (who is the appetizer queen) made a delicious spread for one of our Happy Hour parties at the beach and I've been hooked ever since. I'm not sure I really even knew what Boursin was. I never paid attention, but when it was drizzled with balsamic glaze and scooped up with pretzel chips, it was heaven. My new favorite appetizer! One problem, Boursin is not the cheapest cheese in the case (say that three times!). I was buying it in miniature blocks at the grocery store until I found it at Costco but it was still expensive. Then one day my girlfriend, rather nonchalantly while I was preparing the store bought version, said "You know you can make your own Boursin don't you? It's less expensive too". That was news to me! Where had I been? I have been making my own ever since! Here's how I do it...
 Boursin is basically a mixture of butter, cream cheese and herbs. It's creamy, spreadable, and highly addictive (trust me). You can make it any flavor by using your favorite herbs. This recipe has quite a variety in it but you can keep it as simple as garlic and basil if you prefer.
 Toss all ingredients into a food processor, give it a quick spin and it's done! Ridiculously easy to make!
 The texture of the finished Boursin will be soft. Just place it into a bowl or container, cover and refrigerate until firm.
 My favorite way to serve Boursin Cheese is with a drizzle of Balsamic Glaze and Pretzel Chips (Thanks Rita!). It tastes like something that took a lot of effort but it's probably the easiest appetizer you'll ever make! Perfect for Super Bowl Sunday!
Enjoy!
Leslie xo
- 2 garlic cloves, crushed
- 8 ounces butter, room temperature
- 16 ounces cream cheese, room temperature
- 3 tablespoons fresh grated parmesan cheese
- 1 teaspoon dried dill weed, crumbled
- 1/2 teaspoon dried marjoram
- 1/2 teaspoon dried basil
- 1/2 teaspoon dried chives
- 1/2 teaspoon black pepper
- 1/4 teaspoon dried thyme, crumbled
- 2 teaspoons dried parsley
- Add cheeses and butter to food processor or mixing bowl.
- Add garlic and spices.
- Process or mix all ingredients until well blended.
- Place cheese in container, cover and store in refrigerator.
Favorite Things
 About Face
This winter has been brutal in my neck of the woods! And as much as I love all four of the wonderful seasons we get to experience in Central PA, I am ready to kiss this one goodbye! The cold temps are wreaking havoc on my skin and when you add that to the fact that I'm not getting any younger, the need for a good skin care routine is a must. Don't get me wrong, I am completely willing to accept the aging process and plan to do so gracefully but hey girls, why not preserve what we've got? I think it's important to be proactive and using products that work helps! I thought I would share some of my latest skin care favorites with you today. Happy Friday!
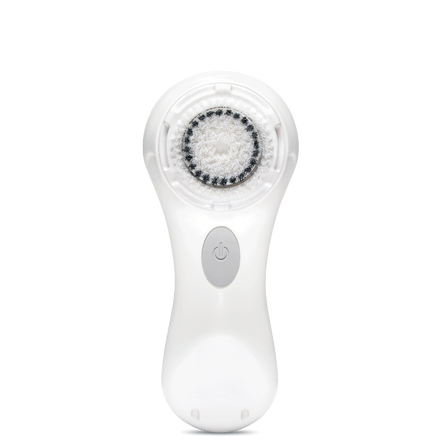 Clarisonic Mia ~ Morning and/or Night
This little gem paired with your favorite cleanser is a great way to start and end your day. It does a great job at gently but thoroughly cleaning your skin. I've had mine for about a year and I love it!
 SkinCeuticals Phloretin CF Gel ~ Morning
Recommended by my Dermatologist, this power packed Vitamin C Gel delivers a healthy dose of antioxidants that do a nice job of repairing and protecting my skin. LOVE it!
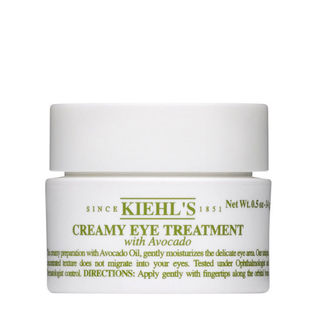 Kiehl's Creamy Eye Treatment with Avocado ~ Morning & Night
This awesome eye cream was in the Swag Bags at the Nordstrom Beauty Trend Show last April and I have been using mine ever since. It's lightweight but does a great job of hydrating. I'm hooked!
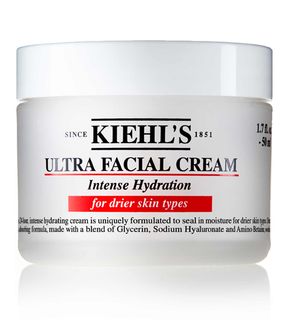 Kiehl's Ultra Facial Cream ~ Morning & Night
Another Swag Bag treat that just might be my favorite right now. While I usually prefer a lighter moisturizer, this intense cream is perfect for keeping skin hydrated in these bitter cold temps. It's like a huge drink of water for your face!
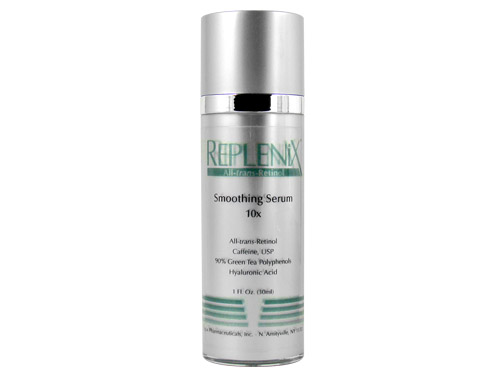 Replenix Retinol Smoothing Serum 10x ~ Night
The older I get the more I appreciate the word Retinol! You know the whole fine line thing... (nothing fine about lines on your face!) And although I am not a fan of most Retinol products because they can irritate my skin, I do love this one! A little goes a long way when I add it to my moisturizer making it last twice as long. Bonus!
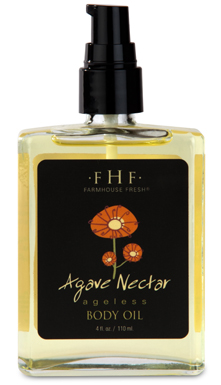
Farmhouse Fresh ~ Agave Nectar Body Oil
Taking care of your skin doesn't stop with your face. I decided to try a sample of this body oil last fall when I was wearing a cocktail dress and heels. I used it on my legs and I LOVED it! It wasn't greasy and sticky like some oils can be. It absorbed really well and gave my skin a nice subtle glow (a perfect fix for that winter white look). I've been loving it ever since!
Take control this winter and make your skin a priority! Do at least one little thing for yourself each day and notice the difference it makes! You're worth it! Have a wonderful weekend!
Leslie xo
Life is Good
 I know, your jaw is on the floor and you're wondering what is going on! A blog post? Really? Yes, really! What has it been? Three, almost four months? I feel like I've been on another planet and I've missed you! And I've missed my blog like crazy! I wanted to hug it when I signed on to write this post (not kidding)! The good news is I have been busy doing something I really love! Here's the story...

Last year I decided to start listening to my inner self and I began to follow my true passions in life. Since then, things haven't been the same. Along with some other amazing changes, I started working full time at Cork Factory Hotel in Lancaster, PA as a Wedding Sales Consultant. (You may remember my daughter Elizabeth's wedding was there.) The place, the people and the job are all awesome and I love it! If you ask me how I got there, I will tell you it was fate. It's been an amazing few months and a perfect fit! The bad news is, my new schedule has not given me time to blog the way I used to. And those of you who work full time know days off are precious. The race to tackle the to-do list begins the minute you leave the office. So obviously the blog went to the bottom of the priority list.
Well last week, for some reason, I decided to bump the blog up a notch on the list and get back to it. Call it perfect timing, prioritizing, whatever it was, I decided to sit down and write. I'm looking forward to blogging again whenever I can, about whatever I'm in the mood to share. No schedule, no plan (if you know me, that's not easy!)
So to give you an idea of what I've been up to, I decided to share a few of my favorite photos that I've captured at Cork Factory Hotel. I think you'll see why I love it there!
 This is a wedding cake in progress behind the scenes at The Baker's Table, our on-site bakery. It's fun to see all of the beautifully decorated cakes that come out of this bakery. The talent is extraordinary.
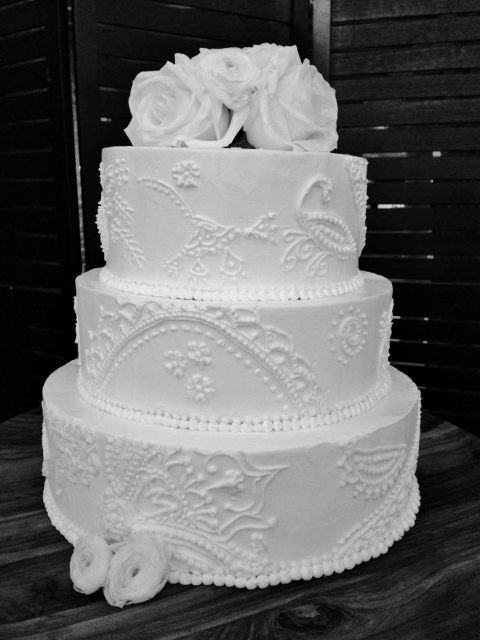 Another day, another gorgeous wedding cake from The Baker's Table.
 Each event is so very different and it's fun to see how people celebrate special occasions. This is a simple candlelight wedding ceremony in one of the newest event spaces at Urban Place, The Warehouse.
 Meeting so many wonderful people in the wedding and event industry is definitely one of my favorite things about this job. I had the opportunity to sit down with Janell Berte of Posh Bridal recently to interview her for a Cork Factory Hotel blog post. These wedding dresses are just a few of the many stunning designs in her upscale shop.
 Another "perk" to the job is having so many amazing coffee shops and restaurants to visit while I'm in the area. I have a few favorites but one of the best cups of tea I have had was at a little place called Cafe Di Vetro. You know how I feel about detail and presentation and this was one of the best!
So there you have it! You are officially updated and I am happy you are here. I'll look forward to staying in touch and keeping you posted! You can look forward to some more frequent posts and a possible new twist to the blog!
Have a wonderful week!
Leslie xo
Pumpkin Pie Biscotti
 Welcome to October! Didn't I just say I couldn't believe summer was over? Well now we've propelled into October, fall is in full swing and I'm wondering where September went! It's all good though. I don't know about you but I am ready for cooler weather, a change in wardrobe and even a change in the menu when it comes to cooking and baking. It's time to bring out the flavors of fall. I have been in a baking mood lately and last week I spent a day in kitchen baking all kinds of fun things. One of my favorites was this Pumpkin Pie Biscotti that I found over on My Baking Addiction. From the pumpkin pie spice to the toasted nut's, it's got a wonderful blend of flavors that are perfect for fall. I love biscotti because it can be enjoyed any time of day with a cup of coffee or tea. So if you're in the mood for some fall baking give this recipe a try, you'll be glad you did!
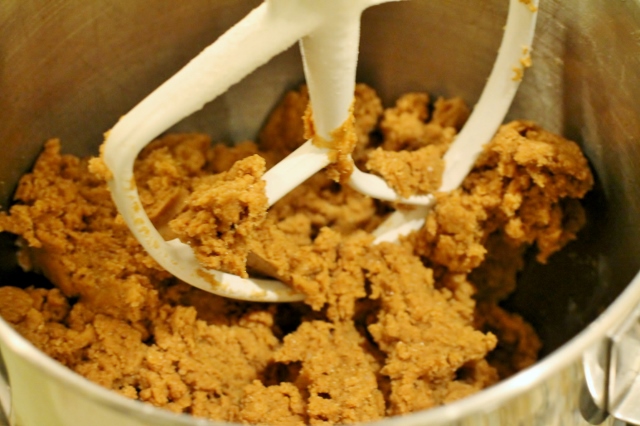 You don't have to use a stand alone mixer for this recipe but the dough is firm and I found it much easier to use my Kitchen Aid once I was mixing the wet and dry ingredients together. Just make sure you don't over mix the dough if you use one.
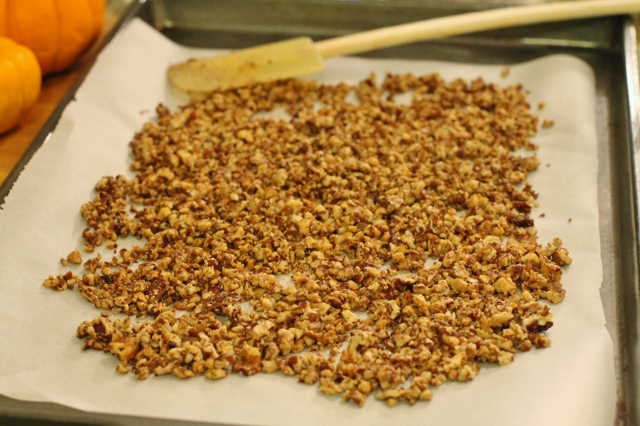 When you add toasted nuts to the dough it takes the flavor to a whole new level. I love pecans but had a mixture of walnuts and pecans in my pantry so I used them both.
 Once you knead the nuts into the dough you will form two separate logs that are flat on top, not rounded.
 Biscotti means "twice baked" so after you bake the biscotti once, you will slice the logs into individual pieces and place them back in the oven for a second round of baking.
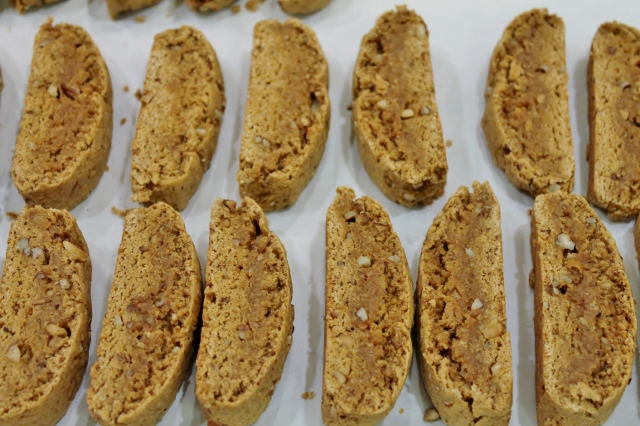 After a second round of baking the inside of the biscotti will be soft but the outside will be nice and crunchy. If you prefer a harder biscotti you can bake them a little longer.
Biscotti is one of my favorite cookies! If they are a favorite of yours you might want to try this recipe for Pine Nut-Orange Biscotti from an earlier post. They are delicious too!
Enjoy!
Leslie xo
- 3 1/2 cups all-purpose flour
- 1 1/2 cups firmly packed brown sugar (I used dark)
- 2 teaspoons baking powder
- 1/2 teaspoon salt
- 2 teaspoons pumpkin pie spice
- 1/2 cup pumpkin puree
- 2 large eggs, lightly beaten
- 1 tablespoon vanilla
- 2 tablespoons butter
- 1 1/4 cup nuts, chopped nuts ( I used pecans and walnuts)
- Preheat oven to 350 degrees. Line a baking sheet with parchment paper.
- Combine flour, brown sugar, baking powder, salt and pumpkin pie spice in a large mixing bowl, stir well. In another bowl combine pumpkin, eggs and vanilla stirring well with a wire whisk.
- Slowly add pumpkin mixture to dry ingredients, stirring until dry ingredients are moistened (mixture will be crumbly at first).
- Heat butter in a large skillet over medium heat. Add nuts. Cook, stirring constantly until nuts are browned. Remove from heat and cool completely.
- Knead cooled nuts into dough. Place dough on lightly floured surface and divide into two equal portions.
- Lightly flour hands and shape each portion of dough into a 2" X 10" log. Place logs several inches apart on a baking sheet. Bake for 24 minutes. Cool logs 15 minutes. Reduce oven temperature to 300 degrees.
- After the logs are cooled, carefully move them to a cutting board and cut diagonally into 1/2" thick pieces using a serrated knife. The outside of the log will be hard but the inside will still be moist.
- Place the biscotti, cut side up, back on the baking sheet and bake for 8 more minutes. Remove the pan from the oven and flip the biscotti over. Bake another 7 minutes.
- Place biscotti on wire racks to cool keeping them separated as they cool so they don't stick together.
- *Optional step - dip into or drizzle with melted white chocolate
- Biscotti will keep in an airtight container for several weeks.
Here's what's coming up...
You can put any content in here.