

Paper Flower Wall DIY
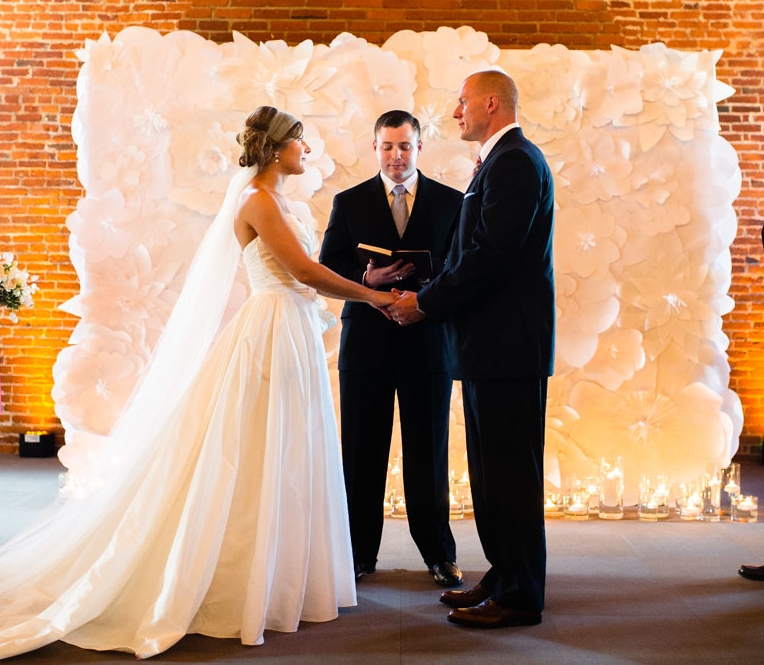
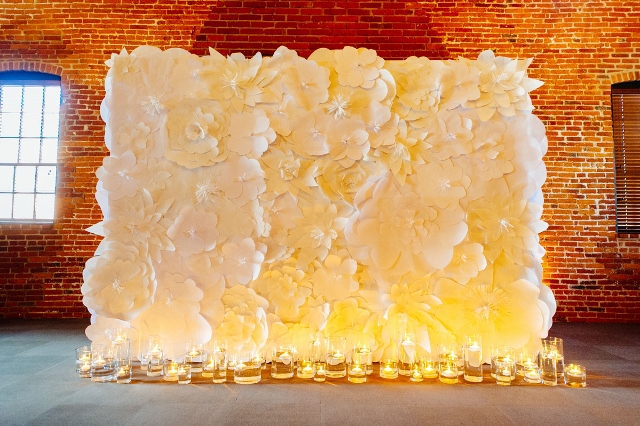 I am one of those people who is always looking forward to the next party or celebration. I just love making the most out of any holiday or event. I absolutely loved helping two of my daughters plan their weddings and I honestly can't wait to do it again someday for the next one! I live for this stuff! What's fun is that each wedding is as unique as the people getting married. This past July Elizabeth and Jon got married at the Cork Factory Hotel in Lancaster, PA. Elizabeth had a vision and knew exactly what she wanted. In case you missed the last post, you can find a little recap here. It was truly a beautiful day. One of our favorite things from that day was the paper flower wall that stood as a back drop during the ceremony and reception. We made it ourselves. It was a labor of love and we were thrilled with the result. We thought it would be fun to share the progress of such a big project with you.
 It all started when we had the wonderful opportunity to attend the Martha Stewart Bridal Market Party in New York City last October. It was a real Who's Who in the event planning world. It was a fantastic night and as you can imagine there were amazing things to see and do. One of the things that caught our eye was the photo booth. The wall behind it was covered with white flowers. It was beautiful.
 At the time, Elizabeth was engaged and the minute she saw the wall she said " I want this at my wedding!" So naturally, since I'm her mom and a person who loves a creative challenge, my answer to her was " Then you shall have it!" We stood in awe of the wall taking pictures and examining the flowers. The whole thing was made from paper. It was so cool. No big deal...right? Well, sort of...
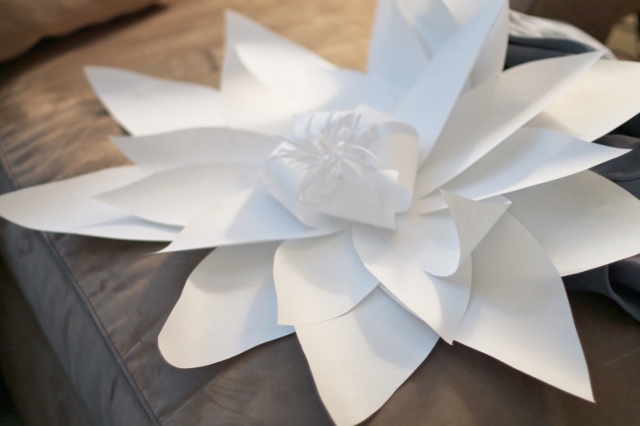
 Soon after we returned from New York City we began the process of making this wall happen. We had 9 months, which was plenty of time, but we couldn't find a how-to anywhere. Not on Martha Stewart's website and not even on Pinterest! So we decided to just figure it out. We started by making tons of paper flowers. We made patterns and cut them out of everything from single sheets of copy paper to rolls of craft paper. The varied weights in paper gave the flowers a few different looks.
 Elizabeth made a job out of designing and cutting paper flowers.
 We had flowers everywhere so we carefully attached them to a bare wall in our basement to keep them from getting wrinkled or torn.
 While we were creating the flowers, Jon and his dad constructed a 12' high by 8' wide wall that would wrap around the fireplace in the ballroom at the Cork Factory. We tested the fit before the big day to make sure it worked. The Cork Factory staff was fantastic to work with and were happy to accommodate us with this project. We just love them!
 Once the wall was constructed we attached the flowers to it. We used a combination of glue and staples.
 In order to make it portable Jon and his dad used five separate boards to create the wall. Three across the front and one on each side. They would all be attached together at the venue.
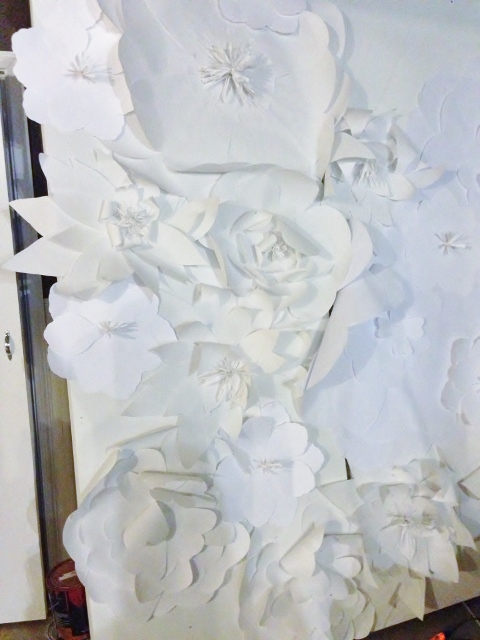 Once most of the flowers were attached we stood each section of the wall up to see how it looked (it helped that Jon's dad's basement had high ceilings!). We added more flowers to completely fill the wall.
 The wall was transported to the venue the day of the wedding in a covered truck. A HUGE thank you to Jon's dad Glenn for making that happen!
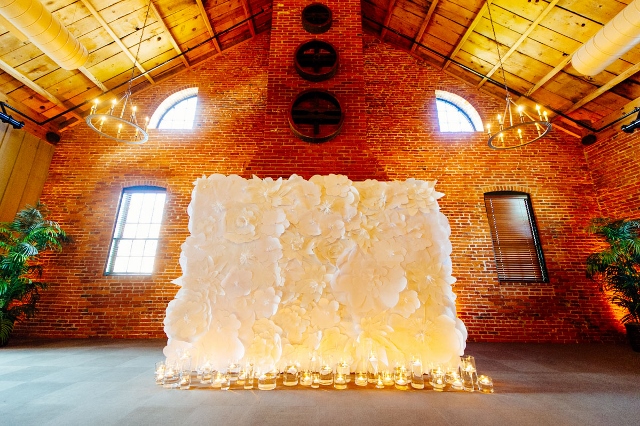
 When the wall was set up in the ballroom we touched it up with a few more flowers and a little bit of glue. We lined the base of the wall with glass vessels filled with water and floating candles. It softened the look and gave the wall a romantic glow.
 Mission accomplished!
 This paper flower wall was truly a labor of love. Elizabeth had a vision and with some hard work and the collaboration of some amazing people it became a reality. And it was perfect!
Have a beautiful day!
Leslie xo
Hello September
 Welcome to September! I can't believe July and August are over. How did that happen? It seems like just yesterday I was saying "I'll be back soon" and all of a sudden we fast forward to September and the last few months are memories. I hope you had a wonderful summer! Mine was filled with celebrations, new beginnings, adventures and time spent with family and friends. It flew by quickly! When that happens we sometimes find ourselves hanging onto the season, not wanting to let go of the here and now. Other times we feel ready for a change. It's why those back to school commercials resonate with mothers everywhere! Either way, it's time for transition and ready or not, here it comes. I love this time of year so I will be embracing the new season and all that it brings but before I jump into fall recipes and cool weather projects, I want to share one of my favorite summer memories with you.
My daughter Elizabeth was married to the love of her life, Jon, in July. It was a magical day and I can honestly say I have never seen her happier. The entire process leading up to that day was wonderful. It was a fantastic collaboration of amazing people and it was one of the most enjoyable experiences I have ever had. I loved every minute of planning this special day with Elizabeth. We worked hard, laughed a lot and even shed a few tears. It was truly the highlight of our summer.
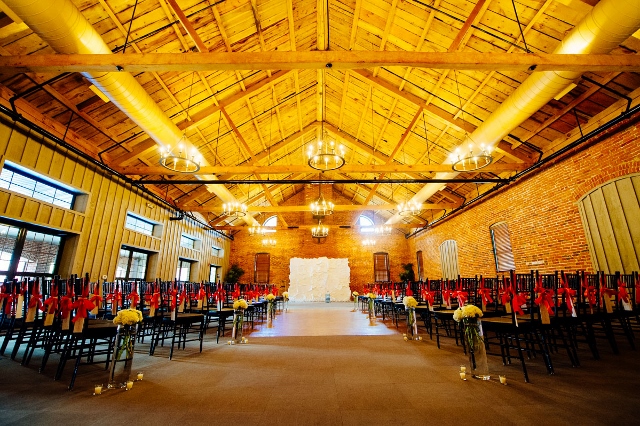 The wedding was held at the Cork Factory Hotel in Lancaster, PA. The wood ceilings and brick walls of this 19th Century building once housed the historic Armstrong Cork and Kerr Glass companies. This well preserved structure was a perfect setting for Elizabeth and Jon's special day. The awesome photos in this post are the work of New Chapters Photography, in Harrisburg, PA.
Elizabeth had a vision for a white flower wall that would be the backdrop for her wedding ceremony. After weeks of cutting and gluing, we covered the entire 8' X 12' structure with handmade paper flowers that we designed ourselves. We were thrilled with the end result. I will be sharing the experience from start to finish in an upcoming post.
 Floating candles in a variety of glass vessels lined the bottom of the flower wall giving it a soft romantic glow.
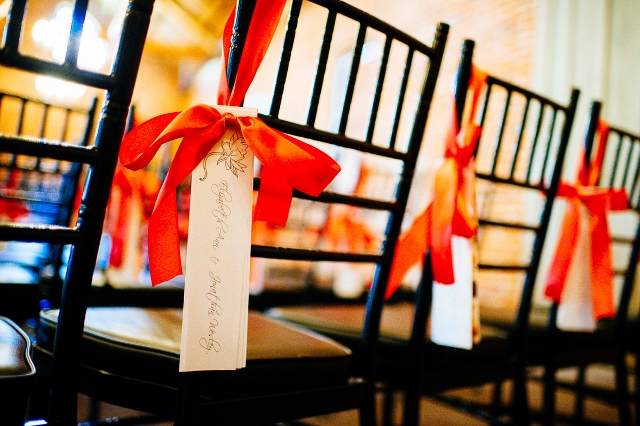 Handmade programs tied with coral ribbon were hanging from chiavari chairs for each guest.
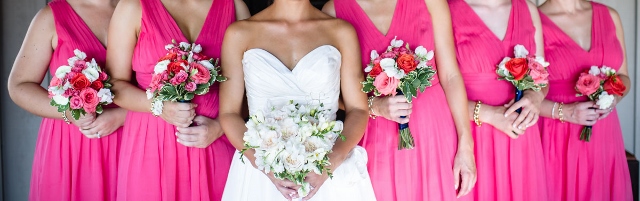
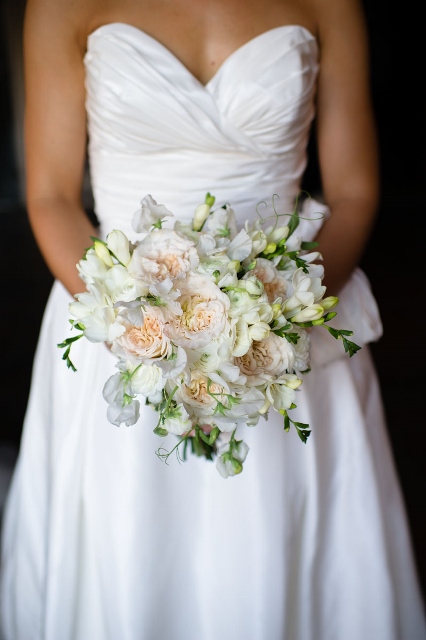 Elizabeth wanted simple but elegant hand tied bouquets of garden flowers. Blooms by Vickrey in Camp Hill, PA did a fantastic job with the entire wedding. Owner Mark Vickrey was on site all day making sure everything went as planned. Not only did that give us peace of mind, Mark was a blast to work with. He is one of our favorite vendors.
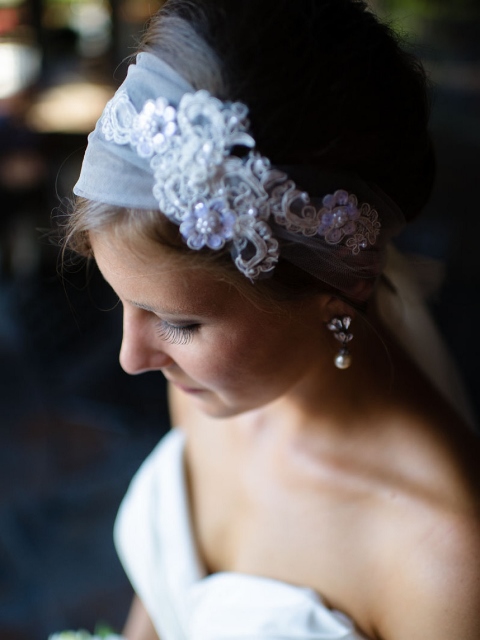 Elizabeth's headpiece was beautifully unique and a perfect compliment to her dress. When she decided to wear a headband I thought I would try to make one for her. I designed it to include a removable veil so she could wear the headband during the reception. It was so simple to make and was special for both of us.
 Simple elegance was the goal for this wedding. Elizabeth chose balls of babies breath, some of which were suspended over the tables, instead of traditional arrangements. Another job well done by Blooms by Vickrey.
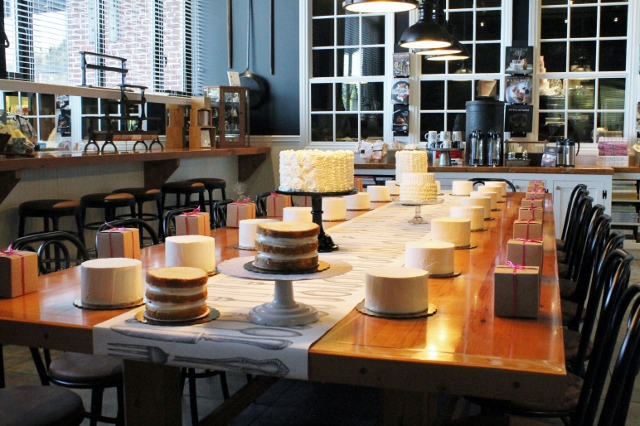
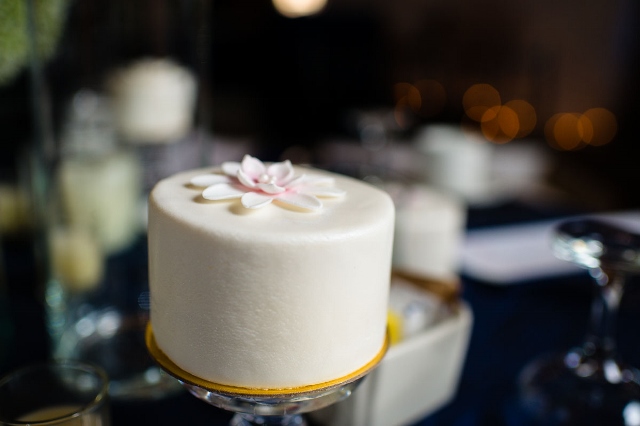 Individual miniature wedding cakes made by Kyrsten's Sweet Designs were placed on the tables for each guest. Kyrsten is an extremely talented local baker and cake designer from Harrisburg, PA. I will be sharing more about her and her amazing work in an upcoming post.
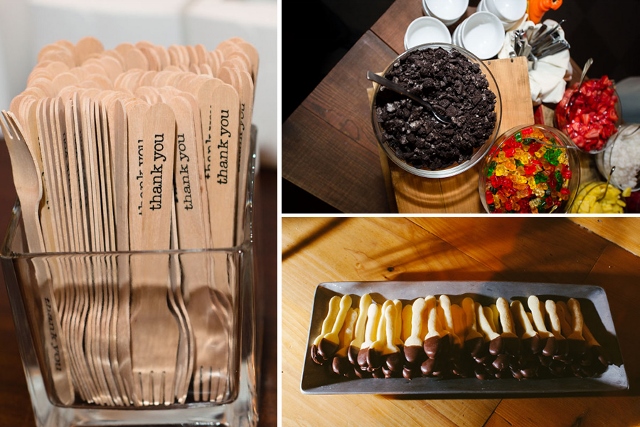 A few of our favorite things from this special day were the ice cream bar, the homemade chocolate covered sugar cookie spoons on the coffee bar and the fact that the guests loved taking their cakes home in individual boxes. We even included a fork just in case they wanted to dig in before they got home!
It was a wonderful day and a memory that will last a lifetime! What is your favorite summer memory? Do you have one or are there many that you will tuck away? It feels good to be blogging again! I'm looking forward to sharing lots of new things this fall so stop back soon. I hope your summer was memorable and you are heading into the new season looking forward to all of the wonderful things to come! There are so many!
Leslie xo
Photo credit and many thanks to New Chapters Photography! Another favorite vendor!
Summer
 It's hard to believe it's July! Where did June go? Summer is moving along quickly and lately I find myself trying to slow it down in an effort to really enjoy each moment but like it or not, it just keeps moving. It's been a busy year for our family. We have so many wonderful things happening. We welcomed my beautiful little granddaughter in May, we're celebrating my daughter's wedding in a matter of days and our entire family will be gathering at the beach for a wonderful summer vacation. My family is spread out from the West Coast to the East Coast but they are all slowly traveling to the same place to be together to celebrate and have a good time. I feel very blessed to have such wonderful people in my life. I want to soak up every minute with them and for that reason I will be taking a little break from blogging in order to fully enjoy every little thing that goes on! Don't worry, I will be collecting photos and memories and will blog about all of it when I get back, especially the details of Elizabeth and Jon's wedding! In the meantime if you're looking for some recipes, DIY projects or things to do this summer, I have a few ideas. Check out these past blog posts.
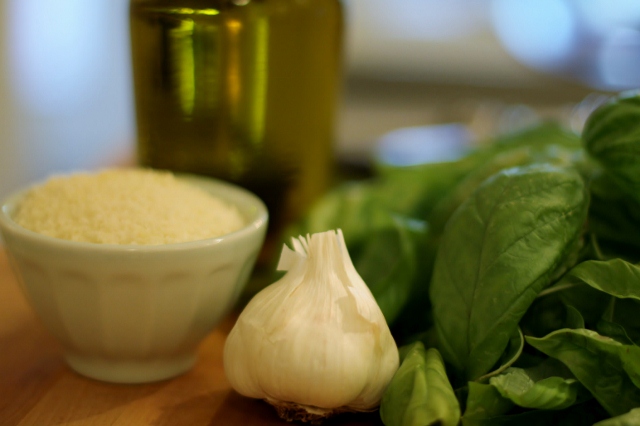
Have some basil growing in your herb garden? Try making pesto. It's quick, easy, and freezes well.
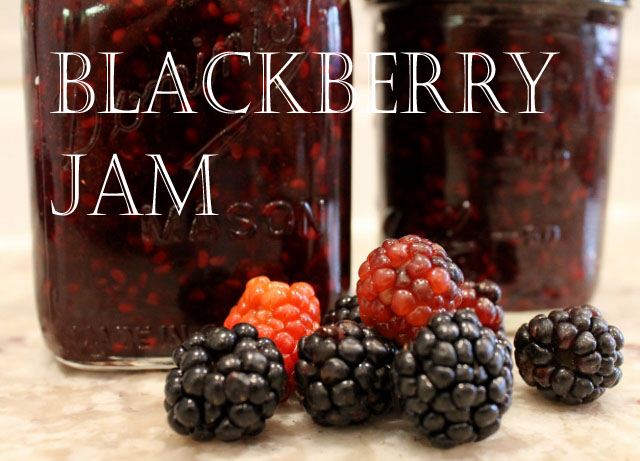
Capture the flavor of summer with this fresh blackberry jam recipe.

Peaches and berries come together to make this delicious summer dessert.

Who doesn't love Sangria in the summer? Get ready for happy hour with these three recipes.
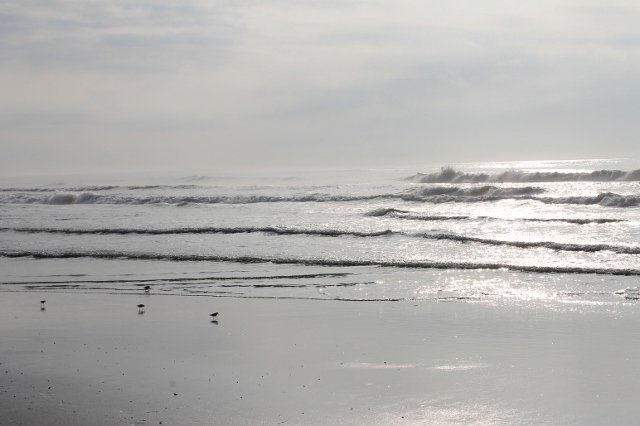
Heading to the beach this summer? Keep your eyes open for Sea Glass. It's one of the prettiest treasures on the beach.

Looking for a summer project? Try making your own beaded bracelet.
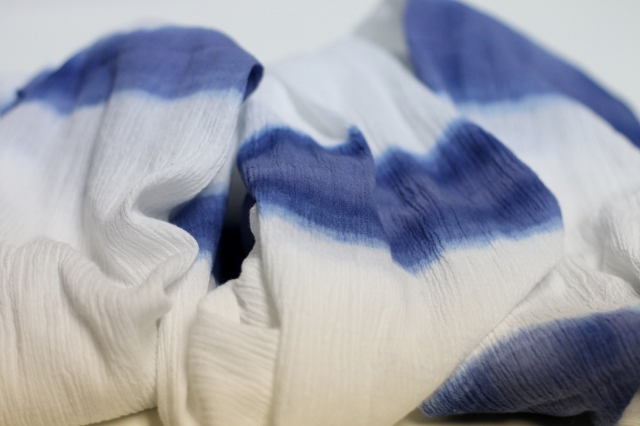
Accessorize your summer wardrobe with this simple DIY project.
Celebrate the little things, enjoy the people around you and have a wonderful summer! I'll see you soon!
Leslie xo
Tandy Cakes Recipe
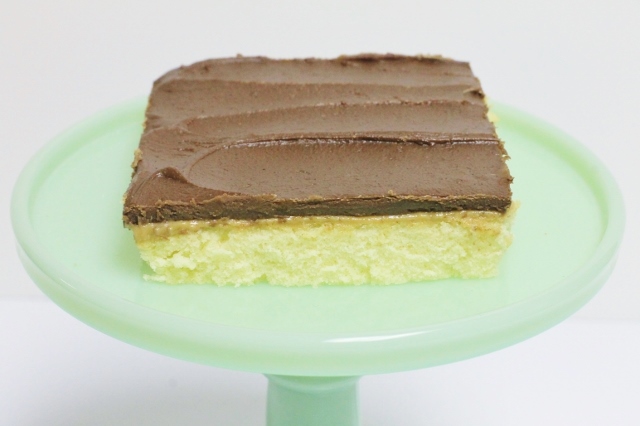 Whenever I see a box of Tastykakes I think back to my days as a little girl. For some reason those boxes of baked goods remind me of packed lunches, after school snacks and life back in the day when we didn't worry so much about many of the things we worry about today. The good old days I guess. Well, even though most of us are now passing up the junk food aisle on our way to the organic aisle in the grocery store, I still think a little flash back to the days of Kandy Kakes and Butterscotch Krimpets is good for the soul. That's why I'm sharing this recipe today. It's been popping up in our house lately for a few occasions and since it brought back some memories for me, I figured sharing it might do the same for you. This recipe is for Tandy Cakes. It's a knock off of those delicious little sponge cakes topped with peanut butter and covered in chocolate. Remember them? Two in a pack? Are you smiling? Well once you make them, you will be. They are that good! This is the pan version and they are every bit as good, if not better than the little cakes you buy. Go ahead, indulge, you won't be sorry!
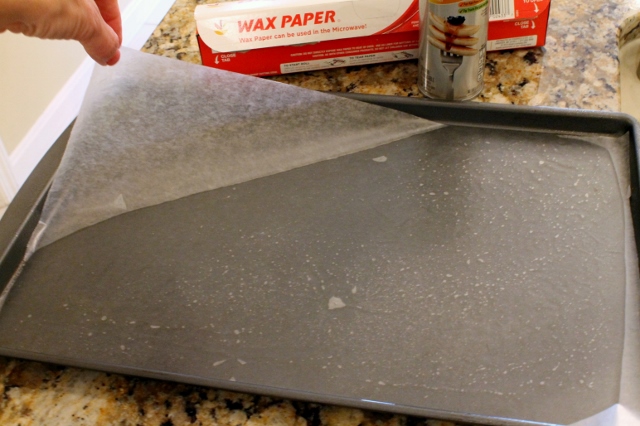 Lining the pan before baking will help avoid sticking. Cover the pan with cooking spray first. Then place a fitted piece of wax paper in the pan. Spray again with cooking spray.
 Pour the batter right on top of the sprayed wax paper.
 Tandy Cakes start with a delicious layer of sponge cake. I actually think this recipe could be used as a base for a lot of other great recipes.
 Next up is a layer of peanut butter.
 It goes onto the sponge cake as soon as it comes out of the oven so it melts into a dreamy sauce that is easy to spread. The pan goes into the refrigerator to cool.
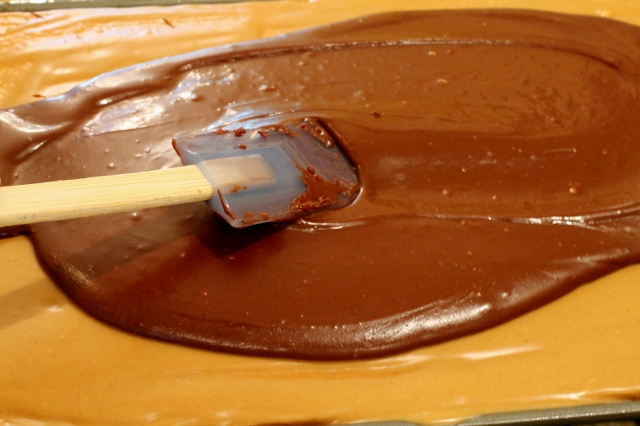 The last layer of the Tandy Cakes is a heavenly cooked chocolate frosting that is spread on top of the chilled peanut butter.
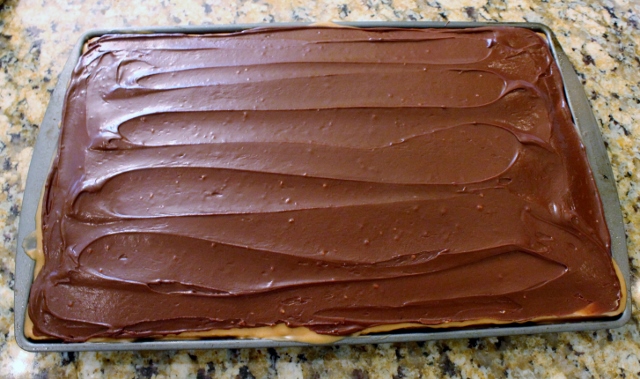 The entire pan is placed in the refrigerator again until the chocolate is set. You can serve Tandy Cakes room temperature or cold. I happen to love them cold!
Enjoy!
Leslie xo
- Sponge Cake Layer
- 4 eggs beaten
- 2 cups sugar
- 2 cups flour
- 1 cup scalded milk
- 2 tablespoons butter
- Peanut Butter Layer
- 1 12-18 ounce jar of peanut butter
- Chocolate Frosting Layer
- 1/2 cup margarine
- 1/2 cup cocoa
- 1 box Confectioner's sugar
- 1/3 cup milk
- Preheat oven to 350 degrees.
- Spray a jelly roll pan with cooking spray, line with wax paper and spray again with cooking spray.
- Beat sugar and eggs together. Add flour and mix well. Melt butter in scalded milk and add to mixture. Pour batter into greased jelly roll pan. Bake 20 minutes or until cake is just browning on the edges and no longer dents when touched.
- Spread peanut butter onto hot sponge cake. Cool just slightly and the refrigerate until chilled.
- Melt butter over low to medium heat. Add cocoa and bring to a boil. Remove from heat and add confectioner's sugar and milk. Mix well. Carefully spread frosting over chilled peanut butter layer. Refrigerate until chocolate is set. Serve room temperature or cold.
- Keep refrigerated.
Favorite Things
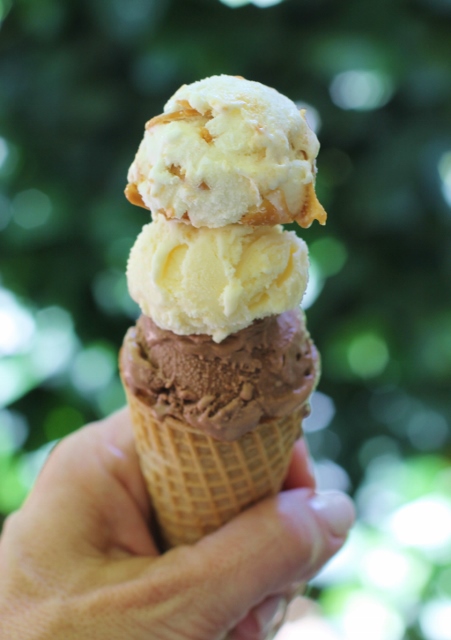 I don't hide the fact that I'm someone who refuses to give up sweet things. I just can't imagine life without sugar and even though I have total control most days there are many days when I cave to the craving. During the summer months ice cream is my weakness. Some days it's a scoop of chocolate peanut butter ice cream with peanuts on top and other days it's an all out party at our local Kiwi Frozen Yogurt shop where you can add all of your own toppings. Either way, it satisfies the craving and it's all good. I thought since today is the first day of summer and my ice cream habit will be kicking into full gear I would share some of my favorite toppings with you. Happy Friday!
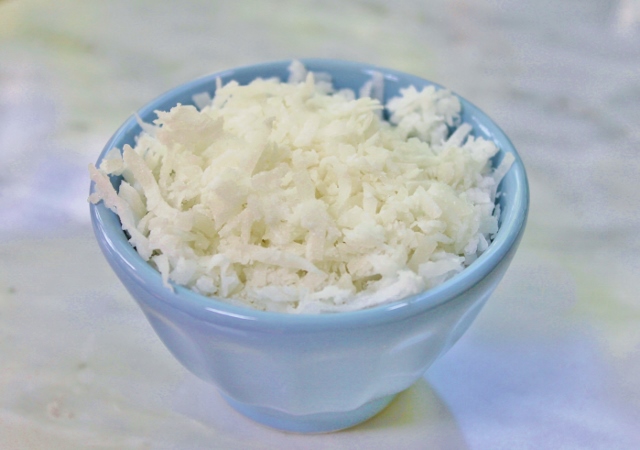 Shredded Coconut
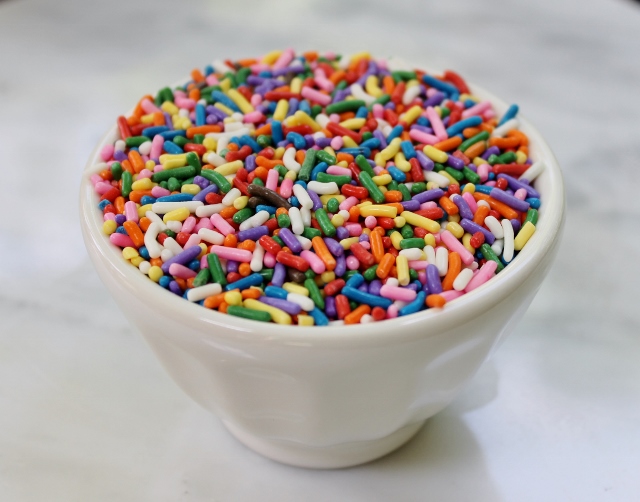 Sprinkles or "Jimmies" as we call them in my house
 Miniature Marshmallows
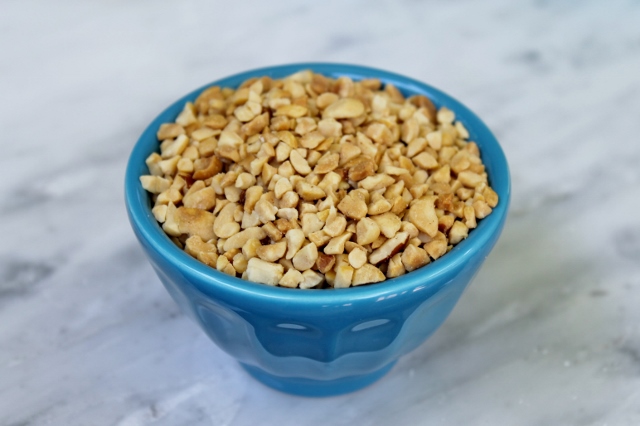 Chopped Peanuts
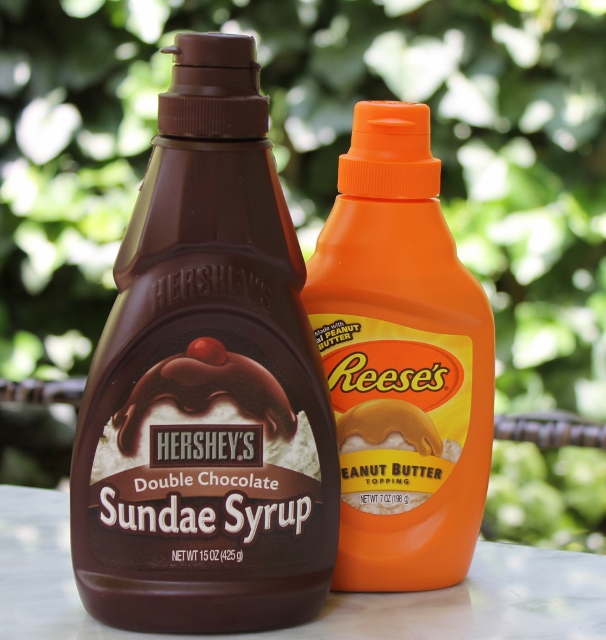 Chocolate and Peanut Butter Syrup
Enjoy everything the warm weather brings and every once in a while indulge in the things that make you happy. Happy Summer!
Leslie xo
Posies
 Last week I spent a few days in New York City to celebrate my birthday. The weather was perfect and the vibe in the city was upbeat and happy. I love wandering around Manhattan this time of year and as I've mentioned before, I like to discover new things each time I visit. This time I found an adorable little flower shop on the Upper West Side called Posies. The store is tucked along Amsterdam Avenue. It's not a big place but the bright pink awning and plants spilling onto the sidewalk are so inviting you can't help but stop and notice. I had to go in and check it out. It was really cute so I thought I'd share it with you. I didn't have my camera so I used my iPhone to capture some photos and show you what Posies has to offer.
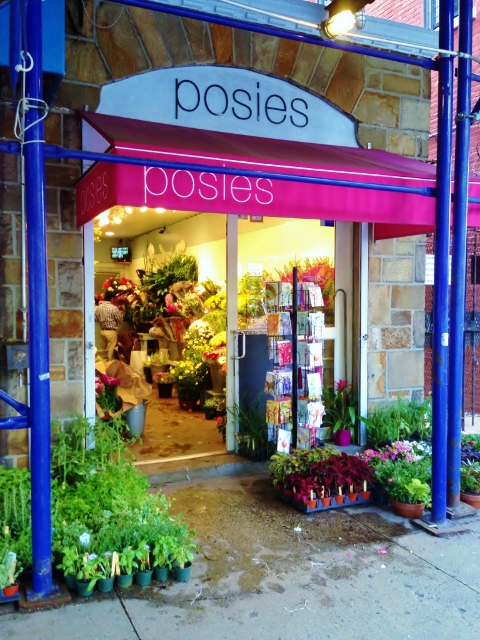 Even though it is currently surrounded by scaffolding, this little flower shop jumps out at you when you are walking down the street.
 The store is literally overflowing with fresh flowers and plants.
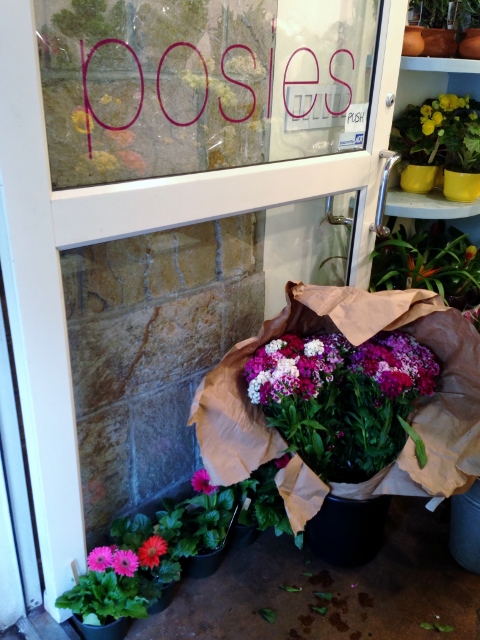
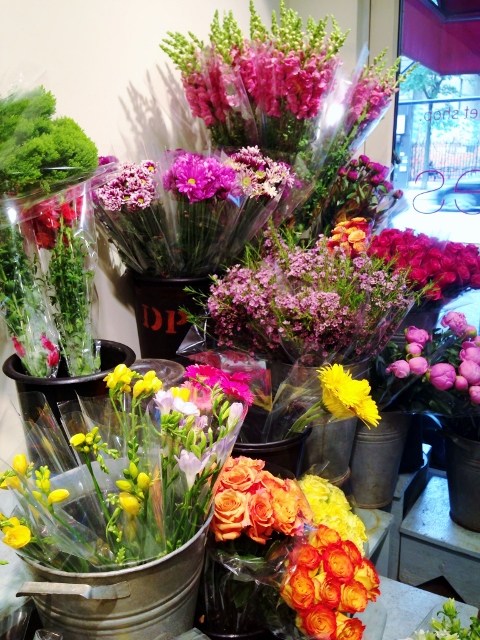 There are buckets of seasonal flowers inside. You can make your own bouquet or have Posies create something for you.
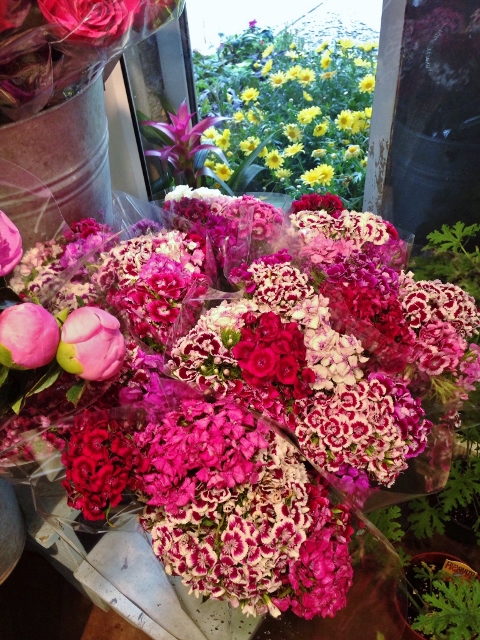 I was amazed at the selection of flowers offered in such a small space. There were so many varieties and colors to choose from.
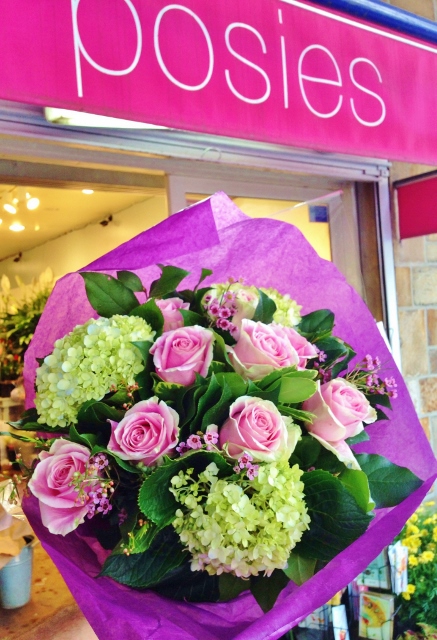
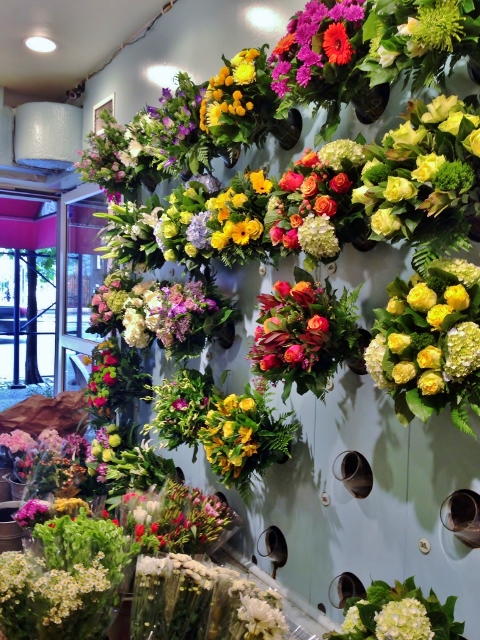 If you can't decide or don't have time to make your own bouquet, you can choose one of the premade bouquets that are lining the wall. This was my favorite part of the store. The bouquets were gorgeous and inexpensive.
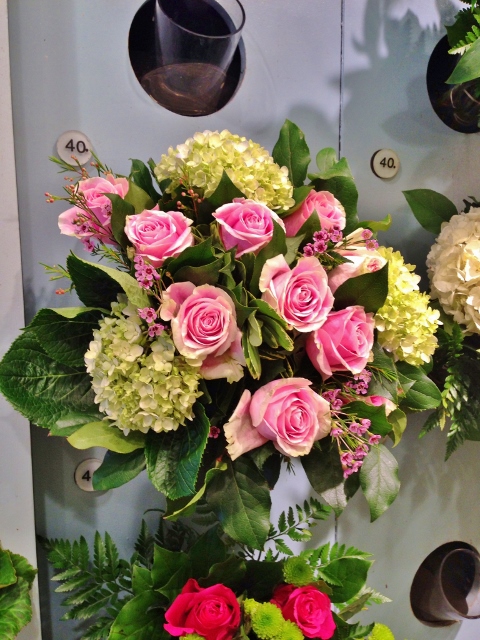 I love garden roses and hydrangeas together so I chose this beautiful bouquet to take home.
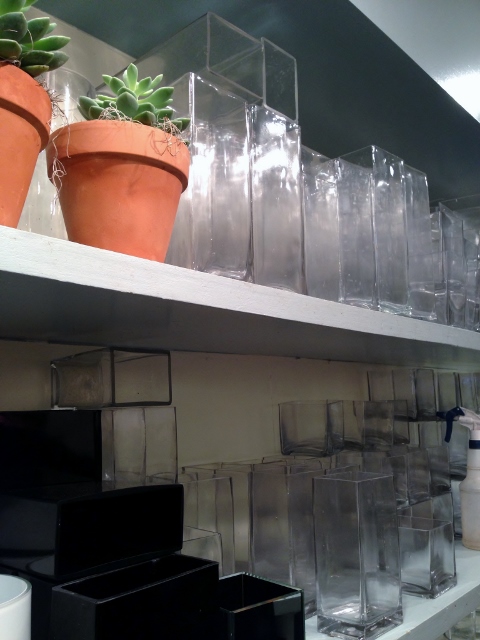 If you need a vase or vessel for your arrangement Posies has those too.
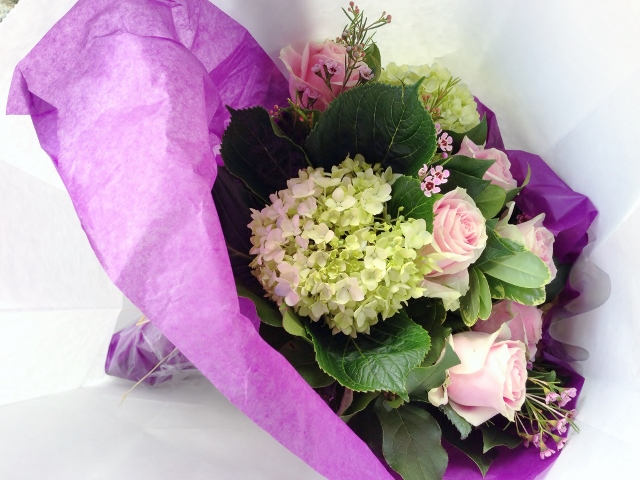 I didn't need a vase so my bouquet was carefully wrapped in purple tissue paper and cellophane, tied with a raffia bow and placed in a large white shopping bag. I love that! So simple but so very pretty. This little flower shop gets a huge thumbs up for me! It was a great little find and a fun stop to make in the middle of a busy day. If you visit the Upper West Side head to Posies!
Enjoy your week!
Leslie xo
Favorite Things
 I am not someone who collects things and I really don't like clutter but lately I am realizing I have an obsession. It's an obsession with cake stands and I can't seem to stop. I love them! I love to bake too and since I am a detail person, I think a pretty dessert should be sitting on a pretty plate. I can't help it. It's who I am. So naturally, every time (well, almost every time) I see a beautiful cake stand, I imagine the dessert I would serve on it, and I buy it. I thought it would be fun to share some of my favorites with you. Happy Friday!
 This little green cake stand is one of my (very) favorites. The color is fun and the size is perfect for petite desserts.
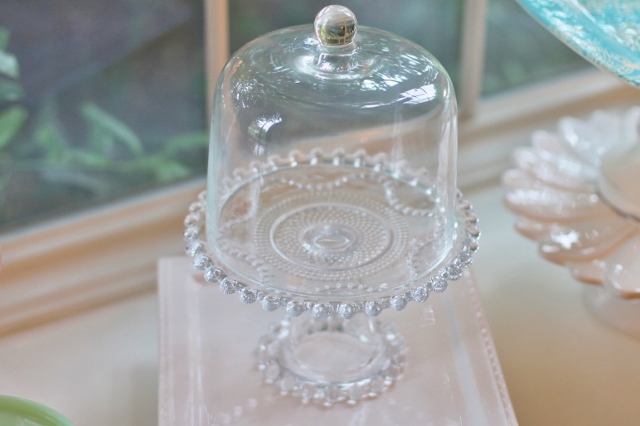 I love the detail on this little glass cake stand and the dome on top just makes it extra cute.
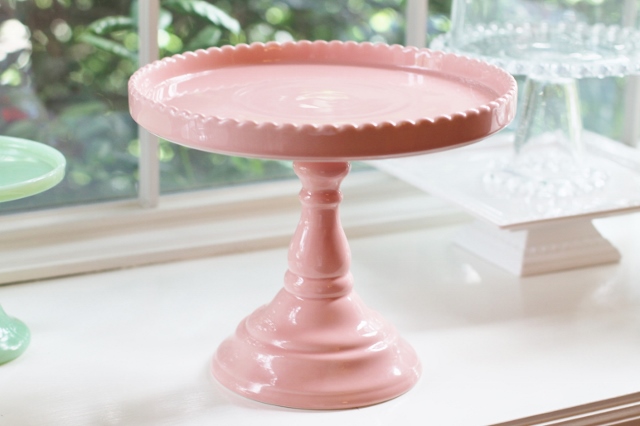 This pink cake stand was a gift from my children. I love the color. It makes serving cake more fun!
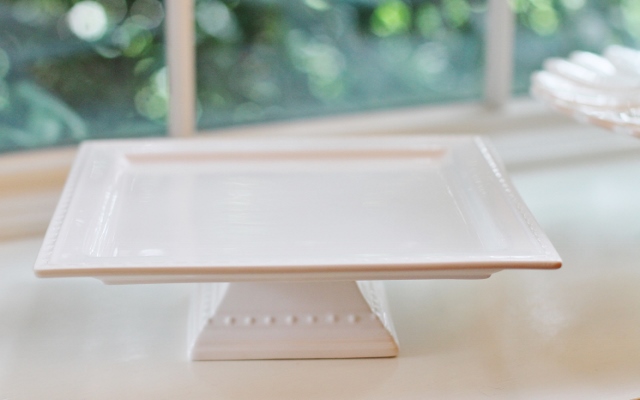 This square cake stand is great for serving things like brownies and bar cookies.
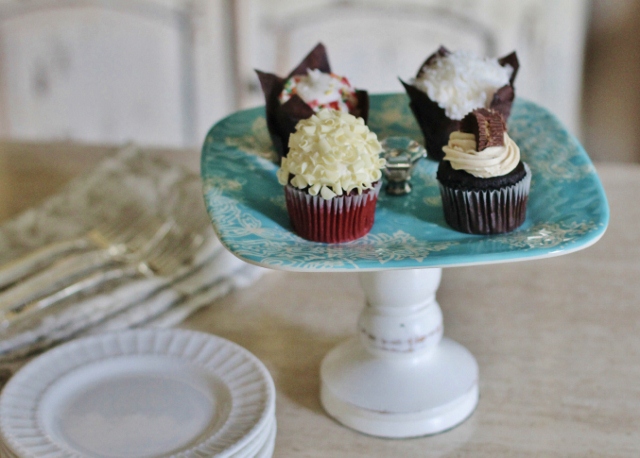 This stand is from a Dessert Stand DIY post I did last year. I've made some fun stands but this blue one is my favorite.
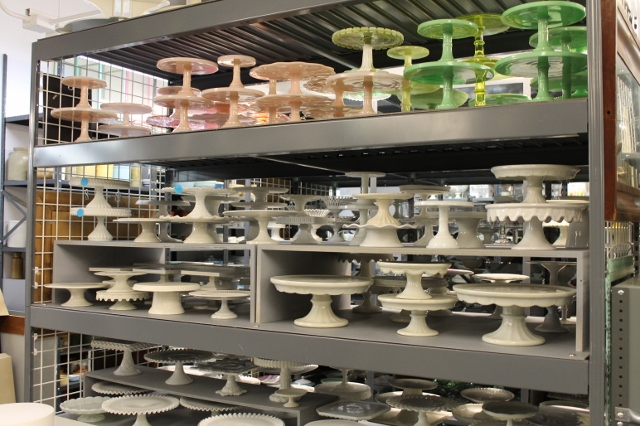 I took this photo during the Martha Stewart Living Behind The Scenes Tour last fall. I have never seen so many beautiful cake stands!
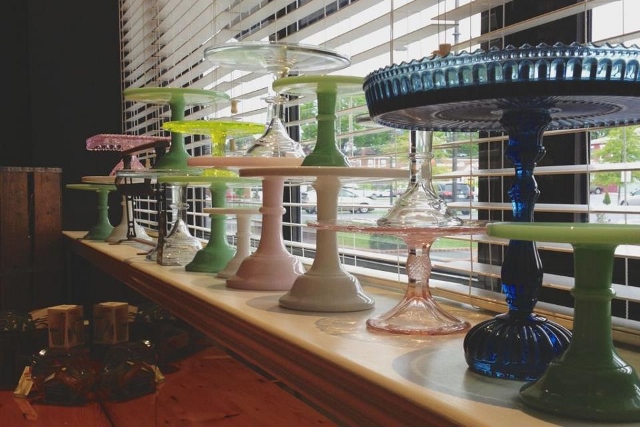 This photo is from The Baker's Table in Lancaster, PA. If you're local check it out! They have the most amazing selection of cake stands! Each time I go in I have to look at what's new before I do anything else. It's getting dangerous!
Have a wonderful weekend!
Leslie xo
The Baker's Table cake stand photo: property of The Baker's Table
Ultimate Chocolate Cupcake Recipe
 Well, she did it! She is Stefani Pollack, founder of Cupcake Project, a delightful blog devoted to everything cupcake! Last July Stefani began her search for the Ultimate Chocolate Cupcake Recipe. She had already found The Ultimate Vanilla Cupcake Recipe and was now ready to master the chocolate version. She sent out a call for help and from over 500 applicants she chose 50 Explorers to bake, taste and bake again. I was lucky enough to be one of them. The testing went seven rounds and almost a year later The Ultimate Chocolate Cupcake was crowned! I had a great time participating in this project. I learned some things that will help me with my own baking projects so it was well worth every minute in the kitchen! Stefani was so much fun to work with and her determination to keep trying round after round was inspiring. I wanted to share my experience and her recipe with you. You'll want to hang onto this one!
 The project began last July. Stefani would send all 50 Explorers a recipe and we would have to bake the cupcakes, taste them and fill out a survey tracking everything from taste and texture to quantities and bake time. If over 60% didn't like it, it was back to the drawing board and a new recipe. We baked a total of seven rounds before there was a winner.
 We weighed and measured lots of different ingredients. We tried everything from buttermilk and sour cream to water and coffee.
 We kept track of bake time, size and quantities yielded. Some recipes were really, really delicious and some were not. I can't imagine trying to round up 50 bakers' opinions and experiences, especially when everyone has different tastes. Stefani had quite a task on her hands but was determined to keep going. One of the worst parts for me was having to say that one of the recipes was not the ultimate when I knew it was one Stefani had a lot of faith in. I was not alone and we kept going.
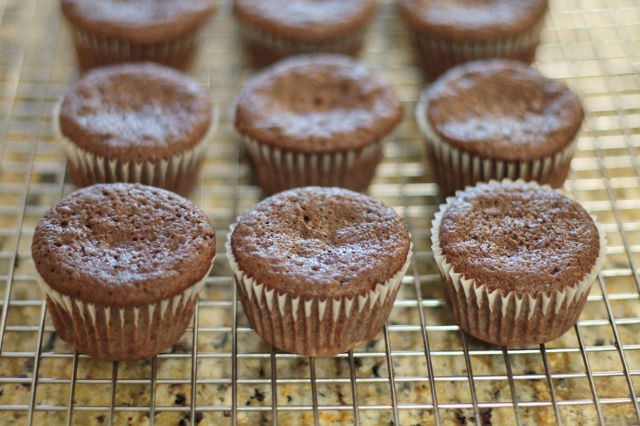 Some of the recipes resulted in a delicious but flat cupcake.
 Some of the recipes were the opposite, nicely domed but not the best flavor.
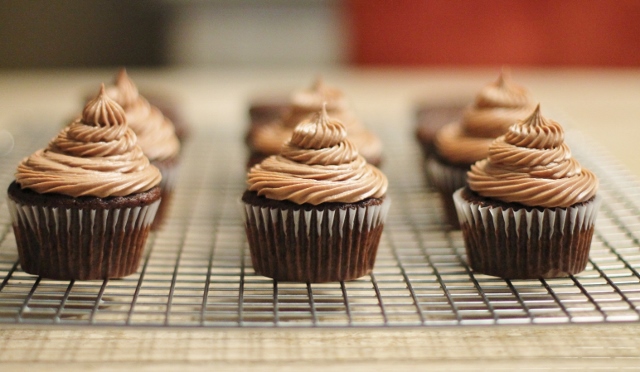
 Finally, after seven rounds of baking and tasting, The Ultimate Chocolate Cupcake was discovered! This one had the most amazing chocolate flavor AND the perfect texture for a cupcake. And most of us agree, it truly is an amazing chocolate cupcake! If you are a chocolate lover you will love this cupcake! Head over to Cupcake Project for the recipe and to learn more about Stefani Pollack!
Enjoy!
Leslie xo
 Click Here for The Ultimate Chocolate Cupcake Recipe
Photo credit for crowned cupcake: Cupcake Project
Favorite Things
 Social Media is all the rage these days. From Facebook to Pinterest there are apps connecting us to people all over the world and we're sharing anything from recipes to photos and everything in between. I'm a people person and I love that there are so many ways to meet new people and stay in touch with old friends. But there are limits. How much is too much? How much time do you spend scrolling through Twitter or hanging out on Facebook? I don't spend a lot of time in any one place but I do have a few favorites. I like gathering information and sharing my ideas. I have one rule for myself; keep it positive. If you share positive information you receive positive feedback. And if you spend your time wisely, social media can be beneficial as well as a lot of fun. Here are a few of my favorite sites. Happy Friday!

Instagram is a place where you share photos. You can follow businesses, friends, blogs etc. I love to see how creative people can be with their photos.
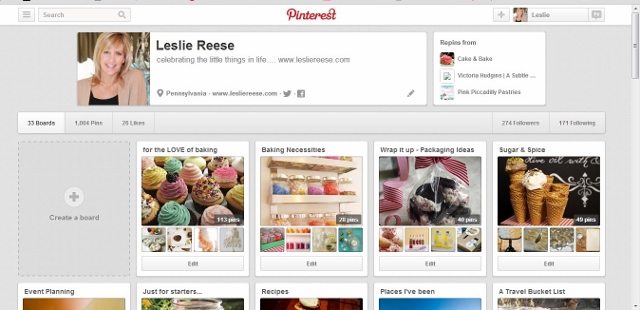
Pinterest is a place where you create digital inspiration boards. You can gather your favorite photos and ideas from different websites and put them on boards that you categorize and save. I love Pinterest!

Co-founded by my rock-star brother-in-law, Jesse Engle, Seesaw is a place where you can get help making decisions by posting photos and asking for opinions. Maybe you need help choosing a dress to wear, shoes to buy, or recipe to make. Just ask and people answer. Seesaw is addicting and a lot of fun!

I love Twitter. There are so many interesting people on Twitter and the opportunity to learn and grow is huge. If you follow the right people it's amazing who you can meet. I found my graphic designer for my blog on Twitter. She's from Alaska! I also met my friend Melissa from Best Friends for Frosting on Twitter. It's a great place to connect!
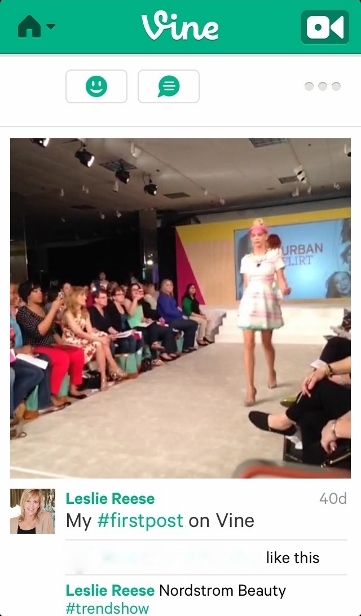
Vine is a fun app for sharing short videos. I'm not sure how much I will use this but it's been interesting to see what people are posting. Some businesses post really cool videos. Others not so much. It has been fun to explore but we'll see if I stick with it.
I don't know many people who aren't on Facebook. I resisted for a long time and when I finally tried it, I realized it was a great way to connect with people you don't get a chance to see often. I have a personal page to connect with family and friends and a business page to share blog posts and other fun stuff. I spend a limited amount of time here but it's a great way to stay connected!
So those are a few of the social media sites where you might find me hanging out. Stop by and say hi. I'd love to connect with you.
Have a great weekend!
Leslie xo
Simple Pasta Salad Recipe
 It's hard to believe June is upon us! I don't know where the time goes but it seems like every time I blink, another year goes by! My house is buzzing right now. There are kids home from college, a wedding coming up and people coming and going every day. It's total chaos and I love it! Everyone has a different schedule though so planning meals can be tough with a full house. It's a challenge to keep the pantry and fridge stocked let alone have something prepared when someone needs a quick meal. There are certain things that are great to have on hand during busy times and pasta salad is one of them. It's inexpensive, easy to make in large quantities and tastes great, especially when you have a recipe like the one I am sharing today. It's an old recipe that has been in my family for several generations. My grandma made it, my mom made it and now I make it. It's simple but delicious.
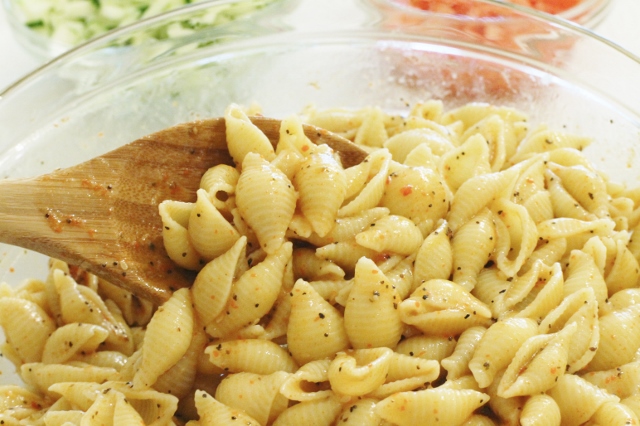
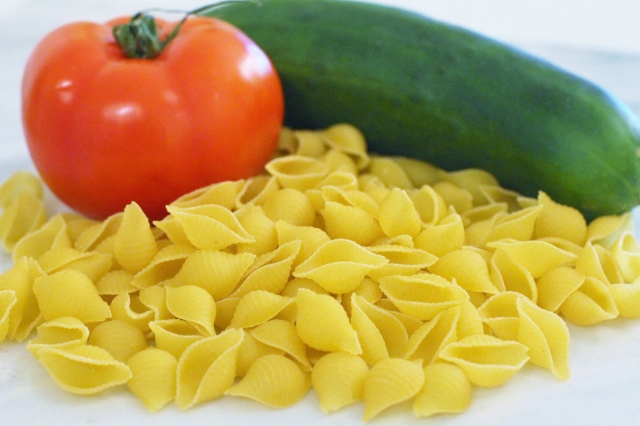 Small pasta shells, tomatoes and cucumbers are the main ingredients in this recipe.
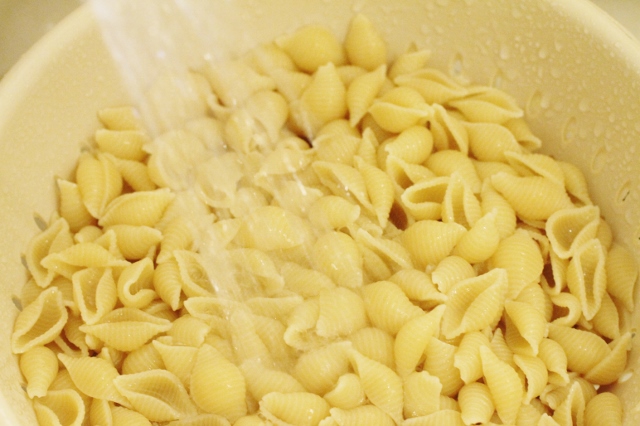 It's easy to make. Just boil the pasta, rinse it in cold water and drain.
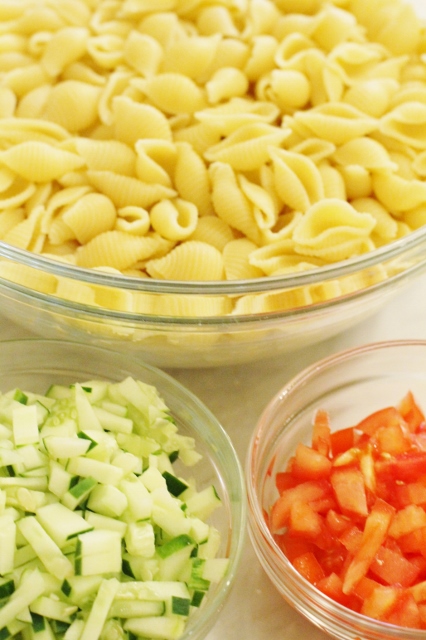 Add chopped cucumber and tomato.
 Toss with McCormick Salad Seasoning, onion powder and Wishbone Italian Dressing.
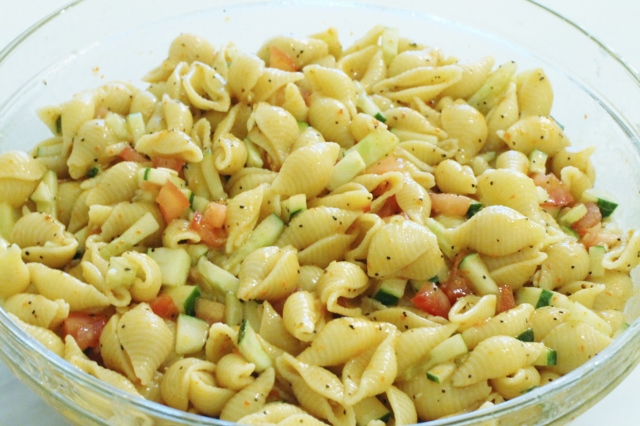 That's it. It doesn't get much easier!
Keep it simple and enjoy!
Leslie xo
- 1 pound small pasta shells
- 1 large tomato chopped fine
- 1 cucumber diced
- onion powder
- 1/2 bottle of McCormick Salad Seasoning
- 1 large bottle Wishbone Italian Dressing
- Croutons (optional)
- Cook pasta according to package directions. Drain and place in a large bowl.
- Toss cooked pasta with Salad Seasoning and Dressing.
- Add a sprinkle of onion powder and stir.
- Add cucumber and tomato and toss until combined.
- Add croutons.
- Refrigerate.
- Serve cold.
Favorite Things
 The summer season is fast approaching and temperatures are warming up. Beach vacations, outdoor workouts and dining Al Fresco are a few of my favorite things to do this time of year. For me, summers are all about keeping things light and simple. It's a laid back time of year. I'm all for no makeup days, simple accessories and minimal fuss to make the summer routine quick and easy. So when it comes to beauty and skincare I have some favorite things to help me lighten up for the season. These are some of the things that you'll find in my travel bag right now. Happy Friday!
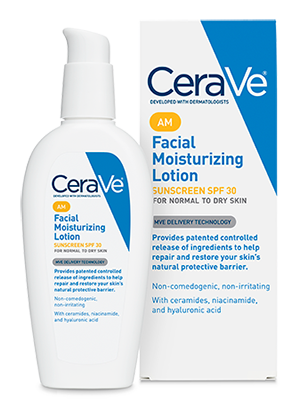
CeraVe Facial Moisturizing Lotion with SPF
In January I shared a great tip from my dermatologist, CeraVe Moisturizing Lotion. It's inexpensive and effective. During the summer months I make sure I use the AM lotion with SPF 30 every day.
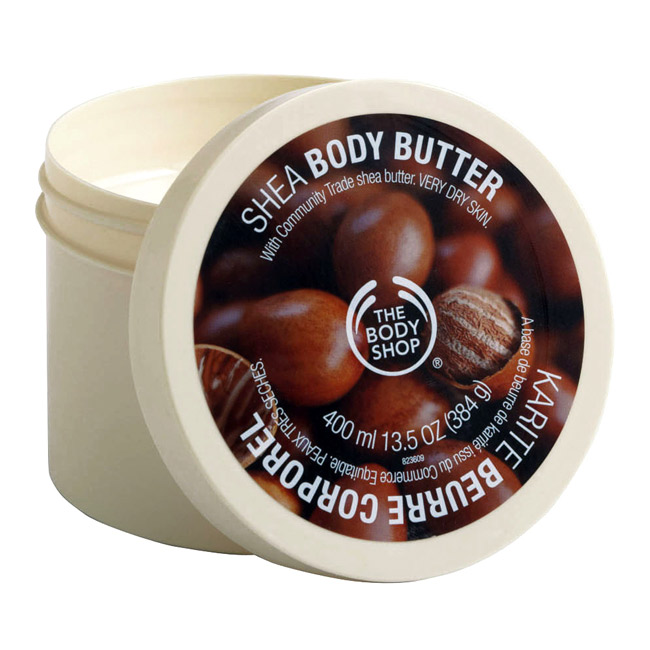 Shea Body Butter from The Body Shop
I love Shea Body Butter. It's hydrating and works well to keep skin soft without feeling greasy. I've been using it for years.
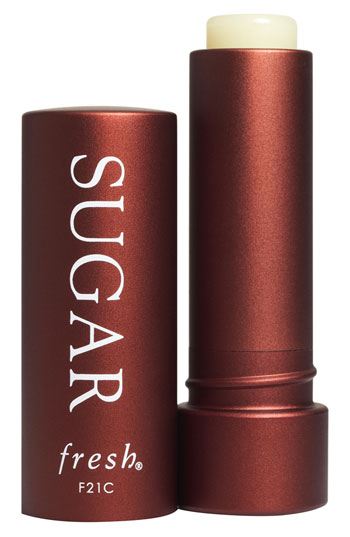 Sugar Lip Treatment with SPF by Fresh
Sugar Lip Treatment with SPF 15 is great every day but especially on a beach day.
 Almay One Coat Waterproof Mascara
Remember, great beauty products aren't always expensive. Almay's One Coat Waterproof Mascara is my choice for smudge free eyes all summer.
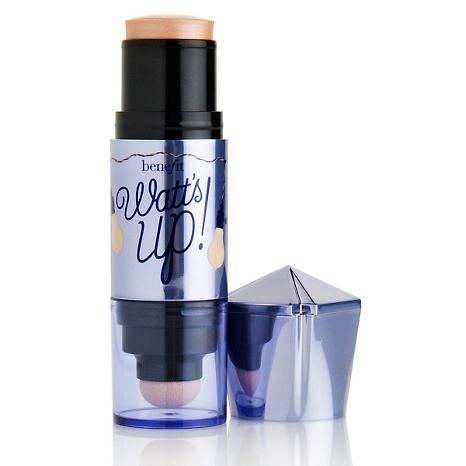 Watt's Up! Highlighter by Benefit Cosmetics
A little touch of Watt's Up! Highlighter above your cheeks and you just brightened up your whole face. I love this anytime but it's perfect for those no makeup days!

Beach Fragrance by Bobbi Brown
One of my favorite summer fragrances is Beach by Bobbi Brown. It's a fresh, light scent that is so reminiscent of summers at the beach.

Essie Nail Polish in Come Here
A bright summer color like Essie Nail Polish in Come Here is always fun for beach toes.
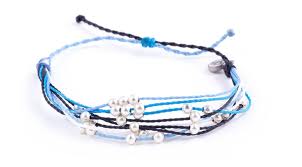
PuraVida bracelets are one of my favorite summer accessories. They are lightweight, colorful and fun to stack together. PuraVida donates a portion of the proceeds from each bracelet sold to help clean up and preserve beaches and oceans worldwide. Very cool.
Enjoy the warm weather and have a wonderful weekend!
Leslie xo
Sorbet and Sugar Cookies
 We officially kicked off the summer season yesterday and for most of us that means picnics, parties and lots of warm weather fun ahead! I love this time of year and in our family, there are so many things happening in the next few weeks, I can hardly contain myself. Life will be busy but I'm looking forward to getting together with some of my favorite people. I'm also looking forward to the opportunity to host some informal gatherings in our home. Whether it's dinner or dessert, I love bringing people together. Today I'm sharing two dessert recipes with you. One is a recipe for homemade sorbet. It's a simple recipe that can be made ahead of time and is refreshing in warm weather. The second is my favorite sugar cookie recipe. I'm including it simply because I like the idea of serving cookies with sorbet. Both are great to have on hand all summer.
 I used a blend of fresh strawberries, blueberries, blackberries, and raspberries to make sorbet.
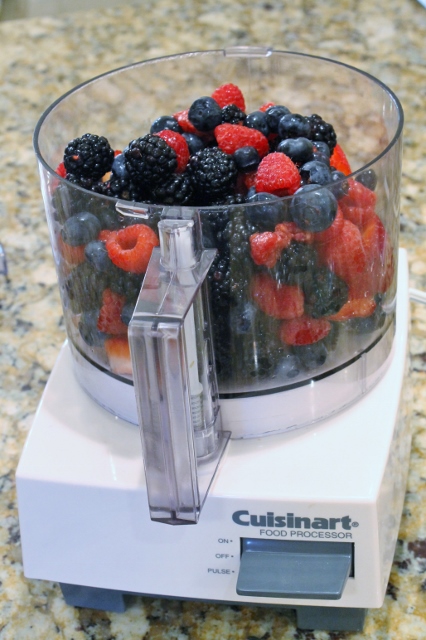 I used my food processor to blend the ingredients but an immersion blender would work too.
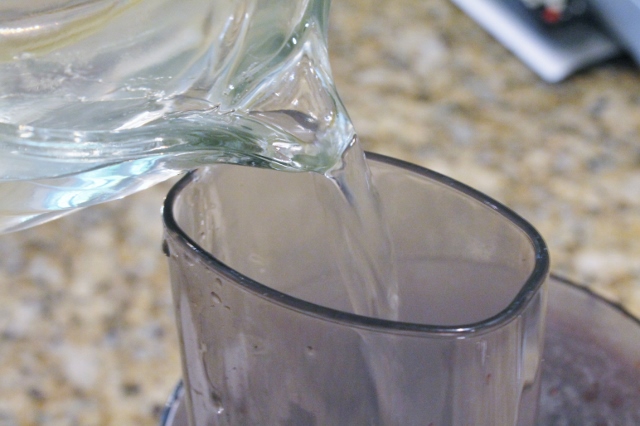 Simple syrup and a pinch of salt were added to the fresh berries as they were pureed in the food processor.
 I like the texture of the whole fruit in this sorbet so once it was blended, I didn't strain the puree. If you prefer a smoother texture you can pour the mixture through a fine mesh strainer after it's blended.
 I covered the mixture and placed it in the refrigerator for about 3 hours.
 While the sorbet was in the refrigerator I made the sugar cookies. I rolled the dough into a log shape so I could slice and bake the cookies instead of rolling and cutting them.
 I sprinkled some colored sugar on the cookies to dress them up.
 Once the puree chilled for a few hours I poured it into my Ice Cream Maker to make the sorbet. If you don't have an ice cream maker you can put the puree in the freezer until it's firm. Either way works fine! Another trick if you like softer sorbet but don't have an ice cream maker is to freeze the puree until it's firm and then put it back in the blender before serving to break it up and make it smooth again.
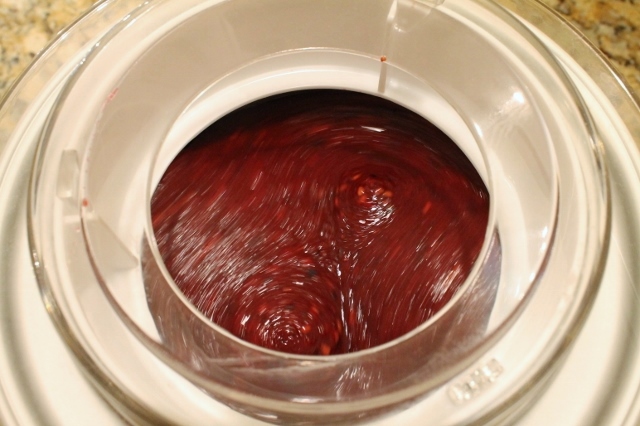 After about 10 minutes in the Ice Cream Maker the mixture started to thicken.
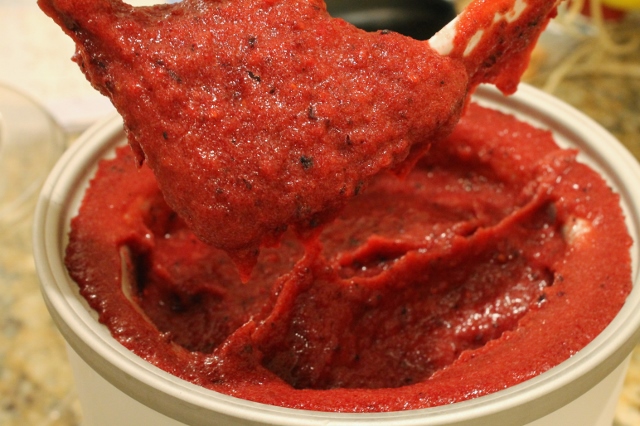 In about 20 - 25 minutes the sorbet was finished. The consistency was soft and creamy but could be eaten right away. If you like a firmer consistency you can freeze your sorbet for a few hours before serving. Serve sorbet with sugar cookies.
- 5 cups of fresh mixed berries (I used strawberries, raspberries & blueberries)
- 2 cups water
- 1 1/2 cups sugar
- pinch of table salt
- Prepare simple syrup by combining water and sugar in a saucepan over low to medium heat. Cook mixture until sugar is completely dissolved.
- Allow simple syrup to cool for a few minutes.
- Place berries, salt and simple syrup in an immersion blender or food processor and blend until mixture is smooth.
- Pour into a bowl, cover and refrigerate 2 to 3 hours or overnight. *pour mixture through a fine mesh strainer first if a seedless sorbet is preferred.
- Pour mixture into ice cream maker and mix until thickened (according to machine instructions) 15-20 minutes. Sorbet will be a soft consistency. Pour sorbet into airtight container and place in freezer for 1 to 2 hours for a firmer consistency. Remove from freezer about 15 minutes before serving.
- 3/4 cup butter
- 1 cup sugar
- 2 eggs
- 1 teaspoon vanilla
- 2 1/2 cups flour
- 1 teaspoon baking powder
- 1 teaspoon salt
- Cream butter and sugar together until smooth.
- Add eggs and vanilla and mix until creamy.
- In a separate bowl combine flour, baking powder and salt.
- Mix dry and wet ingredients together until combined.
- Roll dough into a ball or log for slicing, wrap in wax paper or plastic wrap and refrigerate dough for 1 to 2 hours.
- Preheat oven to 375 degrees. Line baking sheets with parchment paper.
- Roll and cut cookie dough with cookie cutters or slice and place on baking sheets.
- Bake 5-7 minutes.
- Cool and Enjoy
Enjoy and Happy Summer!
Leslie xo
Favorite Things...One Year Later
 One year ago today I entered into the blogging world and published my first post on Leslie Reese. I had been looking for a way to share the things I love to do and blogging seemed like the perfect way to do that. I enlisted the help of a graphic designer and while she was busy designing the layout of my blog, I was figuring out how to work with WordPress, and on May 24th the blog was launched. It has been a journey and the past year has been quite a learning experience. I have really enjoyed taking photos, trying new recipes and visiting fun places. I love blogging and one hundred posts later, I can say it's been an awesome year! Since today is Friday, I thought it would be fun to share my favorite posts from the past year. I've chosen one from each month since the blog was launched. I hope you enjoy looking back with me. Happy Friday!
2012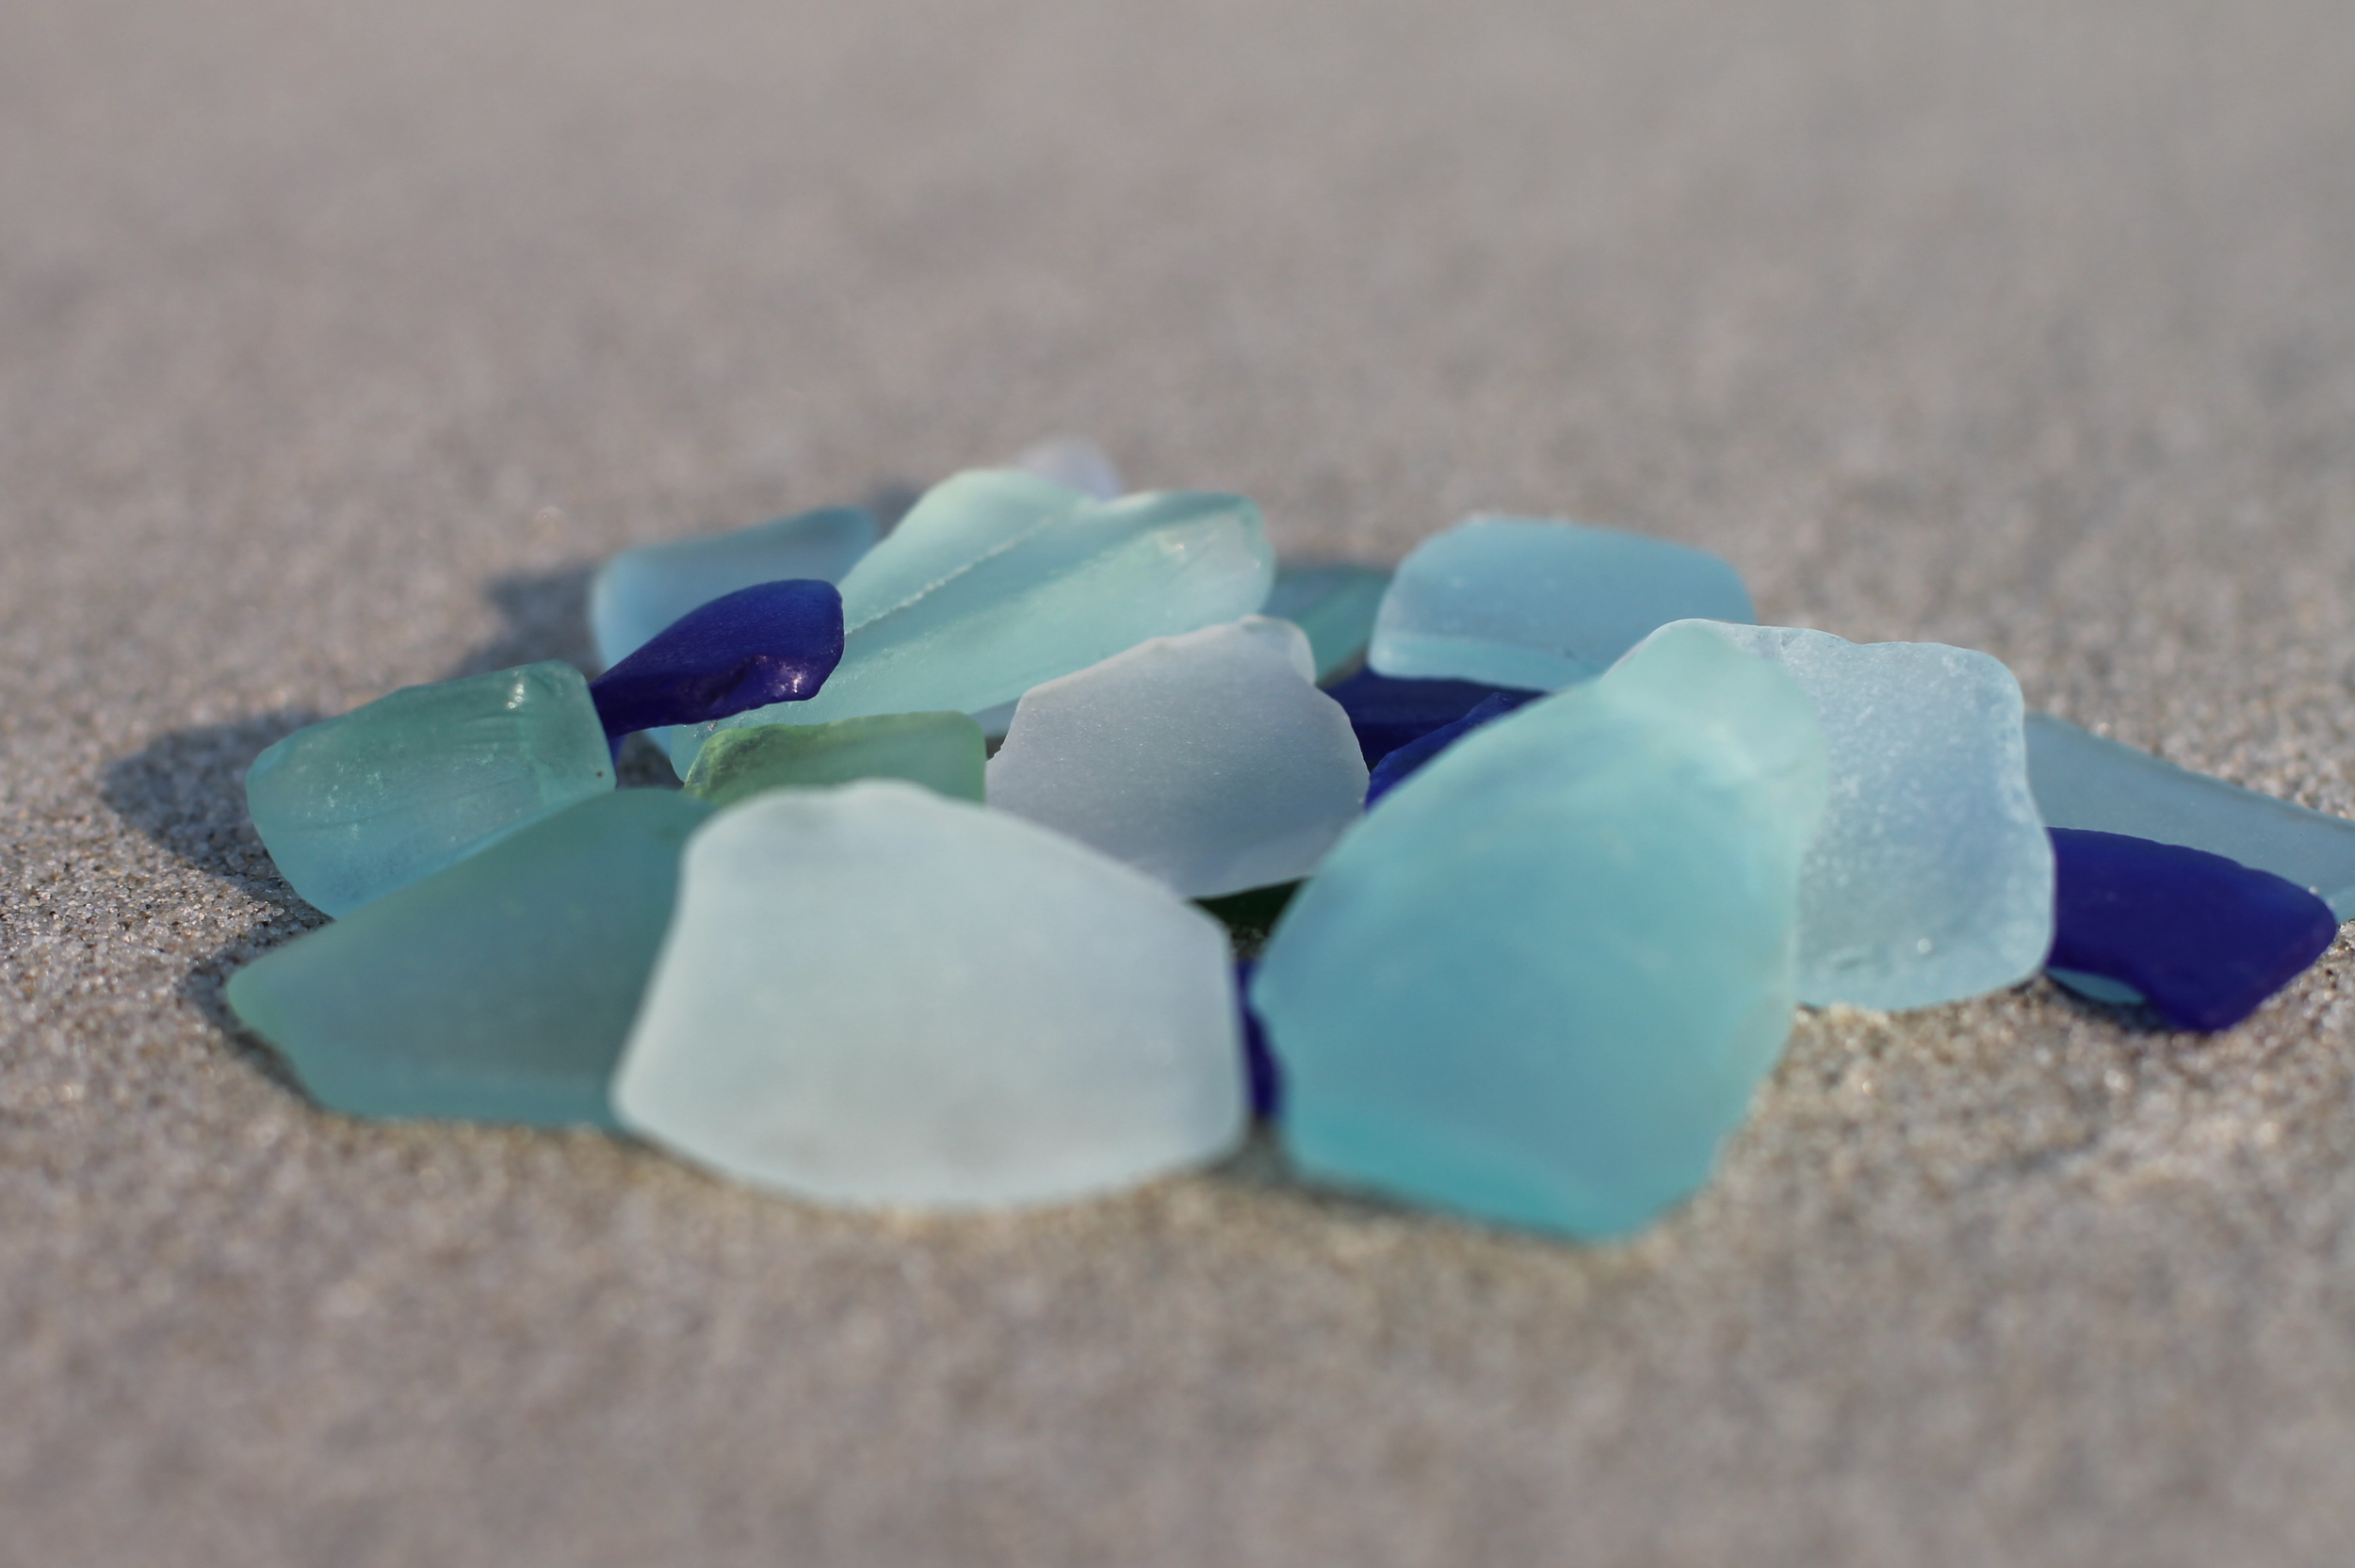 May - Sea Glass
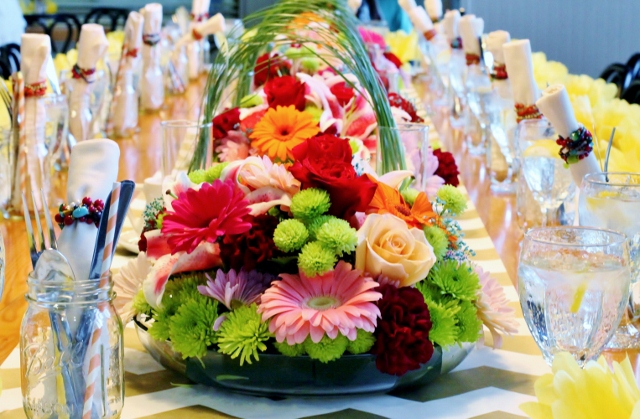
 June - Fresh Cut Flowers
 July - Roasted Rosemary Cashews
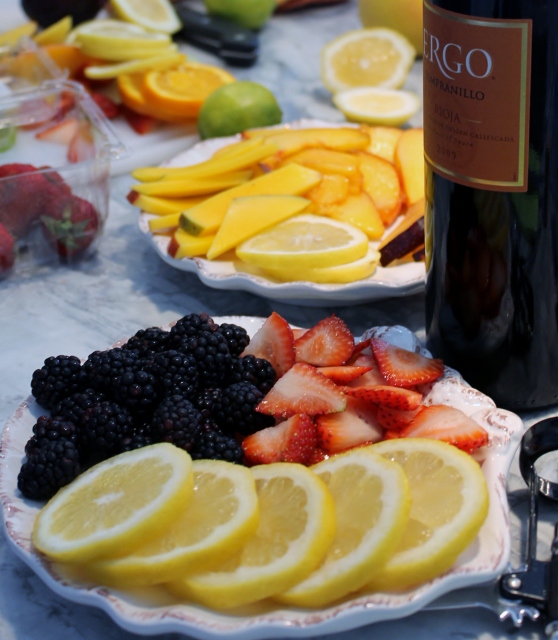 August - Sangria
 September - A Trip to Terrain at Styer's
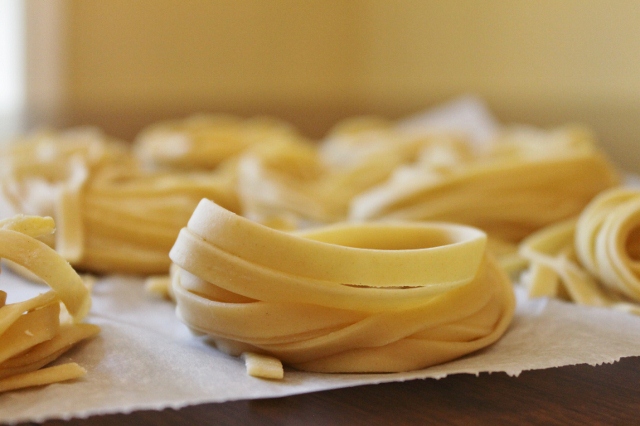 October - Homemade Pasta
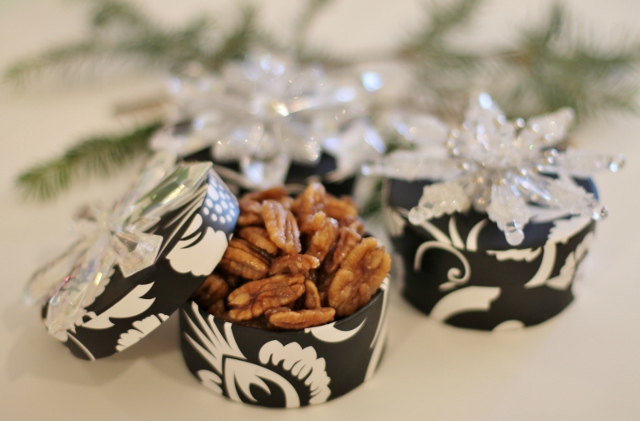 November - Pecans and Pretty Boxes
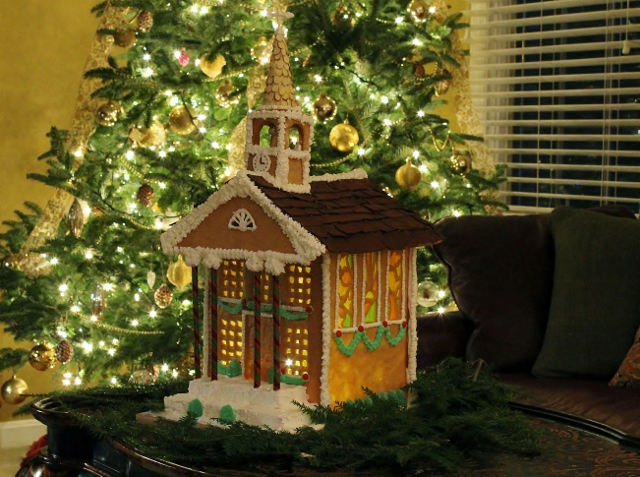 December - Gingerbread Church
2013
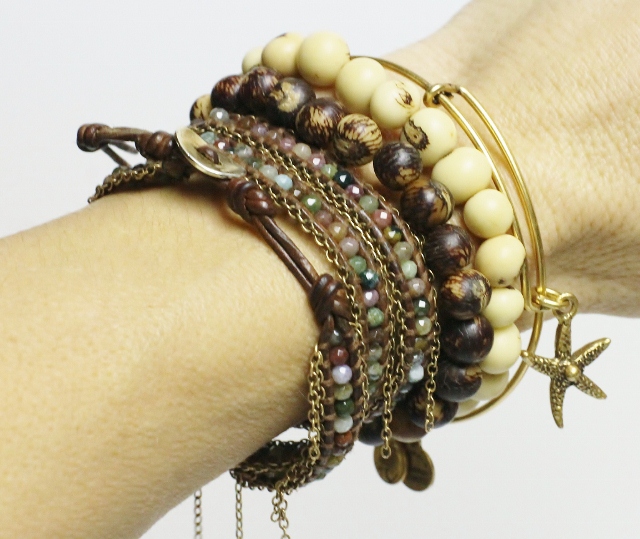 January - Favorite Things ~ Accessories
 February - Bridal Shower Love
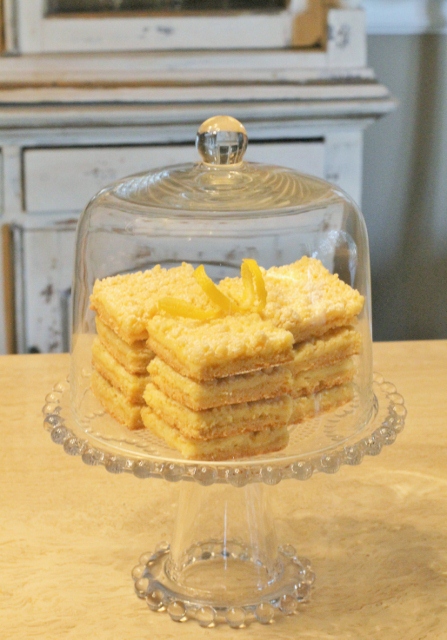 March - Lemon Cheese Bars
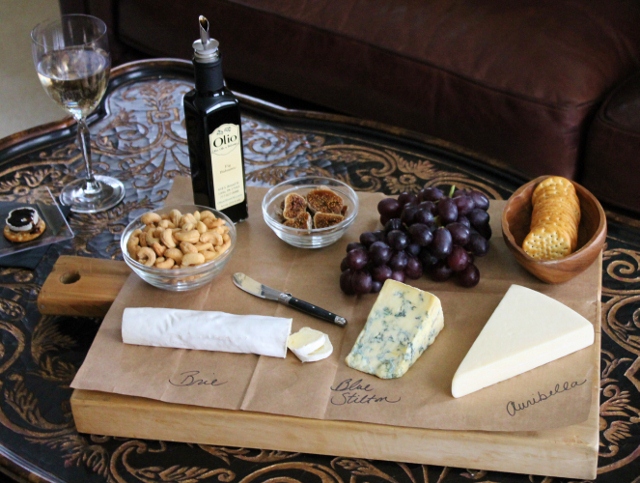 April - Favorite Things ~ Simple Cheese Board
 May - Favorite Things ~ Cocktails and Cake Decorating
I appreciate each one of you for stopping by, following along and giving me your feedback. I have truly enjoyed writing about some of my favorite things and it's been fun sharing those adventures and stories with you. From recipes to baby showers you have joined in the fun and stayed in touch. I am grateful for the support. If there is one thing I hope to do with this blog, it's to inspire you to celebrate the little things in life. So often they are the things that matter most and while so many people are busy worrying about things that won't be important a year from now, those little things you do will be remembered for years to come. So live your life, have fun and find something to celebrate every day! I'll be here doing the same!
Have a wonderful weekend!
Leslie xo
Wine Label Coasters - DIY
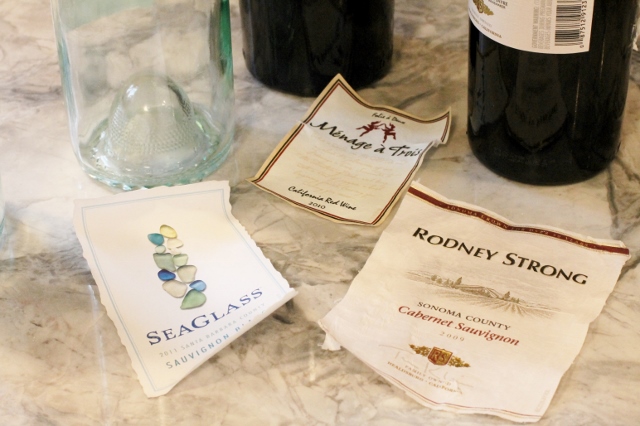
 Today I am sharing a DIY with you that I came up with in the wee hours of the morning while I was lying awake in bed thinking. Don't you love when that happens? I do! I had been planning to make some coasters out of ceramic tiles and pretty paper. I was trying to come up with a unique way to do it and for some reason, I thought it might be fun to use wine bottle labels. Many of us save the corks from our favorite bottles of wine. I love that idea and I do it too, but what about the labels? Would that work on a coaster? It did work and I am going to show you what I did but I am also going to warn you, it wasn't that easy to get some of the labels off of the bottles! What seemed like a perfectly good idea in the middle of the night, turned into a tedious project that I was determined to complete but might not do again anytime soon. I do love how they turned out though so it was worth the effort.
 This is a project that takes some time because you will be removing labels from empty bottles. Some of them will come off easily, others won't. In order to get several usable labels, you might go through twice the amount of bottles. I simply ran this bottle under hot water and the label peeled off without much trouble.
 I soaked this label in hot water and it still wouldn't come off so I wasn't able to use it.
 Eventually I had several labels I was able to use. If they were wet I waited for them to dry completely before I continued.
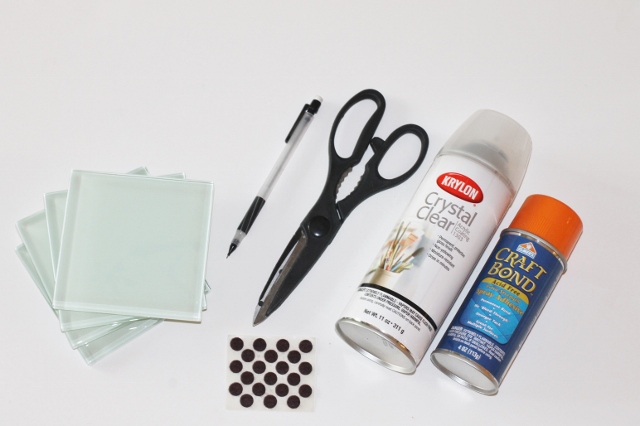 To make the coasters I used 4" X 4" glass ceramic tiles I picked up at Home Depot, Extra-Strength Spray Adhesive to attach the labels to the tiles, Crystal Clear Acrylic Coating to form a water-resistant surface on top of the tile, and felt pads for the bottom of the tiles.
 Some of the labels were bigger than the tiles so I marked them with a pencil once I placed them where I wanted them.
 I cut off the excess label.
 I flipped the label over and carefully sprayed it (in a well ventilated area) with adhesive. There were a few labels that still had adhesive on them after they were peeled from the bottle but I sprayed those too to make sure they didn't lift from the tile.
 Once the label was sprayed with adhesive I immediately placed it on top of the tile moving quickly to put it in place. This is when I realized just how sticky and permanent spray adhesive is! If you do this, be careful. Cover your work area and if you touch the adhesive, like I did, and it gets all over your fingers, you can use baby oil to remove it. I was being a bit of a reckless crafter here! I get a little excited and move too fast at times! Oops...
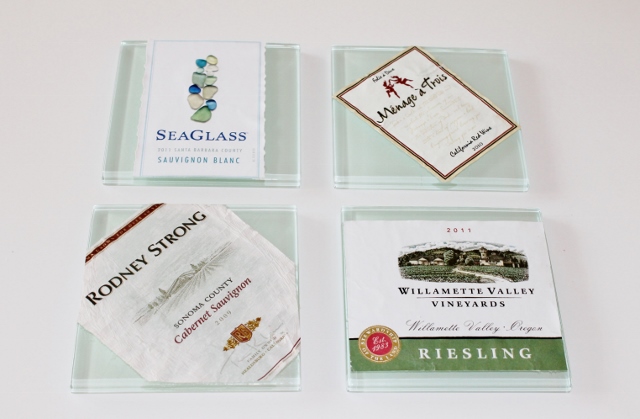 Eventually I had four labels glued onto the tiles. I decided that was enough to make a set of coasters.
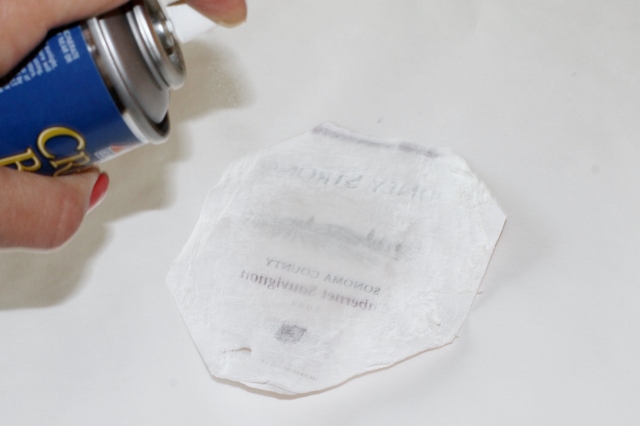
 I sprayed the top of the tiles with Acrylic Coating (again, in a well ventilated area). I waited for it to dry and repeated the process numerous times until the labels were well coated and the tiles had a nice shiny surface.
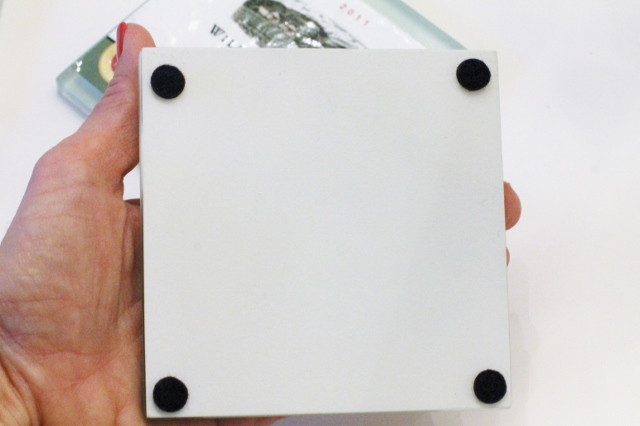 After the tiles were completely (and I mean completely) dry, I flipped them over and attached four felt pads to the bottom of each one.
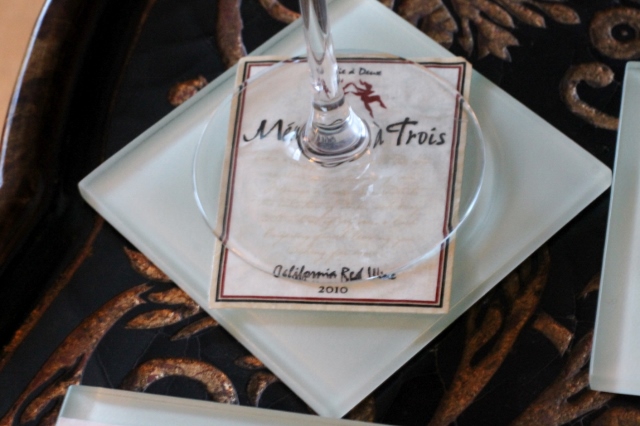 I now have a set of coasters that are not only fun to use but make great conversation pieces. Each one tells a different story or has a special memory and for that reason, I loved creating them.
I did, however, learn a few things in the process that I think are worth sharing...
There are a million ways to remove wine bottle labels on the internet. Everything from soaking to buying special products. If you choose to do this, just Google it to find the best methods.
Spray Adhesive is serious stuff. Period.
Layers of Acrylic Coating need plenty of time to dry (especially if you don't want your wine glass sticking to it). If you think it's dry, it probably isn't.
Patience is a virtue.
It may not seem like it, but I want you to try this project. I just want to be honest about my experience. Basically, I got an idea, tried it, and learned a lot. Bottom line- I LOVE these coasters.
Be brave and try it! And by all means let me know if you do! I can't wait to hear all about it!
Leslie xo
Favorite Things
 A Cup of Tea {in my grandmother's tea cup}
Last September I told you I had become a coffee lover after a recent trip to Italy. I fell in love with Italian espresso and have been drinking it ever since. Before that I was an avid tea drinker and although coffee is now my favorite wake up call, I am still a tea lover at heart. I just drink it later in the day as a way to relax instead of waking up with it. There is something soothing about sitting down to a cup of tea. It can be an afternoon recharge or a quiet way to end the evening. There are so many varieties to choose from and lots of benefits to drinking it. I thought it would be fun to share some of my favorite "tea" things today. Happy Friday!
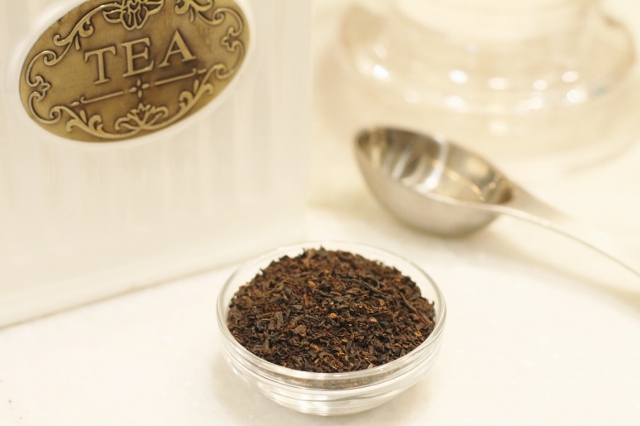 I'm a big fan of loose tea. I like to buy different varieties but Ceylon is my favorite.
 I love this little gadget called the ingenuiTEA. It's the coolest way to brew loose tea.
 Decaffeinated Ceylon Tea from Harney & Sons is my favorite afternoon tea. It has all the flavor of a good black tea without the buzz.
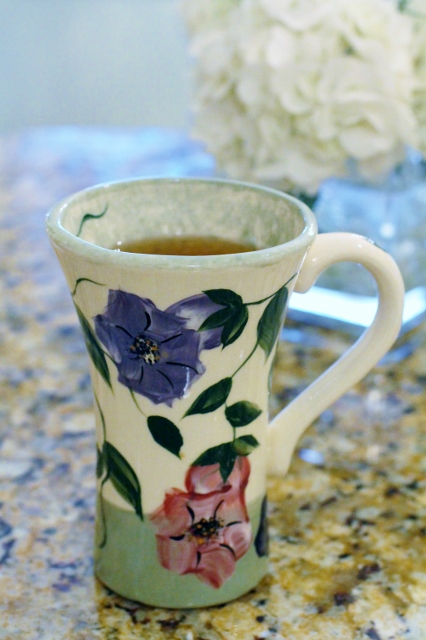 Tea should be poured into something pretty. I bought this hand painted mug on a trip to Alaska. It's one of my favorites.
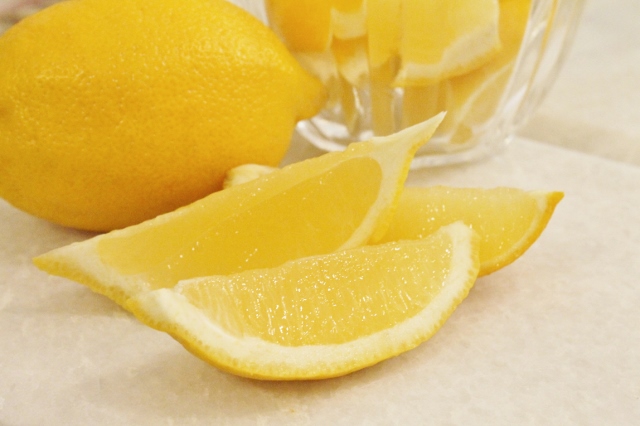 I love the flavor of lemon in tea. And I'm a huge fan of lemon wedges because you can't squeeze skinny slices! Silly but true.
Whether you enjoy tea or coffee, pour a cup, relax and enjoy the moment. Have a wonderful weekend!
Leslie xo
Try this recipe for Pine Nut Orange Biscotti with your tea or coffee!
Healthy Granola Bar Recipe
 As you may know if you follow my blog, I am a big fan of oatmeal and granola. I love the taste and texture of grains and when they are paired with dried fruit and nuts, there is rarely a combination I don't like. It's great for breakfast, lunch and mid-day snacking. The only drawback is that it's difficult to eat granola and oatmeal on the run. We all have busy schedules and so many times, when we are in a hurry, we grab processed bars and call them a meal. Recently I found a recipe for healthy granola bars on Martha Stewart. They seemed simple to make and the bars looked delicious so I tried them. I love how they turned out and will definitely make them again. There are no artificial ingredients in these bars so you can feel good eating them. You can also tailor them to your taste by substituting ingredients. Try using different fruits and nuts or simply omit the flax or oat bran if you are sensitive to it and add more oatmeal. Be creative and make them your own.
 Dried fruit, nuts and grains are the main ingredients in these granola bars. Cinnamon, salt and honey are also added keeping them simple and healthy. I want to point something out here. When you look at the ingredient list on the recipe, you will notice two forms of measurement, cups and weights. I found that very helpful when I was shopping. I bought my ingredients in the bulk food section at Wegman's and purchased the exact weight I needed. It was less expensive than buying a whole bag of each item.
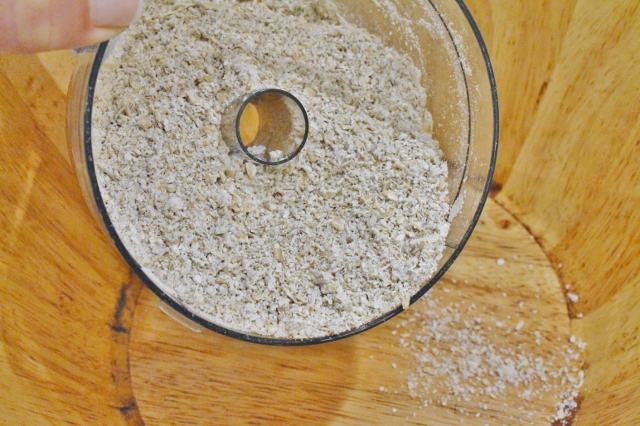 I bought old-fashioned organic oats and ground them at home in my food processor.
 The nuts in this recipe are toasted before chopping which really brings out their flavor.
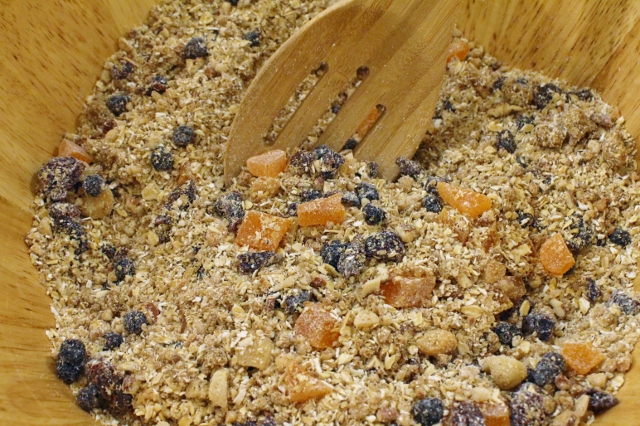 Everything is tossed together in one large bowl. It doesn't get much easier than that.
 Honey and pureed dates hold the dry ingredients together. There are no eggs, butter or oil in this recipe.
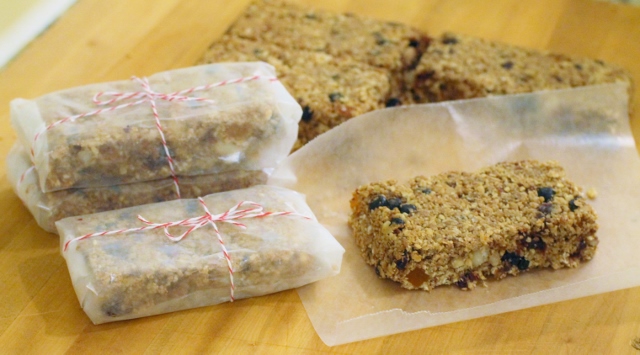
 The mixture is pressed into an 8 X 8 pan to bake and then cut into bars.
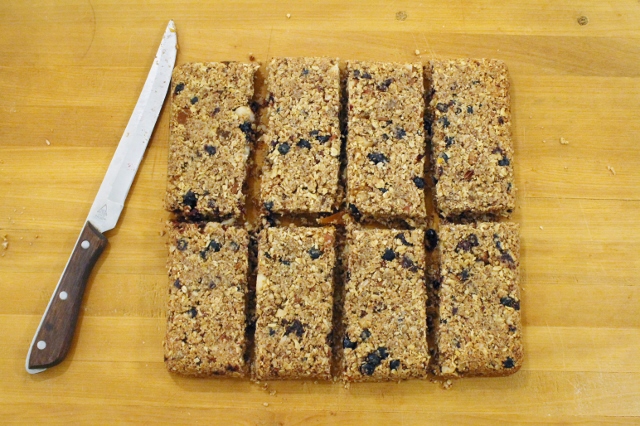 One recipe will give you 8 bars. They are delicious!
- 1 cup (9 ounces) pitted dates
- Vegetable-oil cooking spray
- 1 1/2 cups old-fashioned oats, finely ground, or 1 cup quinoa flakes
- 1 cup (4 1/2 ounces) pecans,toasted, 1/2 finely ground, 1/2 coarsely chopped
- 1/2 cup (2 ounces) unsalted macadamia nuts, toasted, 1/2 finely ground, 1/2 coarsely chopped
- 1/3 cup (2 1/4 ounces) dried papaya, cut into 1/2 inch pieces
- 1/3 cup (1 3/4 ounces) dried cherries, chopped
- 1/3 cup (2 ounces) dried blueberries
- 2 tablespoons oat bran
- 3 tablespoons ground flaxseed
- 2 tablespoons wheat germ
- 1/2 teaspoon coarse salt
- 1/2 teaspoon ground cinnamon
- 3 tablespoons brown-rice syrup or honey
- Preheat oven to 350 degrees
- Place dates in a small saucepan, cover with cold water, and bring to a simmer. Drain. Puree in food processor until smooth.
- Coat an 8-inch square baking pan with cooking spray.
- Mix oats or quinoa, nuts, papaya, cherries, blueberries, bran, flaxseed, wheat germ, salt and cinnamon in a large bowl.
- Mix in date puree and brown-rice syrup or honey.
- Press mixture into pan.
- Bake until center is firm and edges are golden, about 25 minutes.
- Let cool in pan on a wire rack.
- Cut into 8 bars.
Enjoy!
Leslie xo
Favorite Things

 This Sunday is Mother's Day. It's a day to honor not only our mothers but all of the important women in our life. It's a time to say thank you and a time to be grateful. So much of who we are we owe to them. They love, teach and guide us all of our lives. I personally feel I would not be the mother I am today without the love and support of my own mother. The dedication and commitment she has shown her family over the years is truly admirable and I am a better person because of it. Today I thought I would share some favorite photos of the most influential women in my life. They have shared so many wonderful gifts through the generations and although some of them are no longer with us, their gifts will be present forever. Happy Friday!
 This is my maternal grandmother. She was an amazing woman. She loved unconditionally, had tremendous faith and a compassionate heart. She touched everyone's life in a positive way and treated every person she met with love and respect. She was full of wisdom and an absolute joy to be around. She was an amazing role model.
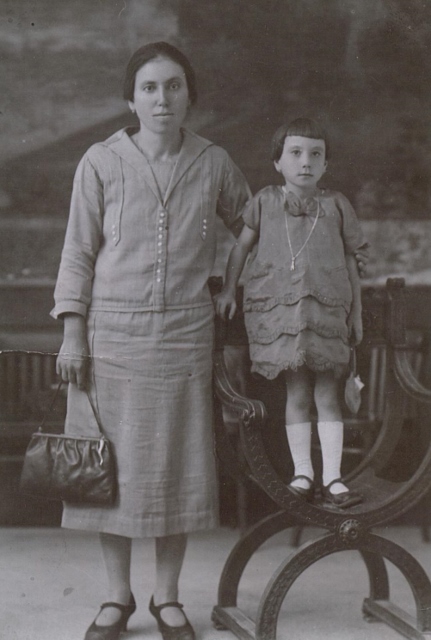 This is my paternal grandmother. As an Italian immigrant, she worked hard to create a better life for her family. Hearing the stories of her voyage to the United States and all that she had to go through as a young mother traveling alone, makes her a hero in my eyes. Having a conversation with her was a history lesson that I only learned to appreciate once I grew up. Her cooking skills were something not many of us have mastered but what we did learn made us better in the kitchen. She was a wonderful woman.
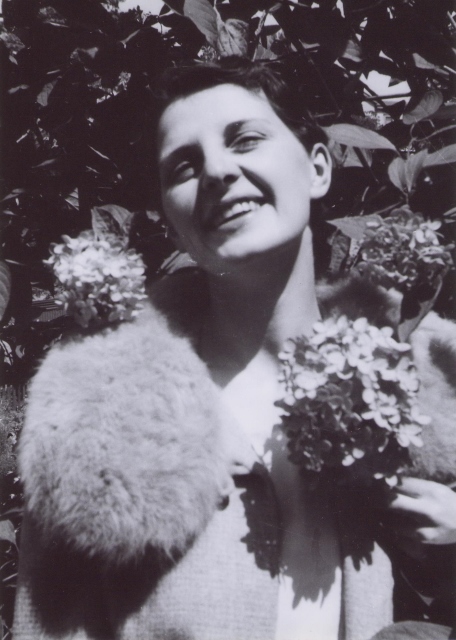
 This is my own mother. I could write a book about her. She has shared so many gifts I will forever be grateful for. My creativity, love of tradition and dedication to my family are some of the things I have learned from her. She always celebrated the little things in life and still does. She knows how to find the joy in anything and would rather take a last minute trip to the zoo with her great grandchild than cross something off of her to-do list. She is a wonderful mother, grandmother and now a friend. I feel blessed that I live close to her and have the opportunity to spend so much time with her. She is amazing.
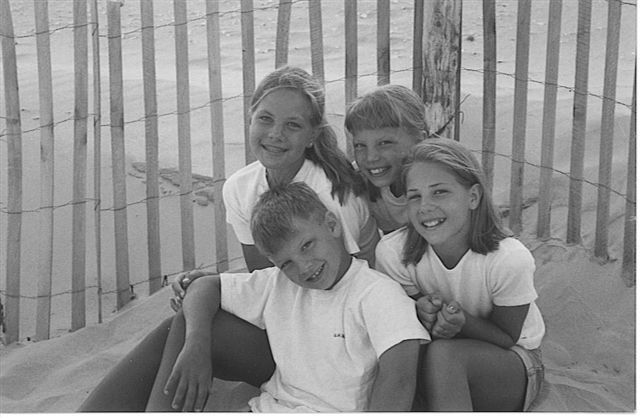 This is one of my favorite pictures of my four children. It was taken 15 years ago in one of our favorite places, Stone Harbor, NJ. When I look at this picture, I see four beautiful people who have made my life complete. From the time they were little we have been making wonderful memories. We played in the sand, danced in the rain, ate ice cream late at night in pajamas and sprayed silly string all over the yard, just because. It has been a privilege to be the mother of these great kids and I have loved every minute of it. To me, this weekend is about them.
 This is my daughter Lauren with her son Braden. I will never forget the day he was born. It was one of the happiest days of my life. You can't imagine a joy greater than your own child until you have a grandchild. The past two years have been some of the best in my life.
I hope you all have a wonderful weekend! Take time to be grateful for the people in your life. Thank them and show them you care and remember you just might be a bright spot in their life too!
Happy Mother's Day!
Leslie xo
Photo of Lauren and Braden by Mariclare Lavelle
Mother's Day Brunch Recipe Ideas
 Fresh Berries in Orange Juice
I recently published a post about a Baby "Sprinkle" I hosted for my daughter, Lauren. It was a recap of the wonderful little brunch we put together to celebrate my newest grandchild, who will be arriving this month. Oh just typing that makes me giddy! Anyway, since it was a Favorite Things post, there were no recipes included with the photos. I have been receiving requests for some of those recipes ever since. I thought it would be fun to share them today since we will be celebrating Mother's Day this weekend. We served French Toast Souffle and Sun-dried Tomato and Asparagus Frittata at the Sprinkle. I added the Fresh Berries in Orange Juice recipe because it goes well with the other two. Together they are all you need for a perfect Sunday brunch!
This Fresh Berries in Orange Juice recipe is a fun way to serve a fruit salad. Fresh squeezed orange juice and a sprinkle of confectioner's sugar adds a little extra flavor and sweetness while still keeping it healthy. And it looks pretty too!
- one cup fresh sliced strawberries
- one cup fresh blueberries
- one cup fresh red raspberries
- one cup fresh blackberries
- 3/4 cup fresh squeezed orange juice
- 1 tablespoon confectioner's sugar plus extra for sprinkling
- Place berries in a large bowl, set aside.
- Add confectioner's sugar to orange juice and mix until combined.
- Pour orange juice mixture over berries and toss lightly.
- Sprinkle confectioner's sugar over berries before serving.
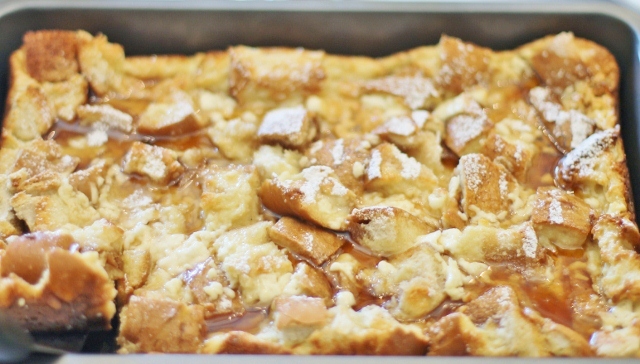 French Toast Souffle
This recipe for French Toast Souffle is amazing! My sister Lori served it at a brunch she had a few years ago and it was a hit. I made sure I had the recipe before I left. It is now one of our favorites. You prepare it a day ahead so it's ready to go when you are.
- 10 cups sturdy white bread cut into 1" cubes (about 16 slices)
- 8 ounces cream cheese, softened
- 8 large eggs
- 1 1/2 cups milk
- 2/3 cup half-and-half
- 1 1/4 cups maple syrup divided into 1/2 and 3/4 cups
- 1/2 teaspoon vanilla
- 2 tablespoons confectioner's sugar
- Place bread cubes in a 13 X 9" pan that has been sprayed with cooking spray.
- Beat cream cheese until smooth.
- Add eggs, one at a time, mixing well after each addition.
- Add milk, half-and-half, 1/2 cup of maple syrup and vanilla. Mix until smooth.
- Pour cream cheese mixture over top of bread.
- Cover and refrigerate overnight.
- Preheat oven to 375 degrees.
- Remove bread from refrigerator; let stand on counter for 30 minutes.
- Bake for 50 minutes or until set.
- Sprinkle souffle with confectioner's sugar and serve with maple syrup.
 Sun-dried Tomato and Asparagus Frittata
A Frittata is a nice way to serve eggs at a brunch. It's easier than making individual omelettes and less work than quiche. You can add anything you want to it so use this as a base recipe and customize it to your own taste.
- 1 dozen large eggs
- 1/2 cup sun dried tomatoes
- 1/2 lb asparagus, cleaned and cut into 1" pieces
- olive oil
- your favorite grated cheese for sprinkling
- Beat eggs until fluffy.
- Drizzle 2-3 tablespoons of olive oil in the bottom of a large non-stick skillet over medium heat.
- Add asparagus and sun-dried tomatoes and saute until heated through and asparagus is cooked.
- Add eggs and lightly swirl pan to distribute asparagus and tomatoes.
- Gently run a rubber spatula around the inside edge of the pan as the eggs begin to cook to help eggs spread out. Cook on medium to low heat until the eggs begin to set on the bottom of the pan.
- Once the eggs are starting to set on the bottom but still wet on top, place entire pan under broiler (on low) until eggs are cooked through and no longer wet.* If you are using a skillet with plastic handles, cover them with foil before placing pan under the broiler.
- Turn off broiler and sprinkle cheese over top of Frittata.
- Transfer Frittata to a large cutting board or leave in pan and cut into pie shaped slices to serve.
Favorite Things
 Cocktails and Cake Decorating
Last night I hosted a Cocktails and Cake Decorating Class at The Baker's Table in Lancaster, PA. This hip new bakery was the perfect place for a Girl's Night Out. I remember the first time I stopped in. I took one look at the large communal table and collection of antique baking tools that decorate the room and I knew this was a place I would visit often. The casual but creatively arranged space makes a great backdrop for so many events. I held my daughter's bridal shower at The Baker's Table in February and once that was over, I suddenly felt the urge to throw another party (this happens often) so I decided a cake decorating class would be next on the list. It was a fantastic night full of great food, lots of laughs and a whole lot of buttercream! It was so much fun, I thought I would share some of it with you! Happy Friday!
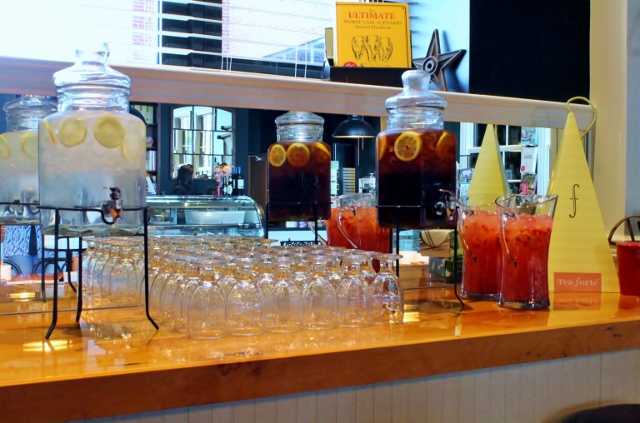 Attention to detail is so important and The Baker's Table excels at it. Everything from drinks to food was beautifully arranged. It's one of the things I love about this place!
 A wonderful selection of hors d'oeuvres including Grilled Chicken Caesar Salad and Foccacia Pizza were on the menu.
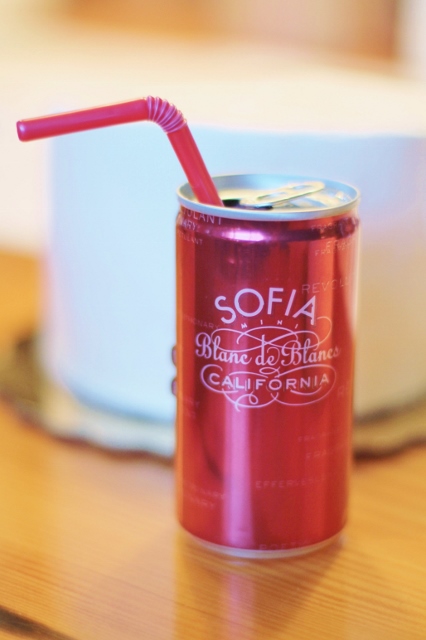 Sparkling wine in a can? This Sofia Blanc de Blanc Mini is the cutest thing I've ever seen on a cocktail menu!
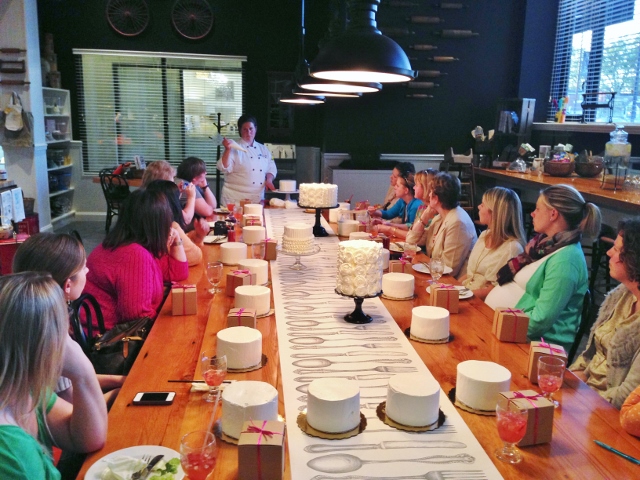 Executive Chef Tammy Hurley led the decorating class and taught us how to frost and decorate a cake with basic buttercream. I am blown away by her talent!
 She makes it look so easy!
 Tammy also shared her secrets on decorating with melted chocolate.
 Each guest had the chance to test their skills on their own cake.
 Bags filled with frosting and decorating tips were available to try the different designs on our cakes.
 Beautifully decorated cakes were placed on the table to guide and inspire us.
 After my first swirl, I thought this was going to be easy.
 After a few more swirls, I realized it was not easy and I gained even more respect for Tammy!
 Getting together with good friends was so much fun. There were lots of laughs as we frosted our way through this class.
 Having my mother and two of my daughters at the event was really special. I love making memories with them.
These are a few of the finished cakes. I'd say there are some talented cake decorators out there!

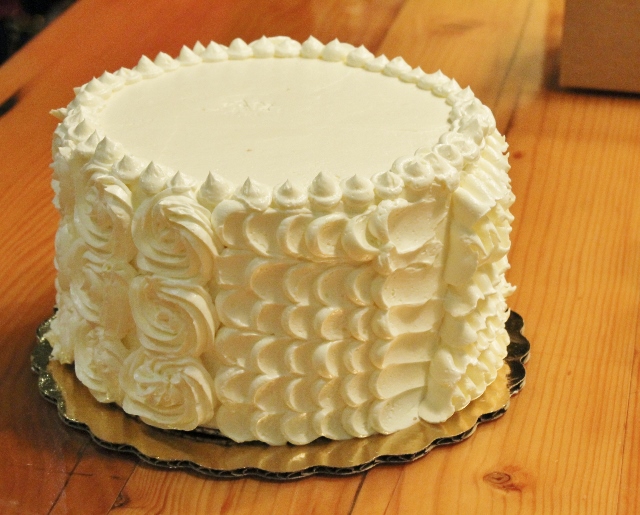
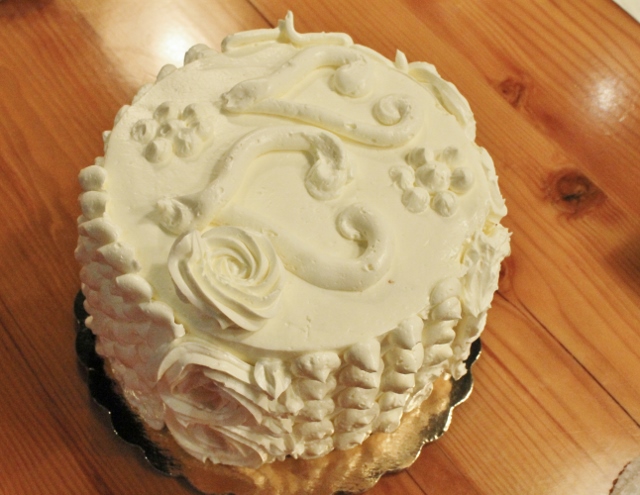 The Cocktails and Cake Decorating Class was a blast and I can't wait to do it again! Whenever you bring great people, cool places and fun ideas together, it's bound to be a wonderful event! Maybe we'll see you at the next one! Have a wonderful weekend!
Leslie xo
Easy Black Bean Salsa Recipe
 It's hard to believe today is the last day of April. Spring is moving along and the months are flying by. How can it be May already? What's fun about the time flying is with each new month comes some new reason to celebrate and for me, an excuse to throw a party! This weekend, on May 5th, people everywhere will be celebrating Cinco de Mayo. To get into the spirit of this Mexican holiday, I thought I would share one of my family's favorite recipes for Black Bean Salsa. My daughter Lynsie started making this salsa when she was in college. It was a great tailgate food then and makes a great party food now. The recipe yields a huge bowl of salsa so it's perfect for a crowd. It's simple to make and great to have on hand when you have a houseful of people or feel a happy hour brewing!
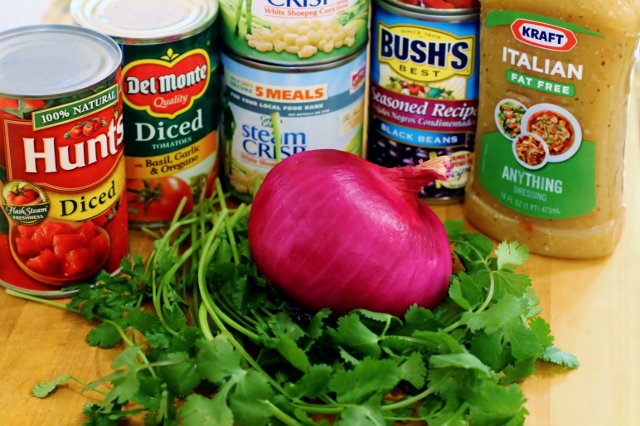 This recipe is so simple because almost every ingredient comes from a can or bottle.
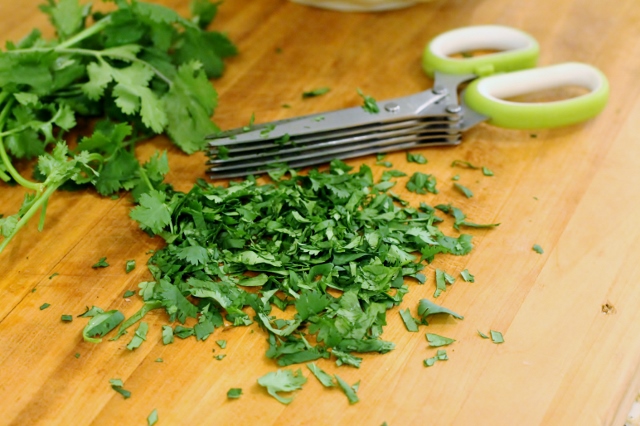 Fresh chopped Cilantro makes the flavor come alive in this salsa recipe. You can use as much or as little as you like.
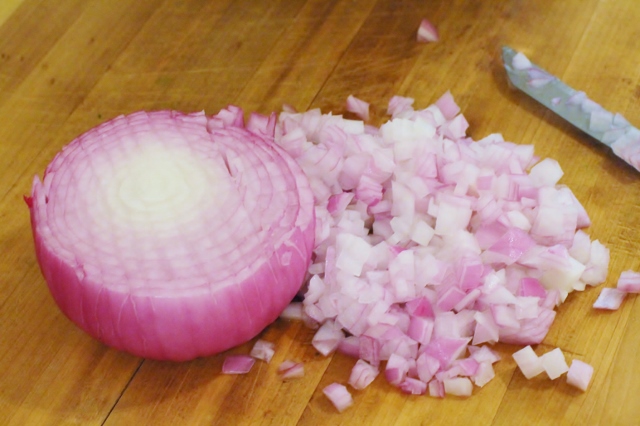 Chopped red onion is the only other ingredient that you need to prepare.
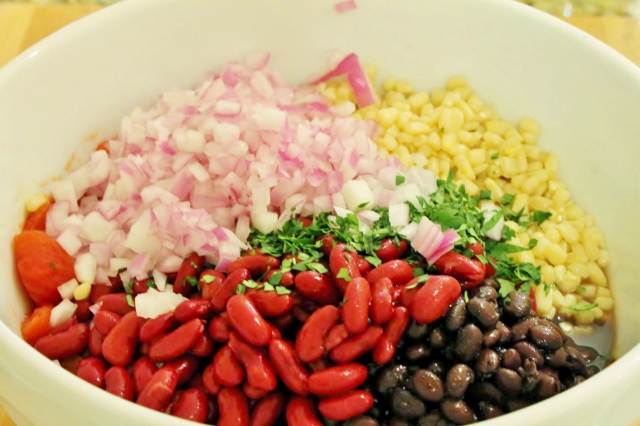 Everything gets tossed into a bowl and refrigerated.
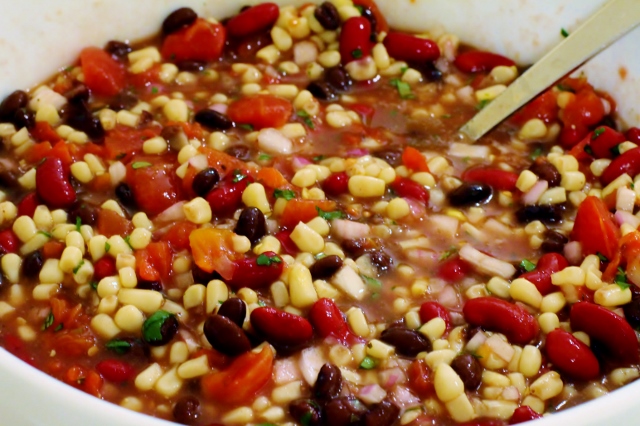 It's the perfect quick recipe for picnics, happy hours or parties. Just add chips and you are good to go!
- 1 can diced tomatoes (basil, oregano & garlic flavored)
- 1 can regular diced tomatoes
- 1 can Seasoned Recipe black beans (Bush's)
- 1 can Seasoned Recipe kidney beans (Bush's)
- 2 cans white shoepeg corn
- 8 ounces fat free Italian dressing
- chopped cilantro
- chopped red onion
- Drain liquid from kidney beans and black beans but do not rinse. Drain corn.
- Add all canned ingredients to a large bowl.
- Chop onion (to taste) and add to bowl. Use as much as you like. I used about 2/3 of a large onion.
- Chop cilantro (to taste) and add to other ingredients. I used about 1/4 cup of chopped cilantro.
- Stir ingredients together and refrigerate.
- Best served cold. Make a day ahead if possible so flavors have a chance to blend.
- Add chips and serve!
Enjoy!
Leslie xo
Here's what's coming up...
You can put any content in here.