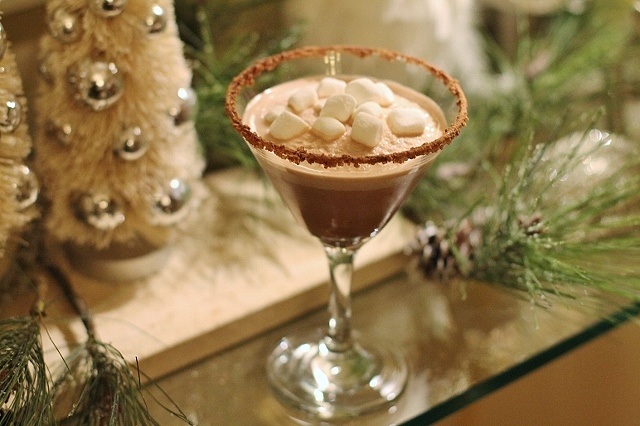
We made it! Today is the 12th day of Chocolate Covered Christmas and we're going to go out with a bang and stir up some holiday cheer with a Frozen Hot Chocolate Martini! Why not? The shopping and baking should be coming to an end so it's time to relax and have some fun. Whether you have wrapping to do or a party to host, this fun, frozen concoction will have you singing Jingle Bells in no time. It's made with hot chocolate mix and vodka and it's a fun way to indulge in something sweet this time of year. So put on the Christmas music and find your holiday cheer because it's time to raise our glasses to a wonderful Christmas and a fantastic year!
Frozen Hot Chocolate Martini
Author: Leslie Reese
Serves: one serving
Ingredients
1 1/2 cups ice
1 packet or serving of good quality hot chocolate mix
3/4 cup milk
1 shot vanilla vodka
mini marshmallows
Instructions
Sprinkle some of the hot chocolate mix onto a small plate. Wet the rim of a martini glass and dip it into the hot chocolate mix.
Combine ice, remaining hot chocolate mix, vodka and milk in blender and blend until smooth.
Pour into martini glass and garnish with mini marshmallows.
Notes
This recipe is written for a single serving. Multiply amounts for additional servings.
3.1.09
It has been so much fun sharing my chocolate recipes with you. I hope you found something you like and I hope you enjoyed your visit while you were here. Enjoy each of the last few moments that are leading up to Christmas. It's those little things that make the best memories.
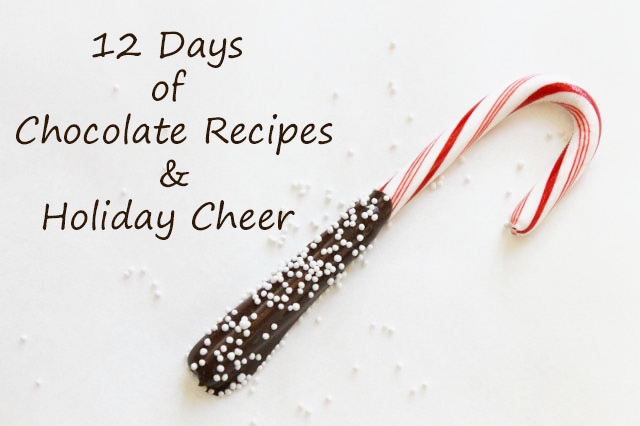
Whoopie Pies have been around for a long time. I am from Pennsylvania and there is a huge debate about whether they originated here in the Amish Country or in New England. It all depends on who you talk to, or where you look it up for that matter. All I know is whoopie pies are a fun and delicious thing to make and eat so I personally don't care who came up with the idea, I'm just glad they did. When I was a kid, my mom made really good whoopie pies. They were a hot bake sale item so when she was making them for an event, we got to eat a few. Back then, it was just a basic chocolate cookie with vanilla icing inside. Now there are Whoopie Pie books with all sorts of recipes for fun and interesting flavor combinations. I stuck with the basics here. Why mess with a good thing? I just jazzed up the edges with broken candy canes for the holidays. Simple but pretty.
*Note ~ The icing recipe that I use has egg whites in it. It's an old recipe and it's really good so I like to use it but if you prefer not to use egg whites I am including a separate icing recipe that comes from the Whoopie Pies book. It uses marshmallow cream instead.
Chocolate Whoopie Pies
Author: Leslie Reese
Serves: makes about 30 whoopie pies
Ingredients
cookies
2 cups sugar
1 cup butter or margarine
2 eggs
4 cups flour
1 cup cocoa
2 teaspoons salt
1 cup buttermilk
2 teaspoons vanilla
2 teaspoons baking soda
1 cup hot water
icing
2 egg whites
2 teaspoons vanilla
4 tablespoons milk
4 cups confectioner's sugar
1 cup vegetable shortening (Crisco)
Instructions
For cookies
Preheat oven to 400 degrees. Line baking sheets with parchment paper.
In a large bowl, cream together sugar, shortening and eggs. Beat until fluffy.
Sift together flour, cocoa and salt. Add to creamed mixture alternately with buttermilk. Add vanilla. Beat until smooth.
Dissolve baking soda in hot water and add to mixture. Beat until smooth.
Drop by teaspoons onto baking sheet (I use a small cookie scoop so my cookies are all the same size).
Bake for 8 minutes or until cookie bounces back when touched.
Cool. Sandwich cookies together with generous amount of icing.
For icing
Combine egg whites, vanilla, milk and 2 cups of confectioner's sugar. Beat until well combined. Add 2 more cups confectioner's sugar and shortening. Beat until fluffy.
3.1.09
Classic Marshmallow Filling
Author: Adapted from the Whoopie Pies book
Ingredients
1 1/2 cups Marshmallow Fluff (or other prepared marshmallow cream, which will do in a pinch)
1 1/4 cups vegetable shortening
1 cup confectioner's sugar
1 tablespoon vanilla extract
Instructions
In the work bowl of a stand mixer fitted with the paddle attachment, beat Marshmallow Fluff and the vegetable shortening, starting on low and increasing to medium speed until the mixture is smooth and fluffy, about 3 minutes. Reduce mixer speed to low, add the confectioner's sugar and the vanilla, and beat until incorporated. Increase mixer speed to medium and beat until fluffy, about 3 minutes more.
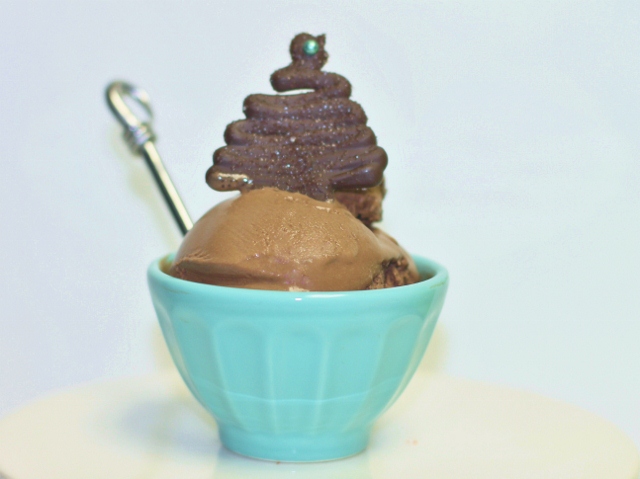
It's the middle of December, it's cold outside and there's a fire in my fireplace. So, why am I posting a gelato recipe? Because, it's a great dessert and it's something we don't usually think to serve in the winter time. I like things that are different and homemade gelato doesn't have to be a summer-only dessert. I was in the mood to try something new so I got out my ice cream machine and recipe book, The Ciao Bella Book Of Gelato & Sorbetto, and whipped up a batch of chocolate gelato. The process is a little more involved than making ice cream but the taste and texture is well worth the extra effort. A little will go a long way because gelato is rich, so you won't need to make a lot. I dressed up each bowl with a sugar dusted chocolate tree to give it a holiday feel. If you like the idea but just can't imagine getting out your ice cream machine, or you don't have one, you can buy ice cream or gelato and serve it with a chocolate tree on top. That's close enough and just as festive!
In a heavy bottom saucepan, combine milk and cream. Place over medium-low heat and cook, stirring occasionally, until mixture reaches a temperature of 170 degrees F. Turn off heat and whisk in cocoa powder. Add chopped chocolate, and stir or whisk until chocolate is completely melted and mixture is smooth.
Meanwhile, in a heatproof bowl, whisk egg yolks until smooth. Gradually whisk in the sugar until it is well incorporated and mixture is pale yellow. Temper the egg yolks by very slowly pouring in the hot milk mixture, mixing continuously. Return the custard to the saucepan and place over low heat. Cook, stirring frequently with a wooden spoon, until the custard is thick enough to cover the back of the spoon and it reaches a temperature of 185 degrees F. Do not bring to boil.
Pour mixture into a bowl and cool to room temperature, stirring every 5 minutes or so. Cover and refrigerate until very cold, 4 hours or overnight.
Place custard into the container of an ice cream machine and churn according to manufacturer's instructions. Transfer to an airtight container and freeze for at least 2 hours before serving.
Notes
To make chocolate trees: pipe melted chocolate onto wax or parchment paper into desired shape. Sprinkle with sugar and freeze for 10-15 minutes or until ready to serve. Gently peel paper away from chocolate when ready to serve and place on top of ice cream.
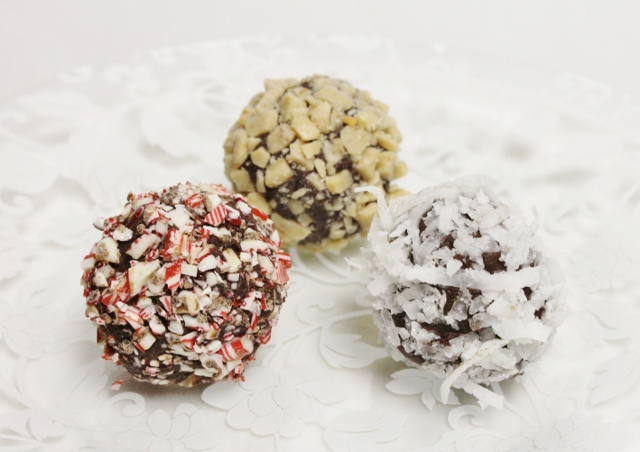
When I was flipping through my Food Network Magazine recently, I found something that I couldn't wait to try. A customizable recipe for Mix & Match Truffles. What a fun idea! I had to add it to the Chocolate Covered Christmas list! The concept is simple. Start with ganache (which sounds difficult and fancy, but is really very easy), then mix and match different flavors, mix-ins and coatings. The possibilities are endless and the end result is a beautiful and delicious little truffle that is custom made and fun to give. I decided to make Espresso Chocolate Truffles with Toffee so I included that recipe here. I played around with some different coatings to get different flavors and colors. If you want the complete 5 step customizable recipe, check out the December issue of Food Network Magazine or go to Food Network online.
Chocolate Espresso Truffles with Toffee
Author: Adapted from Food Network Magazine
Ingredients
12 ounces of bittersweet or semisweet chocolate
1 cup heavy cream
1 tablespoon unsalted butter
pinch of salt
1 teaspoon vanilla
1/4 cup brewed espresso
crushed toffee bars, for coating
Instructions
Chop chocolate (if not using chips) and place in a heatproof bowl.
Bring cream, butter and salt to a simmer in a saucepan over medium heat; pour over the chocolate and let sit until completely melted, about 10 minutes. Stir with rubber spatula or whisk until smooth. (If necessary, microwave in 20-second intervals until the chocolate melts.)
Whisk in the vanilla and then stir in the espresso. Stir until the ganache is smooth and shiny. Pour into a shallow baking dish and refrigerate until firm, at least 3 hours or overnight.
Roll tablespoons of ganache into 18-24 balls, then roll in crushed toffee. Transfer to parchment-lined baking sheet, cover with plastic wrap and refrigerate until firm, at least 1 hour or overnight. (to make in advance, roll into balls but do not coat. Cover and freeze up to 2 weeks.Let sit at room temperature for 20 minutes before uncovering, then roll in coating.)
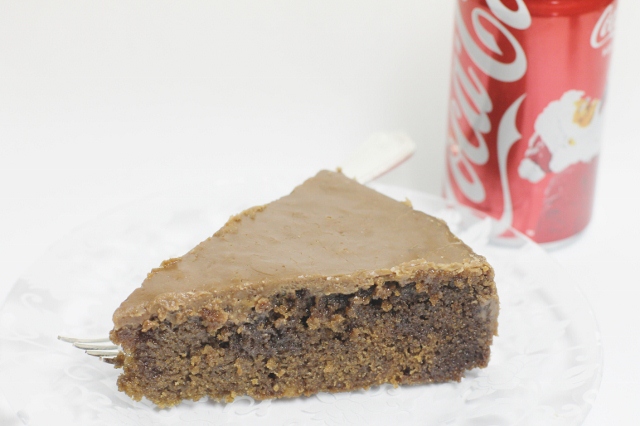
Chocolate Covered Christmas ~ Day 8Today I am sharing a recipe for a chocolate cake with a twist. It's made with cocoa powder and Coca Cola. It's a moist chocolate cake that has a sweet cooked icing poured over the top. This cake takes me way back to when I was a kid. The recipe was given to my mom by one of the moms from our swim team. It brings back memories of swim meets and bake sales. Yes, I am nostalgic. I love recipes that have something attached to them. They are fun to share. This cake works well in a 13 x 9 pan. You can easily cut it into squares that way. I used one large round pan for this post.
Cocoa Cola Cake
Author: Leslie Reese
Ingredients
Cake
2 cups sugar
2 cups flour
1/2 cup butter
1/2 canola oil
3 tablespoons Hershey's Cocoa
1 cup Coke ( I have used Root Beer before and it's just as good)
1/2 cup buttermilk w/ 1 tsp baking soda added
2 eggs
1 teaspoon vanilla
1 1/2 cup mini marshmallows
Icing
1/2 cup butter
3 tablespoons cocoa
6 tablespoons Coke
1 box confectioners sugar
1 teaspoon vanilla
1/2 cup walnuts (optional)
Instructions
For Cake
Preheat oven to 350 degrees.
In large bowl mix sugar and flour. Set aside.
Mix butter, oil, cocoa and Coke in a saucepan and bring to a boil. Pour over dry ingredients.
Stir baking soda into buttermilk and add to mixture. Stir together.
Add eggs and vanilla. Stir until combined.
Add mini marshmallows.
Pour batter into a well greased pan. Bake 30 to 40 minutes or until cake tester comes out clean.
For Icing
Mix butter, cocoa and Coke in a saucepan and bring to a boil.
Add confectioner's sugar, vanilla and walnuts (optional). Mix well and spread over hot cake.
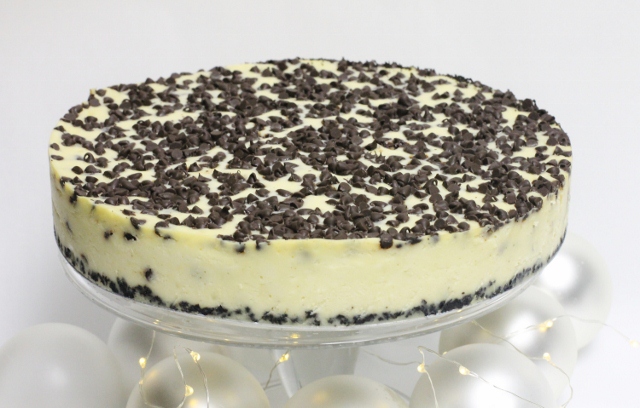
Today I am giving you a recipe that is not as "chocolate" as the ones I have posted so far, but every bit as delicious. This Chocolate Chip Cheesecake recipe is another family favorite and has been around a long time. The Oreo cookie crust is topped with a layer of cheesecake and sprinkled with mini chocolate chips, giving it just a touch of chocolate flavor. It's simple to make which is a plus this time of year! It will slice easier and taste better once it sits in the fridge for a little while so make it ahead of time if you can. Four to six hours is great but a day ahead is even better.
Chocolate Chip Cheesecake
Author: Leslie Reese
Ingredients
Crust
1 1/2 cups Oreo cookies crushed ( about 20 )
1/4 cup melted butter
Cheesecake
3-8 oz packages of cream cheese, softened
1- 14 oz can sweetened condensed milk
3 eggs
2 teaspoons vanilla
1 cup mini chocolate chips, divided
1 teaspoon flour
Instructions
Crust
Mix crushed cookies with melted butter. Press into a spring form pan and set aside.
Preheat oven to 300 degrees.
Cheesecake
Mix cream cheese, milk, eggs and vanilla until well blended.
In a separate bowl, toss 1/2 cup chocolate chips in 1 teaspoon of flour, Add to cream cheese mixture.
Pour mixture into pan.
Sprinkle remaining chocolate chips on top of cheesecake. Do not mix in.
Bake for 1 hour.
Once cheesecake is cool, place in refrigerator with pan until ready to serve. Remove outside of spring form pan before cutting.
When I discovered this recipe for chocolate sugar cookies on Sweetapolita, I knew I had to try it. I make sugar cookies all of the time but I had never made chocolate sugar cookies. Once I tried them, I couldn't wait to include them in Chocolate Covered Christmas. They are delicious and so unique. I dressed them up for the holidays but you can make them any time of the year in any shape!
Happy Baking!
Leslie xo
Dark Chocolate Sugar Cookies
Author: Adapted from the recipe from Sweetapolita
Ingredients
6 cups all-purpose flour, sifted
1 1/4 cups dark cocoa powder
1 teaspoon salt
2 cups unsalted butter, softened
2 cups granulated sugar
1 cup light brown sugar
3 eggs, cold
2 teaspoons vanilla extract
Instructions
In large bowl, sift together flour, cocoa powder and salt. Set aside.
In an electric mixer fitted with the paddle attachment, cream butter and sugars until fluffy and pale, about 5 minutes,
Beat egg whites until just combined.
Add flour mixture and mix on low speed until thoroughly combined.
Add vanilla and blend.
Remove 1/2 of dough from bowl, make a ball, and then flatten to form a disc. Wrap in plastic wrap. Repeat with second half of dough.
Chill both discs of dough for about 45 minutes.
Take out one disc and remove plastic wrap. Place on top of a large piece of parchment paper.
Roll dough until it is about 1/4" thick. The dough will be a little tough to roll until it softens up.
Preheat oven to 325 degrees.
Slide parchment paper and dough onto a board and place in the refrigerator for about 15 minutes.
Remove dough from refrigerator and cut into shapes with cookie cutters. Place them on a baking sheet lined with parchment paper leaving about 2" between cookies.
Place baking sheet with cookies in the freezer for 15 minutes before baking.
Bake until cookie edges are just crisp, about 12-15 minutes.
Cool sheets on wire racks for 10 minutes, then gently remove cookies and place on wire racks to finish cooling.
Notes
Cookies may be stored at room temperature in an airtight container for up to two weeks.They also freeze well in an airtight container.
Making pizzelles with my Italian grandmother is one of my favorite childhood memories. Every so often, my sisters and I would get to sit with her while she carefully made the cookies on her pizzelle iron, two at a time, over and over, until all of the dough was gone. She would make large batches so they would last a long time. Sometimes she let us shape a warm cookie into a bowl and eat ice cream out of it. Such a fun memory! For the holidays, I am changing up my original pizzelle recipe to a chocolate version. The cocoa powder adds a light chocolate flavor and makes the cookie a little crispier. For a pretty display, sprinkle the pizzelles with powdered sugar before serving.
Chocolate Pizzelles
Author: Leslie Reese
Ingredients
3 eggs
1 1/2 teaspoons vanilla
2 teaspoons baking powder
1 3/4 cups flour
1/2 cup butter melted and cooled
1 cup sugar
3 tablespoons cocoa
pizzelle iron
confectioner's sugar (optional)
Instructions
Prepare and heat pizzelle iron.
Beat eggs and sugar. Add cooled melted butter and vanilla.
Sift flour and baking powder and add to egg mixture. Batter will be stiff enough to be dropped by spoon.
Drop a heaping teaspoon of batter in the center of each grid pattern of the pizzelle iron and close. Bake approximately 30 seconds or until cookies are barely brown.
Remove pizzelles from iron with spatula and place flat on counter to cool.
When I was going through my recipes to put together the list for Chocolate Covered Christmas, I decided it wouldn't be complete without this recipe for Triple Chocolate Cake. I have been making this cake for a long time. My children's grandmother made it years ago and shared it with me. It's been a favorite ever since. It's one of those cakes that is so easy to make, it's ridiculous. It starts with a box mix and ends with a moist chocolate cake that is hard to beat with a scratch version. It's so good all by itself it doesn't need frosting, which makes it even easier, but if you want to top it off, by all means, go for it!
Triple Chocolate Cake
Author: Leslie Reese
Ingredients
1 package chocolate ( pudding in the mix ) cake mix
Combine all ingredients in a large bowl. Mix by hand until well blended.
Pour batter into greased 10" tube or bundt pan.
Bake for 45-50 minutes or until cake springs back when lightly touched. DO NOT OVER BAKE.
Cool 15 minutes. Remove from pan and finish cooling on rack.
Sprinkle with confectioner's sugar if desired.
3.1.09
The snowflakes on top of the cake were simply made by piping royal icing onto parchment paper in a snowflake shape. Once they were dry, I carefully glued them on top of the cake with a dot of icing.
My mom is the master of chocolate fudge in our family. She makes it better than anyone I know. I have tried to make her recipe, and I have failed. I just can't get it right. She has that special touch. Lucky for me, I live near her so I just ask her to make it for me when I want some. She doesn't mind at all! Last year, I found a recipe for Cookie Cutter Fudge on the Betty Crocker website. It looked simple, so I tried it. It is now my go-to fudge recipe when I'm in a pinch. It's so easy to make. You don't need a candy thermometer, just a microwave. It's great for giving too. I pour the fudge into copper cookie cutters from Williams-Sonoma and wrap them in a cellophane bag. Perfect hostess gift! The most important thing is that it tastes amazing. It's a great recipe to add to your chocolate collection!
Cookie Cutter Fudge
Author: Adapted from Becky Crocker
Ingredients
1 1/2 cups chocolate chips
1 cup peanut butter chips
1 can (14 oz) sweetened condensed milk
2 tablespoons butter
1 teaspoon vanilla
Instructions
Place cookie cutters on a sheet of foil. Wrap foil securely around bottom and sides of cookie cutter. Lightly spray inside of cookie cutter with cooking spray. Place on cookie sheet.
In a microwavable bowl mix chocolate chips, peanut butter chips, milk and butter.
Microwave uncovered on high 1 to 2 minutes, mixing every 30 seconds, until chips are almost melted. Stir in vanilla.
Pour mixture into cookie cutters, filling to tops of molds OR pour into small rectangular pan.
Refrigerate uncovered 2 hours or until firm.
Decorate with icing and candies ( optional ).
For molded fudge - carefully remove foil and gently press fudge out of molds OR wrap fudge in cookie cutter with plastic and tie with ribbon.
For pan fudge - cut into squares to serve or package.
When my kids were little, every Christmas Eve, they would put on their Christmas jammies, grab pillows and blankets and a little travel cup of hot cocoa and we would get in the car and drive around looking at Christmas lights while we listened to 'Twas the Night Before Christmas. I always loved that night! This recipe for Hot Cocoa has been tucked in my recipe book for a long time. It's on a little piece of paper in my daughter Lauren's handwriting. I will never rewrite it. I thought it would be fun to share it for Chocolate Covered Christmas. These days we love dark chocolate so I substituted that for milk chocolate. You can use whatever you prefer.
Dark Chocolate Hot Cocoa
Author: Leslie Reese
Ingredients
4 cups of whole milk
8 ounces of good quality dark, semi-sweet or milk chocolate finely chopped
1 tablespoon sugar
1 teaspoon vanilla
Whipped Cream or Marshmallows
Instructions
Bring milk to simmer.
Put chocolate, sugar, and vanilla in a blender.
Add simmering milk and blend until foamy and chocolate is melted.
Serve topped with [url href="http://lesliereese.com/?p=2506&/easyrecipe-print/2506-0/" target="_blank"]marshmallows[/url] or whipped cream.
My twin sister and I have been baking together at Christmas time for over 20 years. We chose to make Chocolate Dipped Almond Cookies one year simply because of how pretty they looked on the page of one of our cookbooks. Once we made them, we realized they tasted as good as they looked and they have been on the list ever since! We love these cookies because you can make the dough and chop the nuts ahead of time so they are ready to bake when you are!
Chocolate Dipped Almond Cookies
Author: Adapted from Martha Stewart Holidays
Serves: Makes approximately 6 dozen cookies
Ingredients
1 cup unsalted butter
2/3 cup sugar
1 large egg yolk
1 teaspoon vanilla extract
2 cups all-purpose flour
1/4 teaspoon salt
1 1/3 cups finely chopped sliced almonds
For Decoration
6 ounces semisweet chocolate
3 tablespoons unsalted butter
1 tablespoon hot water
chopped almonds for garnish
Instructions
Cream butter and sugar until fluffy.
Add the vanilla and egg yolk, then flour, salt and finely chopped almonds, mixing well.
Shape dough into 2 rolls each 1 1/2 inches in diameter.
Wrap rolls in plastic wrap and refrigerate until firm, about 2 hours.
Preheat oven to 350 degrees.
Line baking sheets with parchment paper.
With a sharp knife, cut the dough into 1/4 inch thick slices. Place 1 to 2 inches apart on baking sheets and bake 8 to 10 minutes or until just slightly browned.
Cool on a wire rack.
In a double boiler, melt the chocolate and butter. Add the hot water and stir until smooth. Dip one edge of each cookie into the chocolate and sprinkle with chopped almonds. Cool on wax paper on a rack until the chocolate hardens.
About twenty years ago, when my kids were little, I decided to try to make a gingerbread house. I loved to bake and I was pretty crafty so I figured it was worth a shot. I found instructions for a simple gingerbread house in a Martha Stewart Living Holidays book and the rest is history. I loved every step of the process and for years to come, I made a gingerbread house every Christmas. Then life got hectic, the kids got older (I know, shouldn't it be the other way around?) and I sort of fell off the gingerbread wagon. Well, this year I decided to jump back on so I got out my books, pulled the patterns out of the recipe cabinet and went to work. What I realized was, it's not hard to make a gingerbread house but it is time consuming. I forgot that part. I also realized I'm a little rusty. I made a few mistakes (I won't point them out) but I am in love with my gingerbread church and it feels like the good old days when there was one in the house every Christmas.
There are a lot of great resources to get you started. I am partial to books, probably because I like to collect them, but there are plenty of resources online.
Decide what you want to make and cut out the pattern ahead of time. As you might imagine, this part is time consuming. Once you are done making your gingerbread house, save the pattern. If you ever want to make it again, you will be glad you have it.
When you are ready to get started, make your dough. I have a great Gingerbread Dough Recipe below.
Roll your dough and cut out your pattern.
It's not easy to move a piece of dough this big once you roll it out and cut it so I cut my gingerbread right on the parchment paper it will bake on. I slide a flat edge baking sheet under the paper when I'm done cutting and put it in the oven.
Once the gingerbread is baked, I slide the entire sheet of parchment paper right onto a rack to cool.
To make stained glass windows, I baked the gingerbread 2/3 of the way and then took it out of the oven to fill the windows with crushed sour balls in different colors. I put the pan back in the oven to finish baking and to melt the candy.
Once all of the pieces were baked, I spread them out on a table. It's easier to put your structure together if you are organized.
Royal Icing is used to "glue" the pieces together. My favorite Royal Icing Recipe is below. I used a wooden board covered in brown paper as a base for the church.
I piped icing through a decorating bag with a round tip attached to construct the walls. It makes it easier to place the icing where you want it to go.
Start by securing one wall and carefully build from there. Royal Icing is thick and drys fast so the walls tend to stand on their own pretty easily.
Pipe thick lines of icing on the inside of the house.
I switched to a star tip to go over the icing on the outside edges. It looks prettier than a straight line.
Once the walls were standing and dry, I decorated the outside with the Royal Icing.
I did this before I put the roof on.
I added some holiday decorations with colored icing and candy.
I decided to make chocolate shingles for the roof. I simply melted chocolate and spread it out on a tray covered in parchment paper. I put it in the freezer for about 15 minutes so the chocolate could harden slightly.
When the chocolate was hard, I cut it into small squares to make shingles and then broke them apart. You have to work fast when you do this because the chocolate will soften as you handle it.
Starting with the bottom edge and working in rows, I tiled the roof with chocolate shingles. I placed them swirled side up because I like the way it looked.
I love to light up my gingerbread houses. I placed battery operated LED lights inside the church. Some patterns do not include a hole for lights so if you want to add lights, remember to cut a small hole in the back of the house before you bake it.
Finally finished!
Happy Holidays!
Leslie xo
Gingerbread Dough
Author: Leslie Reese
Ingredients
6 3/4 cups flour
1 tablespoon cinnamon
1 1/2 teaspoons ginger
1/2 teaspoon salt
1 1/2 cups light corn syrup*
1 1/4 cups packed light brown sugar*
1 cup margarine
Instructions
Preheat oven to 350 degrees.
Stir the dry ingredients together in a large mixing bowl.
Combine corn syrup, brown sugar, and margarine in a 2 quart saucepan. Stir constantly over medium hear until margarine is melted.
Stir the liquid into the flour mixture in an electric mixing bowl with paddle attachment. Mix on medium to high speed until well blended. Dough will become very stiff.
Form dough into a ball and cover in plastic wrap.
Refrigerate until dough is easy to handle**
Roll dough on parchment paper about 1/8" thick and cut into desired shapes.
Bake for 10-12 minutes or until golden brown. Check for air bubbles during baking process and prick with toothpick to deflate them ( I CAREFULLY tap them with my finger)
Slide gingerbread onto large cookie sheet or baking rack to cool, making sure all pieces lie flat.
Notes
*Dark corn syrup and dark brown sugar may be substituted and will result in darker dough
**Do not refrigerate dough more than a few minutes. You just want to cool it until it is easy to work with. This dough starts out a little sticky but becomes very pliable and is actually easy to work with. You can use a little bit of flour to get it started but after the first roll or two it will roll nicely with out it.
3.1.09
Royal Icing
Author: Leslie Reese
Ingredients
3 eggs whites at room temperature
1 16 oz box confectioner's sugar, sifted
1/8 teaspoon cream of tartar
Instructions
Place egg whites in an electric mixing bowl.
Stir cream of tartar into egg whites.
Add confectioner's sugar to egg whites and mix on low speed, scraping bowl, until well blended .
Turn mixer on high and beat until mixture is thick and white and holds stiff peaks about 5 -6 minutes.
Once the icing is finished you will want to cover it with a damp cloth or plastic wrap as it will dry quickly and form a crust.
One of the things I love about writing a blog is the opportunity it gives me to connect with lots of wonderful people. Today I am participating in aHoliday Treat Party that is being hosted by Molly Allen from CAKEfyi. I met Molly through my connection with Best Friends For Frosting. Molly is one of the editors there. She has her own blog full of dessert recipes and inspiration. When she asked me to participate in this fun little party, I was happy to contribute. The recipe I am sharing is for Snow Ball Cookies. My sister Linda and I bake them every year at Christmas time. They are a fun cookie to add to a white themed dessert bar or holiday table. Check out the recipe and then head over to CAKEfyi to keep the party going. There will be lots of great dessert recipes and a giveaway, just in time for the holidays!
Enjoy!
Leslie xo
Snow Ball Cookies
Author: Leslie Reese and Linda Collins
Ingredients
1 cup of unsalted butter
2 tablespoons of honey
1/2 cup of confectioner's sugar
2 1/4 cups flour
1/4 teaspoon salt
1 teaspoon orange juice
3/4 cup finely chopped pecans
Confectioner's sugar for rolling the snow balls
Instructions
Cream butter, sugar and honey until fluffy.
Mix in confectioner's sugar, flour, salt and orange juice.
Add pecans.
Wrap dough and refrigerate for several hours.
Preheat oven to 350 degrees. Line baking sheets with parchment paper.
Roll the dough, 1 teaspoon at a time, into balls.
Place balls on baking sheet and bake 12 to 13 minutes. Cool on racks.
Roll cooled cookies in confectioner's sugar*
Notes
* place a few balls at a time in a Ziploc bag of confectioner's sugar and toss gently to coat evenly
There is something fun about marshmallows. They add a little "happy" to campfires, hot chocolate and rocky road ice cream. I have been wondering for some time, if it was easy to make homemade marshmallows. If it was, wouldn't those s'mores and cups of cocoa taste so much better? I see recipes and photos of pretty, fluffy white marshmallows and imagine the mess it must take to create one perfect batch. So I decided to try it myself. I found a recipe over at Smitten Kitchenand it looked like a good one, so I went for it, and it really was easy. There are a few steps involved but they are not difficult and the result was well worth the time it took. The best part was the taste. They were delicious!
You start by heating the sugar, corn syrup, water and salt.
You will need a candy thermometer to make marshmallows. You have to boil the mixture until the thermometer reaches 240 degrees.
The hot mixture gets added to a bowl of dissolved gelatin and is whipped with an electric mixer until it triples in size and is very thick and white.
You will beat the egg whites until they form stiff peaks. *TIP* I had my hot mixture whipping in the electric standing mixer while I beat the egg whites with a hand-mixer in a separate bowl. You could also do one at a time but I wanted to move a little faster.
You will beat the egg whites, sugar mixture and vanilla until combined.
When the marshmallow is mixed, it gets poured into a 13 x 9 pan that has been greased and sprinkled with powdered sugar.
The marshmallow has to be chilled for a few hours or overnight before it can be cut.
Once the marshmallow is chilled, it can be inverted onto a cutting board that has been dusted with confectioner's sugar.
If you are going to use cookie cutters to make marshmallow shapes, you will want to dip them in confectioner's sugar before each cut to avoid sticking.
Cut your marshmallow into desired shapes.
Once the shapes were cut, I dusted the marshmallows with confectioner's sugar to keep them from sticking (and because it looked pretty).
I decided to make marshmallow snowflakes. Most of them came out great. You can see how light and fluffy they are. Use your favorite cookie cutters or use a sharp, thin knife to cut squares. There were a lot of pieces left over once I cut out the shapes. I cut them into small pieces with kitchen scissors that were dipped in confectioner's sugar.
I am so glad I decided to try this recipe. It was a lot of fun and really easy to do. I will not hesitate to make my own batch whenever I need some marshmallows in a recipe or on a dessert bar. They really are that easy!
Have fun!
Leslie xo
Homemade Marshmallows
Author: Leslie Reese
Serves: Makes 1 13x9 pan
Adapted from [url href="http://smittenkitchen.com/blog/2009/06/springy-fluffy-marshmallows/" target="_blank"]Smitten Kitchen[/url]
Ingredients
1 cup confectioner's sugar
3 1/2 envelopes of unflavored gelatin (2 tablespoons plus 2 1/2 teaspoons)
1 cup cold water divided
2 cups sugar
1/2 light corn syrup
1/4 teaspoon salt
2 egg whites
1 tablespoon vanilla
Instructions
Grease bottom and sides of a metal 13 x 9 pan and dust with confectioner's sugar.
In bowl of a standing electric mixer or in a large bowl sprinkle gelatin over 1/2 cup cold water and let stand to soften.
In a 3 quart heavy saucepan, cook granulated sugar, corn syrup, 2nd 1/2 cup of water and salt on low heat, stirring until sugar is dissolved.
Increase heat to moderate and boil mixture, without stirring, until a candy or digital thermometer registers 240 degrees Fahrenheit, about 12 minutes. Remove pan from heat and pour sugar mixture over gelatin mixture, stirring until gelatin is dissolved.
With standing or hand-held electric mixer, beat mixture on high speed until white, thick and nearly tripled in volume, about 6 minutes if using standing mixer or about 10 minutes if using hand-held mixer.
In separate medium bowl with clean beaters, beat egg whites until they hold stiff peaks.
Beat egg whites and vanilla into sugar mixture until just combined.
Pour mixture into baking pan.
Sprinkle 1/4 cup confectioner's sugar evenly over top.
Chill marshmallow, uncovered, until firm, at least 3 hours, and up to one day.
Run a thin knife around edges of pan and invert pan onto a large cutting board. Lifting up one corner of inverted pan, with fingers loosen marshmallow and ease onto cutting board.
With a large knife trim edges of marshmallow and cut into squares or cut with cookie cutters dipped in confectioner's sugar.
Toss marshmallows in remaining confectioner's sugar and put in storage bags or containers.
The holidays are in full swing and that means there are social events and parties on the calendar. I don't know about you but I am always looking for hostess gifts that are festive but useful too. This year I thought I'd take a simple recipe for Chinese Fried Walnuts, change it up a bit and put the finished product in a handmade holiday gift box that can be used again.
My mother has been making Chinese Fried Walnuts for years. I have memories of her frying them in the kitchen during the holidays and we would sneak a few when we walked by because they were so good. I love fried walnuts but I love pecans even more so I decided to switch out the walnuts for pecans this time to try something new. They turned out great. Feel free to use walnuts though, if you prefer. They are delicious too!
Take about a pound of raw, shelled nuts (I am using pecans) and put them into a pot of boiling water.
Boil for one minute.
Drain the nuts and quickly rinse them in hot water.
Toss nuts in a cup of sugar.
Fry nuts in oil until they are light brown 3-5 minutes.
Carefully scoop nuts out of the oil and drain.
Cool nuts on parchment paper, then break apart. Store in an airtight container.
I wanted to give my nuts as hostess gifts so I placed them in a festive box. These pretty patterned gift boxes were actually purchased for the guests to use as take home containers at the candy bar at my daughters wedding. We simply hot glued an acrylic snow flake ornament (purchased at Michael's Craft Store) to the top of each box. We had some left over so I decided to get them out and use them for gifts this year. They are perfect for all types of small items and they can even be used as a decoration. It's a simple thing that makes presenting the gift a little more fun!
Enjoy!
Leslie xo
Chinese Fried Pecans
Author: Leslie Reese
Ingredients
1 lb pecans (or walnuts)
1 cup sugar
1 cup vegetable oil
salt to taste
Instructions
Bring 6 cups of water to a boil in a medium saucepan.
Add nuts and boil for one minute.
Drain nuts in a colander and quickly rinse with hot water.
Toss nuts with sugar.
Heat oil in a large frying pan over medium heat.
Add nuts to oil and fry until light brown, about 3-5 minutes.
Carefully remove nuts from hot oil with a slotted or mesh spoon and drain in a colander over saucepan.
Spoon nuts onto parchment paper to cool.
When nuts are completely cooled, sprinkle with salt to taste and break apart.
Notes
If you are placing nuts in a gift box or container that is not airtight, place them in a plastic bag first so they stay fresh.
This post is going to be short but sweet! Thanksgiving is only days away. Soon most of us will be gathering with family and friends to enjoy good food and great company. It’s an awesome weekend that can also be very busy. There are so many things to think about and lots of food to prepare. So when it comes to cocktails, I’m keeping it simple. I found a great recipe for a Fall Sangria on Pinterest a couple of weeks ago. It’s a little different than the Sangria recipes I shared this summer. It has the taste of fall with apple cider, bourbon and cinnamon. I made it for a party that I was having and it was amazing so I shared the original link on my Facebook page. I decided to share it here on the blog too in case you missed it. It’s perfect because it can be made in a large batch ahead of time and most people like it. So easy! Oh and if you want to jazz it up a bit for the holidays, just dress up the glasses like I did with cinnamon sticks tied with lemon and orange peels. All you need is a lemon zester. A simple trick that makes a huge difference!
Fall Sangria
Author: Leslie Reese
[url href="http://www.nerve.com/advice/drink-this-cocktail-fall-sangria" target="_blank"]Adapted from the recipe by Alicia from Tuffet[/url]
Ingredients
2 oranges, cut into small pieces
1 lemon, cut into small pieces
2 apples, cut into small pieces
1-2 cup bourbon
½ cup triple sec
¼ cup simple syrup
2-3 cinnamon sticks
2 bottles Sauvignon Blanc
3 cups apple cider
Instructions
Combine all ingredients except the wine and apple cider in a container and allow to marinate at least a day.
A few hours before serving, combine mixture with 2 bottles of Sauvignon Blanc and 3 cups apple cider in a punch bowl or larger container and adjust to taste.
Garnish with chopped apples, cinnamon sticks or citrus peels (optional)
Makes enough for a small party or a medium-sized punch bowl.
Notes
*the original recipe includes 3-4 teaspoons of hot sauce which I omitted. Feel free to add that if you want the extra kick!
The cold weather is moving in, the fireplace is burning and the holidays are weeks away. In my house, that means it's time to start baking! Soon enough we'll be baking things like gingerbread, Christmas cookies and nut roll. I can't wait and I have some fun things to share with you in the coming weeks, but for now, I thought it would be fun to share a recipe for a cookie that has become a favorite in my family. I found this recipe for Pine Nut-Orange Biscotti in one of my Williams-Sonoma cookbooks and after making it one time, it moved to the top of our "favorite cookie" list. They are perfect with a cup of coffee or tea or with a glass of after-dinner wine. "Biscotti" means twice baked so there are two steps in this baking process but they are well worth the extra time, I promise.
There are two cups of pine nuts in this recipe. Toasting them in the oven really brings out their flavor and is one of the reasons these cookies are so delicious. I started buying large bags of pine nuts at Costco because it's less expensive than buying them in small quantities at the grocery store.
One third of the pine nuts in the recipe are chopped in a food processor before they are added to the dough. I think the combination of whole and chopped nuts gives the biscotti a nice texture.
The zest of a whole orange is also added to the dough giving it a light citrus flavor.
The dough is very thick once it's mixed. It's sticky too, so you'll want to make sure you use a floured surface when you work with it.
You'll divide the dough into four equal parts to form four separate logs on cookie sheets lined with parchment paper.
The logs are baked until they are firm to the touch but not real brown on the bottom, about thirty minutes. They are only half baked at this point.
Immediately after baking, I carefully transfer the logs to a wooden board to cut them. Since they are not fully baked, I place a long metal cake spatula under each log when I transfer it to the board so it doesn't break.
The logs are cut into slices and placed back on the cookie sheets, cut sides down.You'll notice that the dough in the middle of the biscotti is still soft. They will need to bake about twenty more minutes.
Once the biscotti are done baking, they will be firm to the touch. They can be stored in an airtight container for up to two weeks. Perfect during a busy time of year when you are likely to have last minute guests or you need a quick hostess gift.
Enjoy!
Leslie xo
Pine Nut-Orange Biscotti
Author: Adapted from Williams-Sonoma Essentials of Italian cookbook
Serves: Makes approximately 4 dozen cookies
Ingredients
2 cups pine nuts
3 large eggs
1 1/2 cups sugar
6 tablespoons unsalted butter, melted and cooled
grated zest of one orange
3 cups of all-purpose flour
1/8 teaspoon salt
Instructions
Preheat oven to 325 degrees.
Spread pine nuts on baking sheet and toast in oven, shaking every 2-3 minutes until nuts are golden brown, about 8 minutes.
Lay nuts on plate or board to cool.
Put one-third of the cooled nuts in a food processor to finely chop,
Raise oven temperature to 350 degrees.
In a large bowl, mix eggs and sugar until blended. Stir in butter until combined.
Add chopped nuts, and orange zest. Mix well.
Add flour and salt. Mix well.
Add whole pine nuts and mix to distribute nuts evenly. Dough will be stiff.
Place dough on floured surface and divide into four equal portions.
Using floured hands, form each portion into a log that is approximately 9-10" long, 2 1/2" wide and 1/2" thick and place on cookie sheets lined with parchment paper. * I form my logs right on the cookie sheets
Bake the logs until they are firm to the touch, making sure bottoms do not get too brown, about 30 minutes.
Remove from oven and using a spatula transfer logs to a cutting board. Allow to cool just slightly.
Using a serrated knife, cut logs into 1/2" slices.
Place slices, cut side down, back onto cookie sheets and bake until they are slightly brown and firm to the touch,about 20 minutes.
Transfer biscotti to a wire rack and let cool completely.
Store in an airtight container for up to to two weeks.
Halloween is a fun time of year. Costumes, candy, parties... It's a great time to be a kid. It can also be a fun time for adults. Dressing up in costumes and throwing parties is something we never outgrow. It's a great time for everyone to get silly. I'm always up for a party and once in a while I'll put on a costume but what I love most, in all honesty, is coming up with the food and drinks. It's a chance to put a creative spin on Halloween treats. This year I decided to dress up some homemade caramel corn and pair it with a spooky drink to create an adult version of Trick-or-Treating.
I made White Chocolate Caramel Corn with Cashews from Martha Stewart Living. It's an upgrade from traditional caramel corn and worth every second of the time it takes to make it. The recipe is easy to follow and believe me, it gets gobbled up quickly so consider making two batches for a large crowd. I'll show you the steps I took so you have a visual. The complete recipe follows.
White Chocolate Caramel Corn with Cashews
Some of the main ingredients are white chocolate, brown sugar, chopped cashews and popcorn. I used Pop-Secret Sea Salt microwave popcorn instead of popping corn on the stove. I didn't add as much salt at the end. It turned out just fine.
Toss the nuts and the popcorn in a large bowl and set it aside.
You're going to make the homemade caramel on the stove. You will need a candy thermometer.
The caramel is done when the thermometer reaches 248 degrees F. You will add baking soda as soon as you remove the saucepan from the heat. The caramel will become light and airy.
I thought it would be a sticky mess but it slides right out and onto the popcorn. Easy!
I sprayed my spatula with cooking spray before tossing the popcorn. It kept the caramel from sticking to it.
Spread the caramel corn onto baking sheets covered with parchment and bake in the oven on low heat.
After the caramel corn is baked and is completely cooled, drizzle with melted white chocolate.
Refrigerate the caramel corn until the chocolate hardens.
Serve or store in airtight containers. I made individual serving cups by wrapping parchment paper around a glass and securing it with a piece of raffia (remove the glass after you tie with raffia).
Liquefied Ghost Martini
Don't let the ghost fool you! This silly little drink is "adults only" with vodka mixed into the vanilla and cream concoction. Take it easy, because it only looks innocent!
Happy Halloween!
Leslie xo
White-Chocolate Caramel Corn with Cashews
Author: Adapted from Martha Stewart Living
Ingredients
12 cups popped popcorn
1 1/2 cups chopped cashews
1 stick plus 2 tablespoons of unsalted butter
1/2 cup light corn syrup
1 1/4 cups packed light brown sugar
1/4 teaspoon baking soda
5 ounces white chocolate, chopped
Instructions
Preheat oven to 250 degrees.
Mix popcorn and nuts in a large bowl. Melt butter in a saucepan over medium heat. Stir in corn syrup, sugar, and 1/2 teaspoon salt, and cook until sugar dissolves, stirring once or twice. Raise heat to high, and bring to a boil (do not stir). Boil, without stirring, until a candy thermometer registers 248 degrees, 2 to 4 minutes. Remove from heat, and stir in baking soda.
Pour caramel over popcorn mixture, stirring to coat thoroughly. Transfer to baking sheets lined with parchment paper, spreading in a single layer. Bake 45 minutes, stirring twice. Test doneness by removing a few pieces of popcorn from oven; if they crisp within 1 minute, popcorn is ready. Remove from oven, and immediately sprinkle with remaining salt. Let cool completely.
Place chocolate in a heatproof bowl set over a pan of barely simmering water. Stir until melted and completely smooth. Fill a small resealable plastic bag with chocolate, and snip a tiny hole in 1 corner. Drizzle chocolate over caramel corn. Refrigerate until chocolate is set, about 10 minutes.
Break apart and serve. Store in an airtight container for up to one week.
3.1.09
Liquefied Ghost Martini
Author: Adapted from Cooking Channel
Ingredients
Ingredients
2 oz. vodka
1 oz. vanilla simple syrup
1 oz. cream
2 oz. club soda
Marshmallow ghost (optional)
Instructions
Mix vanilla simple syrup, cream, vodka and soda.
Serve in a martini glass.
Slice marshmallow ghost on bottom half and place on martini glass as garnish.
We had our first freeze warning in Central Pennsylvania this past weekend and it was a subtle reminder that summer is over and winter is just around the corner. As you may know, I have several different herb plants growing on my patio outside. I love cooking with them but because of the climate, I can only enjoy using my own supply during the warmer months. My basil plant was full of leaves and looked so healthy but I knew its days were numbered so I figured it was a good time to bring it inside and make some pesto.
Pesto is such an easy thing to make and there are so many ways to make it. I like to keep it simple and use just six ingredients; basil, Parmesan Cheese, olive oil, salt, pepper and garlic. I have a child with a tree nut and peanut allergy so I do not use pine nuts in my pesto. The taste is delicious without them and it actually keeps the cost down because pine nuts are expensive.
I toss everything but the olive oil into my food processor to combine it. Then I slowly add the olive oil until all of the ingredients are incorporated and the pesto is thick and somewhat smooth, sort of like a course ground mustard consistency.
I like to freeze my pesto so that we can enjoy it long after the basil plants are gone. I use a 1 1/4" cookie scoop to place large tablespoon sized balls of pesto onto a baking sheet lined with wax paper. You can use an ice cube tray to make individual cubes of pesto too but this way there is one less thing to wash!
I pop the tray into the freezer until the pesto is firm enough to pick up, about 20 minutes.
I peel the pesto off of the baking sheet, place it in a Ziploc bag and store it in the freezer. Now whenever I want to add a little flavor to my recipes I can just reach in and grab as much as I need.
I love making pesto because it tastes good and it’s easy to do but there is a little part of me that enjoys feeling like I just saved a little bit of summer too.
Enjoy!
Leslie xo
Nut Free Basil Pesto
Author: Leslie Reese
Ingredients
4 cups packed basil leaves
2 large garlic cloves
1 cup freshly grated Parmesan cheese
A few grinds of fresh ground black pepper (approximately 1/2 tsp)
A few pinches of salt (1/2 to 3/4 tsp)
About 1 cup extra-virgin olive oil
Instructions
In a blender or food processor pulse basil, garlic, cheese, salt and pepper to combine.
Slowly add olive oil with food processor running until mixture forms a smooth and thick consistency.
Scoop or spoon very full tablespoon sized amounts of pesto onto a tray lined with wax paper.
Set tray in freezer until pesto is firm enough to pull off of wax paper.
Place pesto scoops in a Ziploc bag or plastic container and store in freezer.

 We made it! Today is the 12th day of Chocolate Covered Christmas and we're going to go out with a bang and stir up some holiday cheer with a Frozen Hot Chocolate Martini! Why not? The shopping and baking should be coming to an end so it's time to relax and have some fun. Whether you have wrapping to do or a party to host, this fun, frozen concoction will have you singing Jingle Bells in no time. It's made with hot chocolate mix and vodka and it's a fun way to indulge in something sweet this time of year. So put on the Christmas music and find your holiday cheer because it's time to raise our glasses to a wonderful Christmas and a fantastic year!
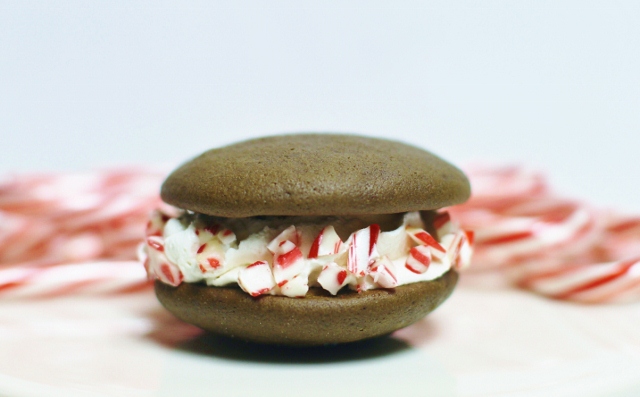

")


")

")

")
")
")
")
")
")
")
")

")

")
")
")
 (628x307)")
")
")

")


")


")


")