

Marble Cheese Board DIY
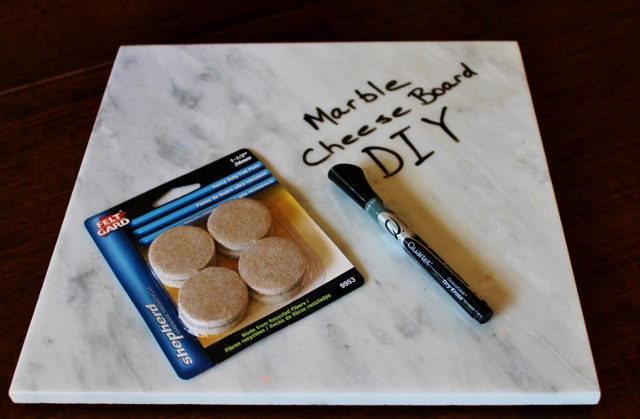 A couple of weeks ago I shared a simple cheese board idea with you. I used an old cutting board, covered it with brown paper and added some of my favorite foods. It was quick and easy and made a perfect happy hour display. Today I thought I would show you how you can make your own cheese board using a piece of marble tile. It's ridiculously easy to do and very inexpensive. I don't think I spent more than ten dollars on this project!
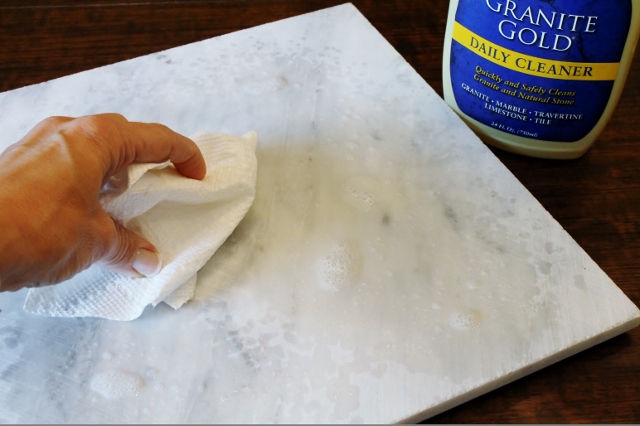 I went to Home Depot and picked up a 12 x 12 piece of white marble tile in the flooring department for $3.99. I cleaned both sides of the tile with a product I use on my granite kitchen counters. You can use soap and water or anything that is safe for marble. The point is to get all of the powder and dirt off of the tile before you use it.
 I also bought a pack of 1 1/2 " heavy duty felt pad circles with adhesive backs at Home Depot. They cost $2.67.
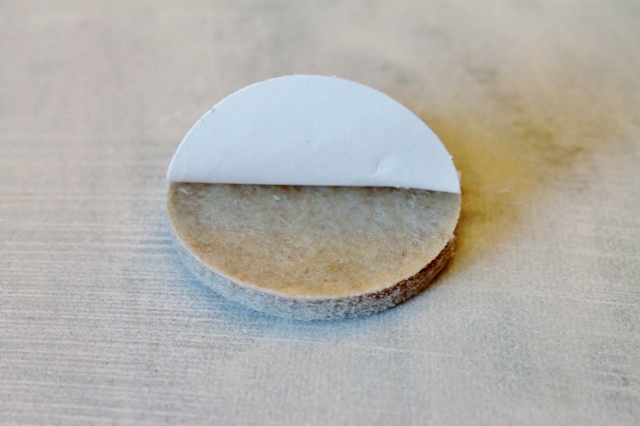
 Place a felt pad, sticky side down, in each corner, on the rough side of the tile.
 The felt pads will keep the tile from scratching tables and counters and will also give the tile a little lift so it's easier to pick up.
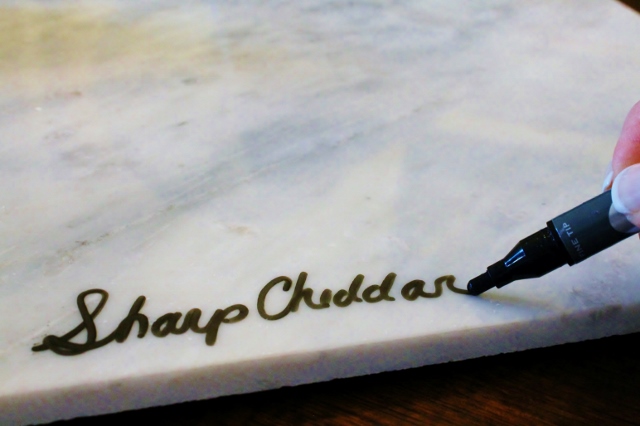 Flip the tile over and it's ready to use. Wipe it clean with a damp cloth or soap and water before you place any food on it. You can label your cheeses with a dry erase marker*. It will wipe right off when you are done! It's a little variation from the slate and chalk cheese boards that are so popular.
 That's it! You now have a marble cheese board to serve your cheese and crackers and it only cost a few dollars! I can't think of an easier way to make something so useful. I plan to pick up a few more tiles so I can use them for a larger party. I think it would be fun to place them at different levels on a table for an eye catching appetizer display.
Have fun!
Leslie xo
*Please keep in mind that the tile used in this DIY is a simple marble floor tile. Marble is porous and I cannot guarantee that the dry erase marker will not stain any area of the tile. Test a small spot first before proceeding. I had no trouble with my tile staining. I wrote on it and erased repeatedly. Do not submerge tile in water once the felt pads are secured to the tile. Clean surface with soap and water.
Favorite Things
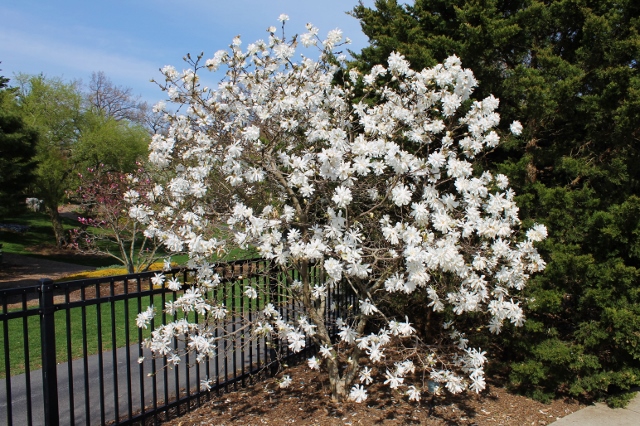
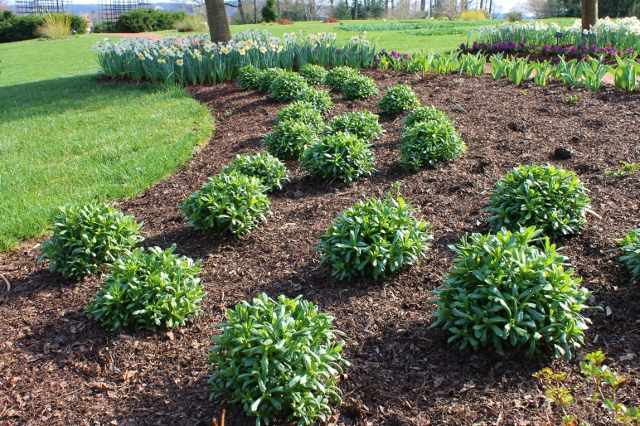
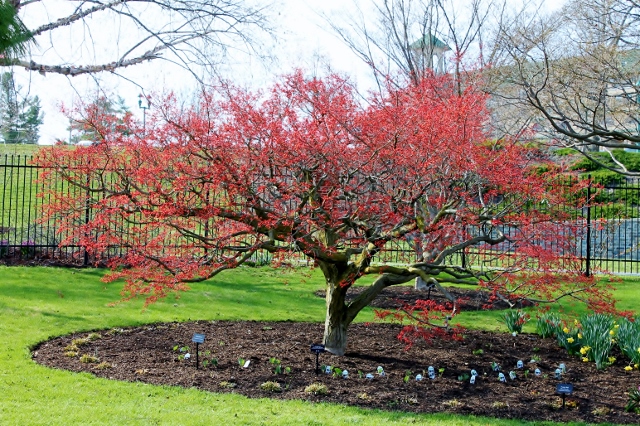
 I love living in an area where we can fully experience all four seasons and the beauty that comes with each one. I look forward to spring every year and the color that pops out from every corner of the earth. It's such a beautiful time of year. My neighborhood is lined with flowering pear trees and they are breathtaking when they are in full bloom. We have had some gorgeous weather in the last couple of weeks so I decided to head over to the Hershey Gardens to wander around and see what else is blooming. I snapped a few photos as I walked around and although they are far from professional, I wanted to share my favorites with you. Happy Friday!


 I hope you are enjoying a beautiful spring and the color that is everywhere. Remember to take time each day to look around and enjoy the little things. In a world where there are so many sad things going on and people are hurting, it's those little things that matter. Don't take them for granted and be thankful for each day!
I hope you have a wonderful weekend!
Leslie xo
Peanut Butter Sandwich Cookies
 My peanut butter addiction is getting the best of me lately and the urge to make anything that contains it has taken over. In order to justify the need to satisfy my craving, I decided to test a slightly healthier version of my favorite peanut butter sandwich cookie recipe. I found this recipe over at Martha Stewart but the original is from the 'wichcraft restaurant. These cookies taste amazing on their own but when you sandwich them with the peanut butter filling, you take them to a whole new level. I made them with natural ingredients so they are healthier than the traditional variety and taste just as good. If you like peanut butter, you will love these cookies!
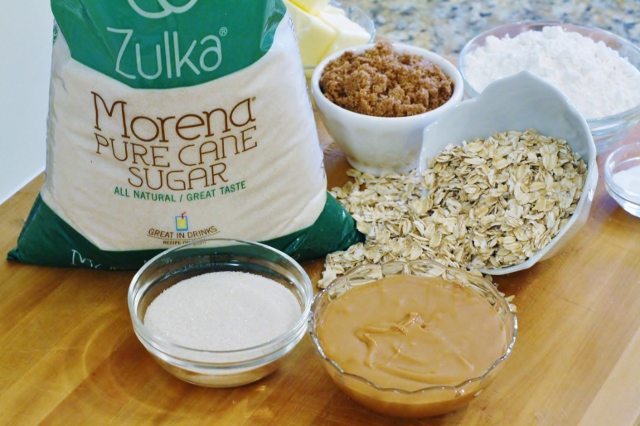 These cookies are made with old-fashioned oatmeal, organic peanut butter and natural sugar. I used Zulka Pure Cane Sugar* which is a Non-GMO Project verified "Morena" sugar that is not only healthier but has a great flavor and works well in baked goods.
 The oats are toasted on the stove with butter before they are added to the dough.
 Once toasted, the oats are cooled before they are mixed with the other ingredients. This step adds a wonderful flavor to the cookies.
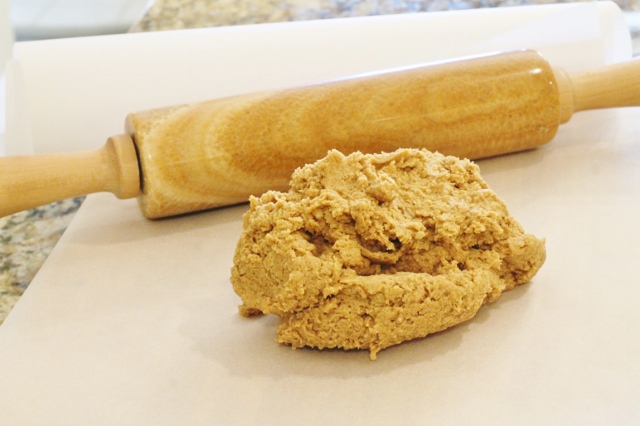 The cookie dough is rolled out between parchment paper before it's chilled and cut.
 The dough is refrigerated for about 20 minutes and then it's cut into circles.
 Believe it or not, I do not have a circular cookie cutter. I used a 2" wide glass to cut out the dough. It worked just as well.
 Because I used natural peanut butter, the dough was softer than it would be if I used regular peanut butter. You can use whichever you prefer.
 Turbinado sugar is sprinkled on top of the cookies before they are baked. It adds a perfect sweet element to the peanut butter flavor.
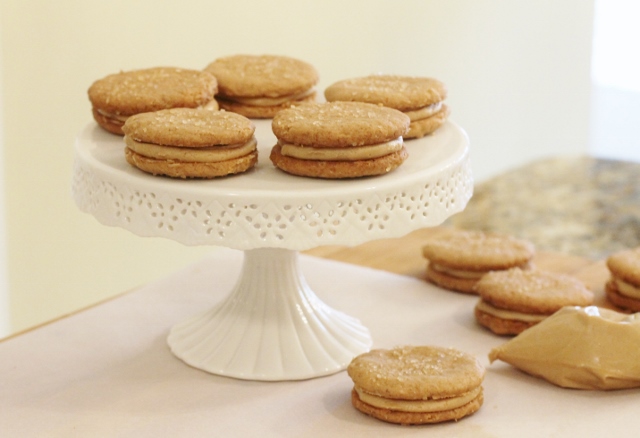
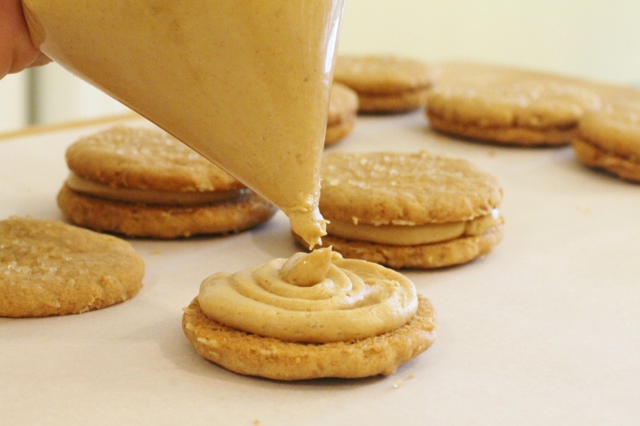 A wonderful smooth and creamy peanut butter filling is swirled between each sandwich cookie. This is your wow factor!
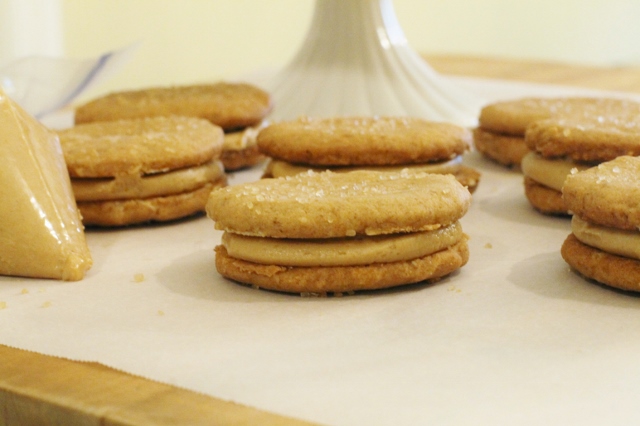 The recipe makes about 12-18 sandwich cookies depending on how thin you roll your dough.
- Cookies
- 1/2 cup plus 4 tablespoons unsalted butter, room temperature
- 1 cup old fashioned oatmeal
- 1 cup plus 2 tablespoons all-purpose flour
- 1 teaspoon baking soda
- 1 teaspoon salt
- 1/3 cup granulated sugar - I used [url href="http://zulka.com/" target="_blank"][b]Zulka Pure Cane Sugar[/b][/url]
- 1/2 cup packed dark brown sugar
- 1/2 cup peanut butter - I used organic peanut butter*
- Turbinado sugar, for sprinkling
- Peanut Butter Filling
- 4 tablespoons unsalted butter
- 3/4 cup peanut butter
- 1/4 cup confectioners' sugar
- 1/2 teaspoon salt
- Line a baking sheet with parchment paper, set aside. Melt 4 tablespoons butter in a medium saucepan over medium heat. Add oats and cook, stirring, until toasted, 5 to 7 minutes. Spread oat mixture onto prepared baking sheet and let cool.
- Meanwhile, preheat oven to 350 degrees. Line 2 baking sheets with parchment paper or a nonstick baking mat; set aside.
- In a medium bowl, whisk together flour, baking soda, and salt; set aside. In the bowl of an electric mixer fitted with a paddle attachment, cream together remaining 1/2 cup butter, granulated and brown sugars. Add peanut butter and mix until well combined.
- Add oat mixture and flour mixture; mix on low speed until combined. Turn dough out onto a piece of parchment paper. Cover dough with second piece of parchment paper and roll out dough, between parchment, to 1/4 inch thick. Carefully slide rolled dough onto the back of a baking sheet and transfer to a refrigerator until chilled, about 20 minutes.
- Remove top layer of parchment paper; cut out cookies using a 2-inch round cookie cutter. Place cookies 1 inch apart on prepared baking sheets; sprinkle with turbanado sugar.
- Transfer baking sheets to oven and bake until golden, rotating baking sheets halfway through baking, about 10 minutes. Let cool completely on baking sheets.
- When cookies have cooled completely, snip the end of the pastry bag and squeeze filling in a spiral motion on the bottom side of half of the cookies. Top with remaining cookies to form sandwiches.
- Mix all ingredients together in the bowl of an electric mixer fitted with the paddle attachment on medium speed until smooth. Transfer filling to a disposable pastry bag until ready to use.
Please note ~ If you make these cookies with natural peanut butter, the dough will be softer and the cookies will be a little more crumbly than cookies made with regular peanut butter. The filling will be softer too. The flavor is still amazing. Consider yourself warned! These cookies are addictive!
Enjoy!
Leslie xo
*About Zulka Sugar
Zulka® Pure Cane Sugar is real, unrefined granulated “Morena” sugar made from freshly-harvested sugar cane that is a better-tasting and less-processed cup-for-cup replacement for refined white sugar. Morena sugar is a term used to describe granulated sugars that do not undergo conventional refining processes, which remove the complexity and depth of flavor present in raw sugar cane after it has been pressed. Zulka Pure Cane Sugar preserves the natural properties of the sugar cane plant, while retaining a flavor profile that’s as close to fresh sugar cane as possible, making it a better alternative to white sugar for baking, cooking and beverage recipes as well as all other everyday sugar uses. With a distinctively pure taste, and rich color and aroma, Zulka delivers a full-bodied and aromatic sweetness to all your favorite recipes.
For more information on Zulka Pure Cane Sugar go to www. Zulka.com
This is a sponsored post. All opinions are my own.
Favorite Things
 If you know me, you know I like to travel. I worked in the travel industry years ago and fell in love with the idea of wandering the globe the minute I took my first trip. I like to explore new places and try new things so the idea of hopping on a plane or taking a road trip has always been exciting to me. I have been fortunate enough to travel to some great places, both near and far but my favorite trips are the ones taken with family. Some of the best memories are made that way! I am usually traveling this time of year but since I don't have anything planned right now, at least not in the very near future, I am reminiscing and I thought I would share some of my favorite places with you. Happy Friday!
 Città Sant 'Angelo, a town in the province of Pescara, Abruzzo, Italy. A beautiful town where my entire family stayed on a trip to trace our family heritage five years ago.
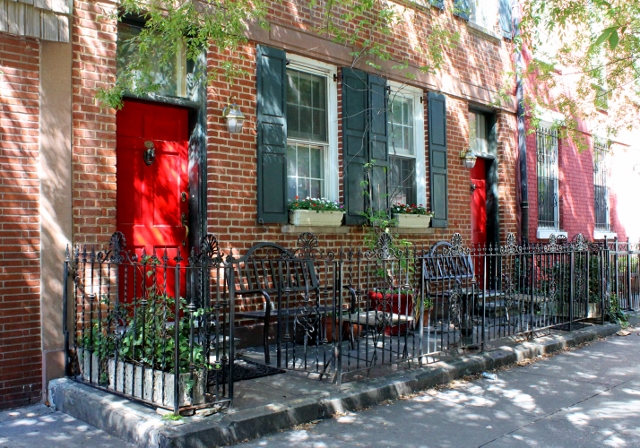 Wandering the streets of SoHo in New York City. Whether you are eating, shopping or people watching, it's a cool place with a great vibe.
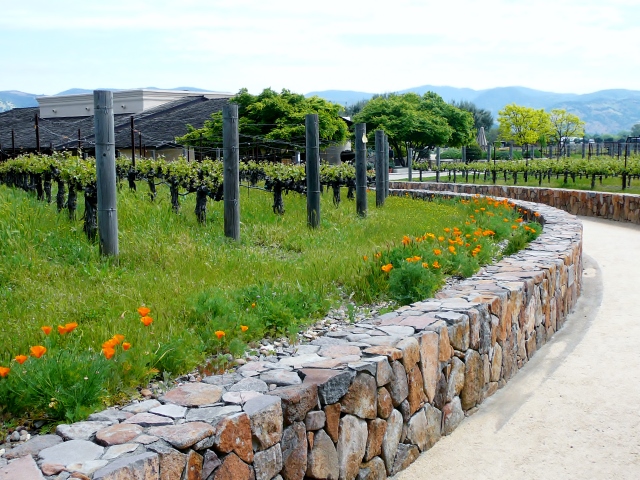 Roaming through the Wineries in Napa Valley, California.
 Watching the sunrise in Stone Harbor, New Jersey. One of my favorite beaches.
 Walking the beaches on Sanibel Island in Florida collecting sea shells.
 Watching the Harbor Seals and enjoying the restaurants and shopping in La Jolla on the California coast.
 Walking through The Flower Fields at Carlsbad Ranch in Carlsbad, California to enjoy the breathtaking view of the blooming Ranunculus.
All of these places hold special memories of good times spent with family and friends. I'm not sure what's next but I'm looking forward to wherever the next adventure takes me! Have a wonderful weekend!
Leslie xo
Photos by Leslie Reese
Vintage Coffee Can Planters
 We had beautiful weather this past weekend and it was a perfect time to be out and about. As I've mentioned before, one of the things I like to do when I have some extra time, is to go wandering through antique shops. This time I had an idea and I was on a mission to find one thing; old coffee cans. I wanted to put some green plants in my kitchen so I thought it would be fun to find something other than standard pots to plant them in. I love how they turned out!
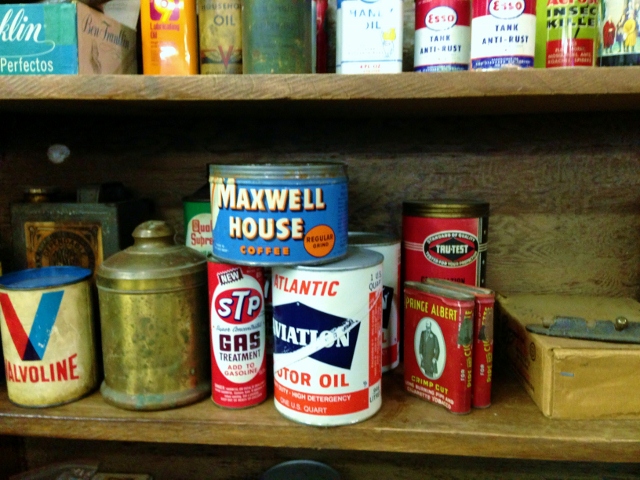 I didn't find anything in the first shop but as I kept looking, I found a few coffee cans scattered among some automotive containers. This Maxwell House can was only $1.
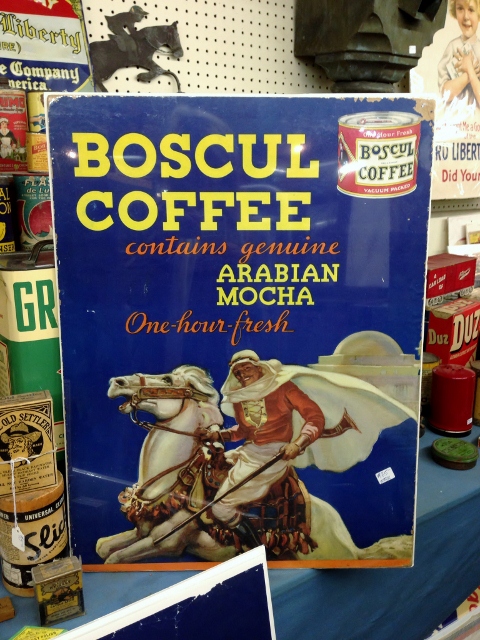 I have never heard of Boscul Coffee but Arabian Mocha sounds good! This antique poster was $165. It made me wish I had a coffee shop to hang it in!
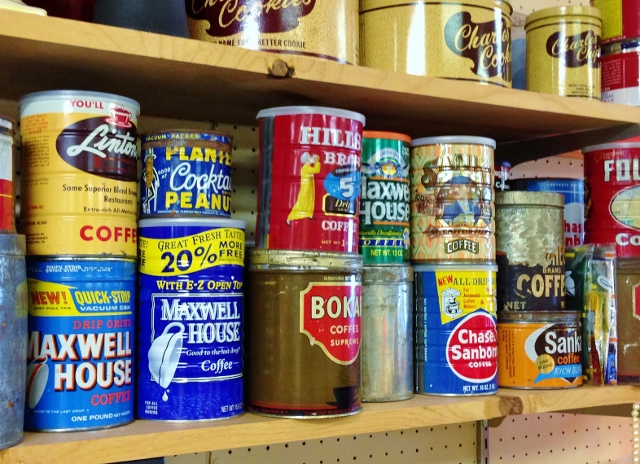 You just never know what you're going to find. This shelf full of coffee cans was at the last stop of the day. The prices ranged from $5 for the Sanka can to $34 for the Bokar can.
 I spent about $35 on 6 coffee cans.
 I stopped at a garden store to pick up some small plants after I bought the coffee cans. That way I could get plants that would fit nicely in the cans I chose.
 I was going to put the plants in plastic containers before placing them inside of the coffee cans to prevent water from leaking out, but it was challenging to find the right size. I decided to line the cans with plastic instead.
 I partially filled the plastic lined cans with potting soil.
 I placed the plant on top of the soil and filled it in with more dirt.
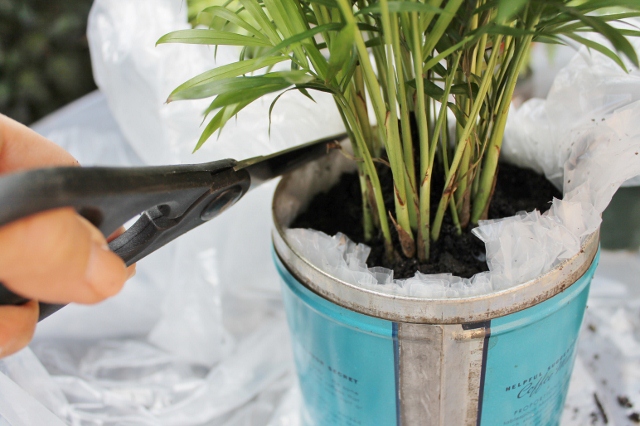 I carefully trimmed the plastic around the inside edge of the can.
 When watering the plants, it's important to keep the water close to the plants and away from the edge of the can. That way the water will stay contained.
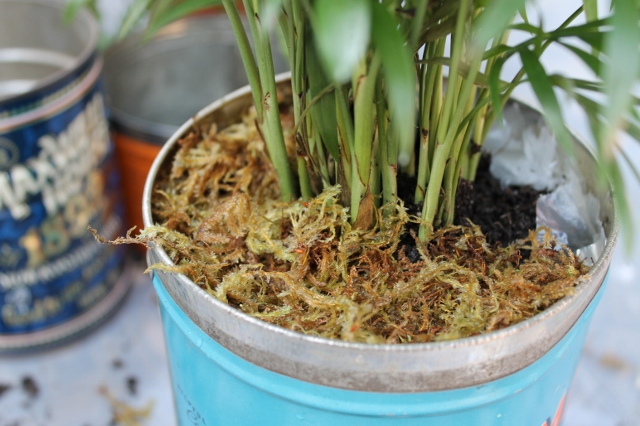 I placed green moss on top of the dirt to keep moisture in, but also because I like the way it looks.
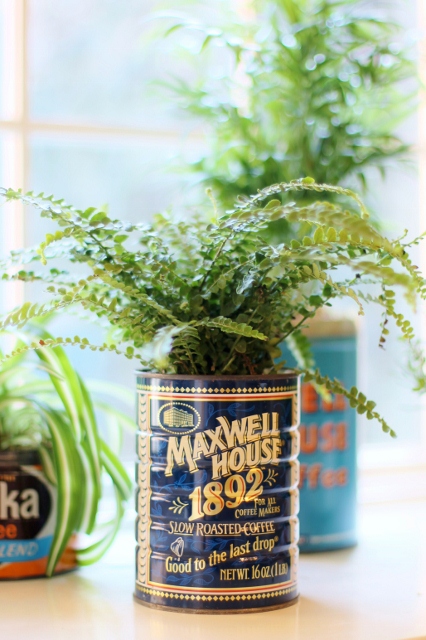 I now have some fun, colorful planters that look great in the kitchen and make interesting conversation pieces too! Such a simple way to create something truly unique.
Have a great Tuesday!
Leslie xo
Favorite Things
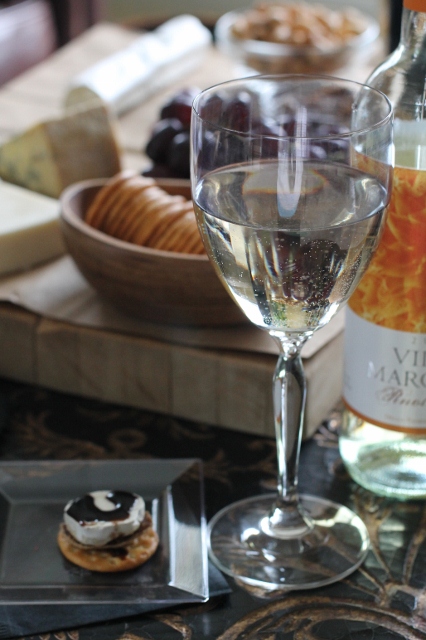
Simple Cheese Board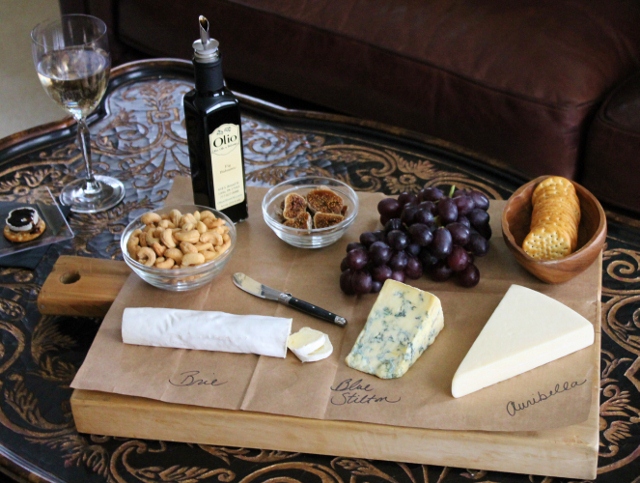 Weekends are a perfect time for last minute gatherings and thrown together happy hours. Some of the best times start with spontaneous invitations that turn into an evening full of laughs and catching up with great friends. When I find a party happening quickly I'll throw together a simple cheese board with some of my favorite things, open a bottle of wine and we're good to go. The key word is simple, not everything has to be over the top! Happy Friday!
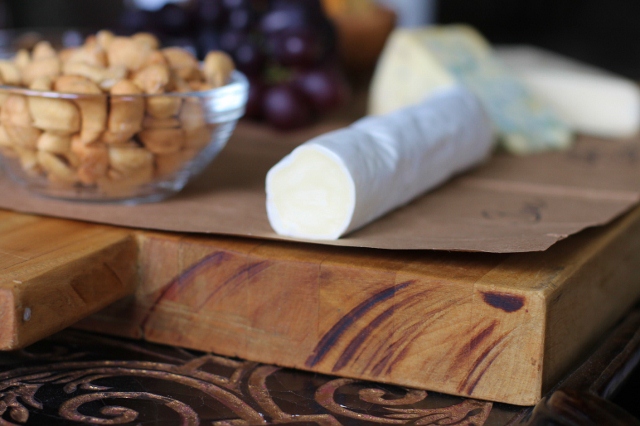 I assemble my cheese board right on top of an old cutting board that was made by my grandfather. I use this board for everything!
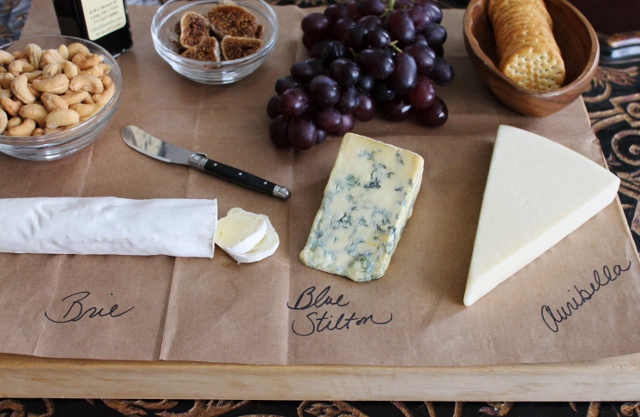 I like to use cheese serving paper on my boards but if I don't have any, a brown paper bag works just as well. Write the name of the different cheeses on the paper instead of using cheese markers. Simple!
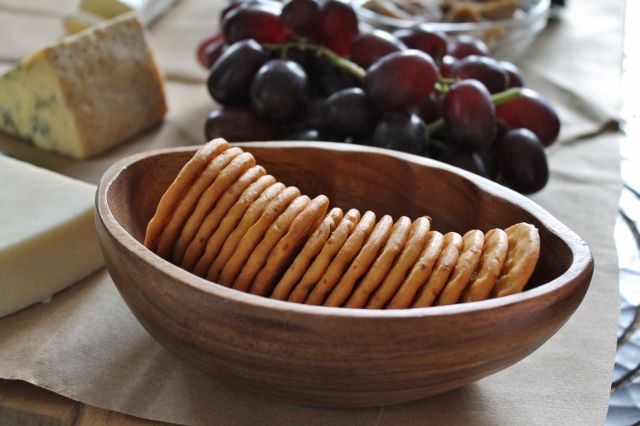 Crackers
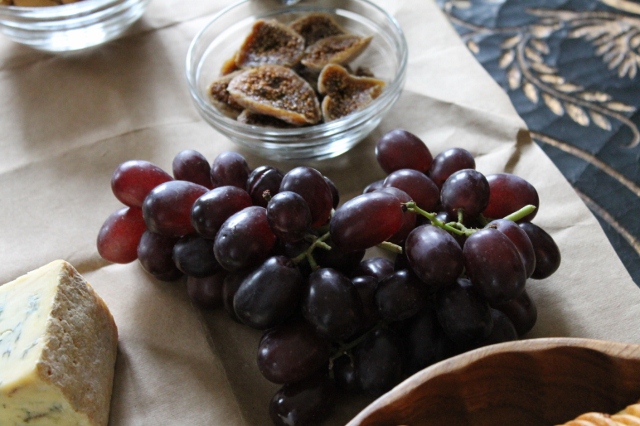 Seedless Grapes
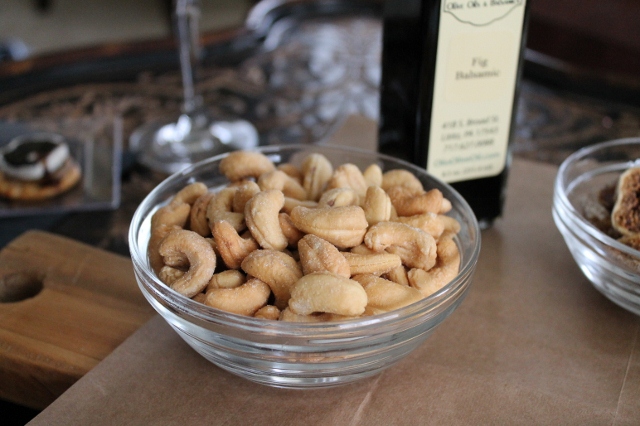 Cashews
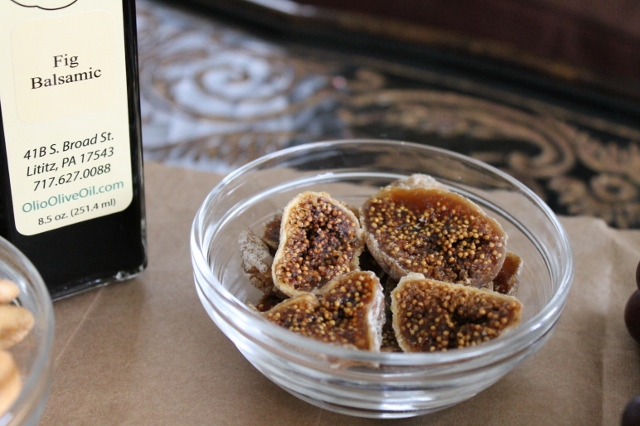 Sliced Dried Figs
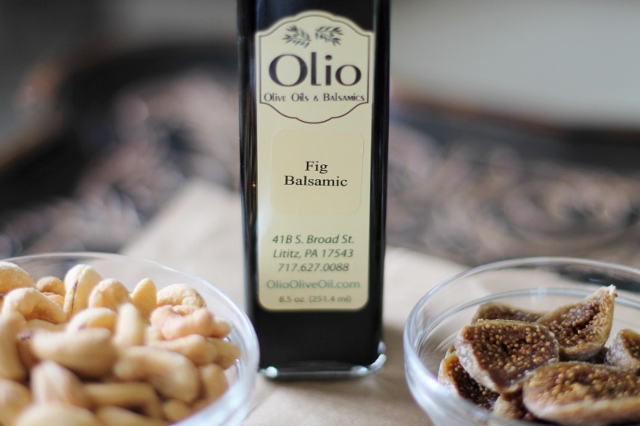 Fig Balsamic Vinegar tastes amazing drizzled on top of cheese.
Cheers to spontaneous gatherings and good times! Have a wonderful weekend!
Leslie xo
Lemon Ricotta Cookies
 I love to bake and I'm always looking for new recipes. This past weekend, I wanted to make dessert for Easter dinner and since there would be plenty of chocolate around, I decided to look for something a little lighter. I found a wonderful recipe for Lemon Ricotta Cookies. They were easy to make and the result was a pretty little glazed cookie that was a perfect addition to the Easter menu. They were delicious too, so I thought I would share them with you.
 Ricotta cheese and fresh lemon are two of the main ingredients in these cookies. It's a delicious combination.
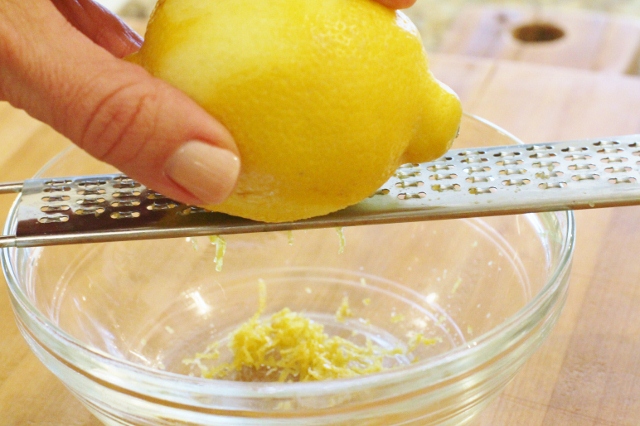
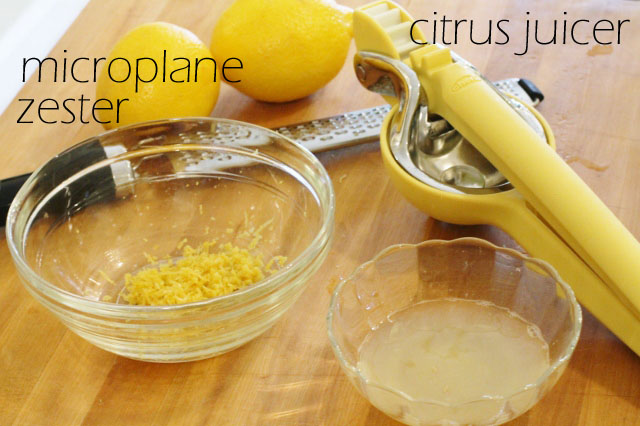 The recipe calls for lemon zest and lemon juice. Use a Microplane grater/zester and a citrus juicer to make it easier.
 The lemon zest not only looks pretty scattered throughout the cookie, it tastes fresh too.
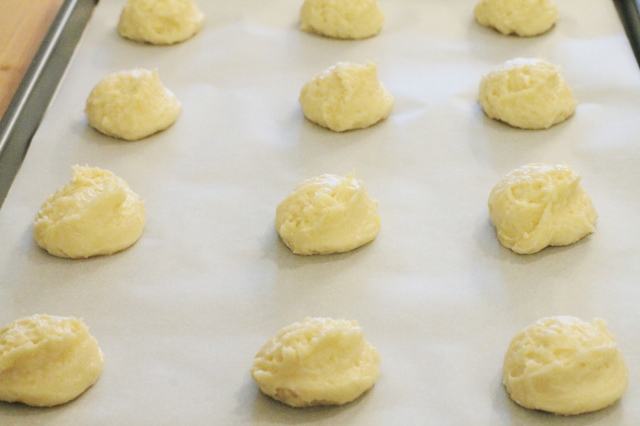 I used a 1 3/4" cookie scoop to transfer the dough onto baking sheets.
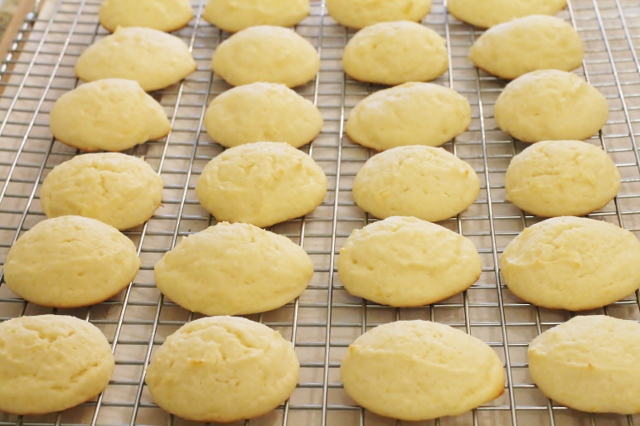 These cookies bake nicely into perfect mounds that are easy to glaze. You need to watch them closely while they are baking. I noticed the bottoms brown quickly and because the dough is light, they might not appear to be done on top but probably are. Test them by tapping the tops of the cookie and if it bounces back they are done.
 Lemon zest is also added to the glaze that tops the Ricotta Cookies.
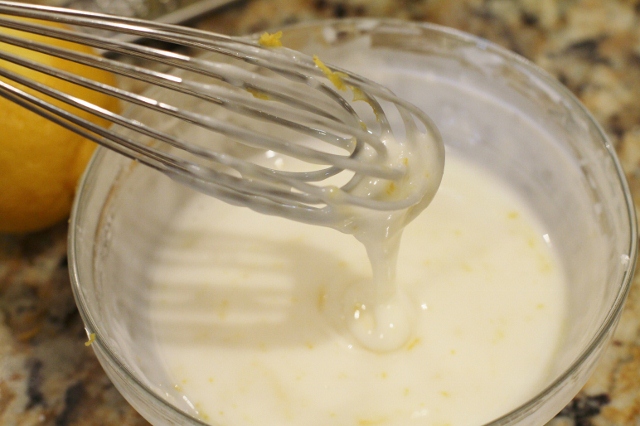 You can use lemon juice or water to make the glaze. I used water because I didn't want a strong lemon flavor with this cookie. If you like a more intense lemon flavor just substitute equal amounts of lemon juice for the water.
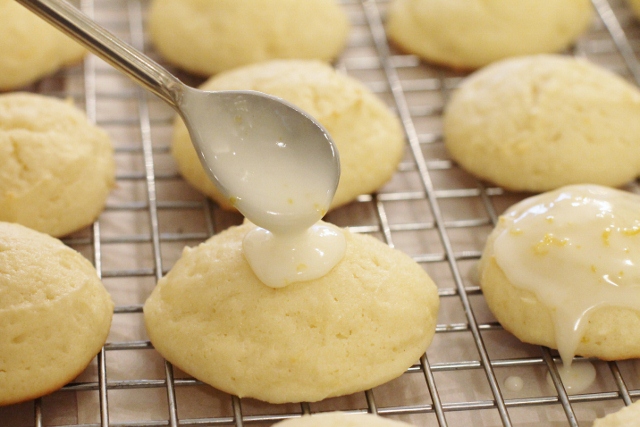 The glaze should be thin. Place the cookies on a rack and spoon a couple teaspoons of glaze on top of each one. Let it drip down the sides.
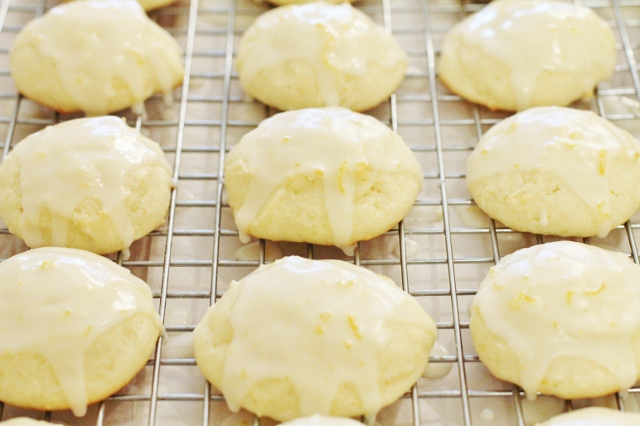 Let the cookies sit for an hour or two before serving so the glaze can dry.
- Cookies
- 2 1/2 cups all-purpose flour
- 1 teaspoon baking powder
- 1 teaspoon salt
- 1 stick unsalted butter, softened
- 2 cups sugar
- 2 eggs
- 1 (15-ounce) container whole milk ricotta cheese
- 3 tablespoons lemon juice
- 1 lemon, zested
- Glaze
- 1 1/2 cups Confectioner's sugar
- 3 tablespoons water or lemon juice
- 1 lemon, zested
- Preheat the oven to 375 degrees. Line baking sheets with parchment.
- In a medium bowl combine the flour, baking powder, and salt. Set aside.
- In the large bowl combine the butter and the sugar. Using an electric mixer beat the butter and sugar until light and fluffy, about 3 minutes.
- Add the eggs, 1 at a time, beating until incorporated.
- Add the ricotta cheese, lemon juice, and lemon zest. Beat to combine.
- Stir in the dry ingredients.
- Spoon the dough (or use a cookie scoop) onto the baking sheets.
- Bake for 12- 15 minutes, until slightly golden at the edges or tops bounce back when touched.
- Remove from the oven and let the cookies rest on the baking sheet for 20 minutes.
- Combine all ingredients together in a small bowl until smooth.
- Spoon glaze onto the top of each cookie, spreading it lightly. Let excess drip down.
- Let the glaze harden for an hour or two before stacking or packaging.
This is a great cookie recipe with room for experimenting. The next time I make them I might use orange zest and try a chocolate glaze. I'll let you know how they turn out!
Enjoy!
Leslie xo
Green Beans with Bacon and Brown Sugar Recipe
 You might be surprised to see a Saturday post. Well, I was typing a recipe for someone and started thinking about how many times I have been asked for this particular dish and I figured why not put it on the blog so whoever wanted it could come here and print it. Consider it a bonus recipe! It's a delicious but simple green bean recipe that I found in the Williams-Sonoma Thanksgiving recipe booklet last year. It was a huge hit and is now a favorite for us. I am making it again for Easter. It's a nice change from the standard green bean casserole so if you want something new, this is a good one to try. I couldn't find the recipe on the Williams-Sonoma website and the booklet was seasonal so here you go:
- 8 thick slices of bacon
- 6 tablespoons unsalted butter, melted
- 1 ½ teaspoons salt
- ¾ teaspoons roasted garlic powder (regular is fine)
- 1 ½ lbs green beans, trimmed and blanched
- ¼ cup firmly packed light brown sugar
- Preheat oven to 350 degrees. Line a baking sheet with parchment.
- In a large nonstick frying pan over medium heat, cook bacon in batches until the slices are just beginning to brown along the edges but are still underdone and pliable, 4-6 minutes. Transfer to a paper towel lined plate and let cool, then cut each slice in half crosswise.
- In a small bowl, whisk together the butter, salt and garlic powder.
- Divide the green beans into 16 equal portions, about 6 beans each. Gather each portion into a neat bunch and wrap a half slice of bacon around the center to hold the beans together. Place the bundles on the prepared baking sheet with the loose ends of the bacon underneath. Sprinkle the brown sugar evenly over the bundles and drizzle with the butter mixture.
- Roast until the bacon is cooked through and browned, 20 – 25 minutes. Let stand for 3-5 minutes. Transfer the green bean bundles to a warmed platter and serve immediately.
- Once the bacon is partially cooked and cooled, toss it with the blanched green beans and place in a large pan or casserole dish.
- Drizzle the butter mixture over the beans and bacon and toss together.
- Sprinkle with the brown sugar.
- Bake until bacon pieces are cooked and beans are heated through.
Enjoy!
Leslie xo
Favorite Things
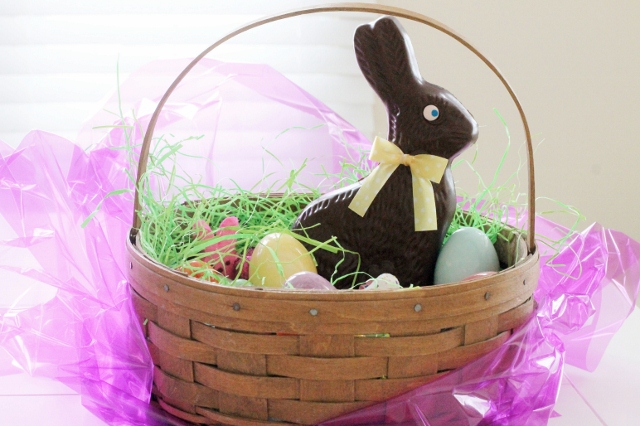 It's hard to believe it's almost April and Easter is just two days away! If you read Tuesdays post, you know I am a bit nostalgic, so it should be of no surprise to you that I might reminisce a bit more today. I can't help it! Holidays always bring back fun memories and I love reliving them! Easter is a religious holiday for most of us and in my house it is a priority to recognize the reason we celebrate this day. On the flip side, we are also celebrating with baskets of candy, colored eggs and family dinners. It's all part of the fun and for most kids that basket of goodies they find in the morning is the most exciting part of the weekend. I vividly remember hunting for our baskets Easter morning when I was a kid. They were wrapped in colored cellophane and filled with small toys and lots of awesome candy, most of which you would only see once a year. Even though my kids are grown, I will search for these favorites every Easter just for the fun of it! Happy Friday!
 Spiced Jelly Beans ~ my absolute favorite!
 Malted Milk Eggs ~ AKA Lipstick Eggs. My sisters and I would paint our lips with these eggs when we were kids.
 Candy Coated Marshmallow Eggs ~ harder to find each year but worth searching for!
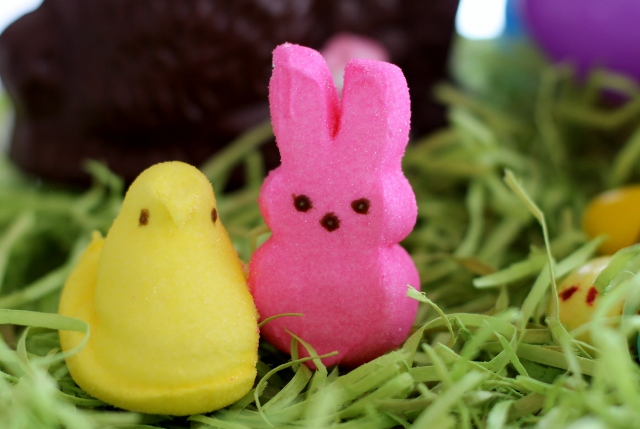 Peeps ~ It's not Easter without traditional yellow chicks and pink bunnies.
 Hershey's Milk Chocolate Eggs ~ there is just something about the shape that makes them taste better than kisses.
 Hershey's Candy Coated Chocolate Eggs ~ Love these crunchy little chocolate eggs.
 Chocolate Easter Bunny ~ No Easter basket is complete without a chocolate bunny. My favorite ones are the old fashioned unwrapped bunnies with candy eyes.
However you are spending your Easter holiday, make if fun and make it memorable! Have a wonderful weekend!
Leslie xo
Vintage Inspired Easter Egg DIY
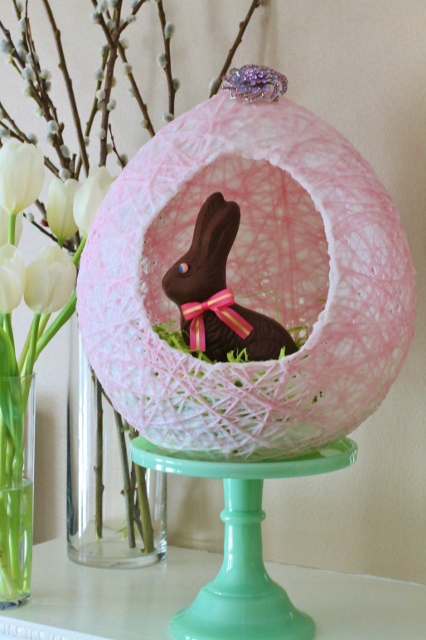 Today's post has a bit of nostalgia attached to it. As you may know, I am a person who loves holidays, tradition and the joy that comes with celebrating the little things in life. When we decorate for a holiday, some of the best memories are recalled when we unpack things that have been carefully tucked away for the past year. Whether it's something our children made or a gift from a relative, it sparks conversation and brings back a feeling of comfort and happiness. That's what tradition is all about, the feeling of being connected to something special. In our family there is a favorite Easter decoration that has been around as long as I can remember. It's a Sugared Easter Egg that my mom made almost 40 years ago. To my sisters and me, it represents the fun we had at Easter time when we were kids. This year I thought I would try to recreate what my mom made long ago. The process was fun and made me appreciate the effort she put into creating something like this while she had 5 little girls running around!
 This is one of the eggs my mother made. I love the cellophane Easter grass and the little vintage rabbit inside. I remember watching her make these eggs when I was little. She was like the Martha Stewart of the 70's. She would give them as gifts to friends and a few of our favorite teachers. We laugh now at the thought of carrying one of these into the school!
 My mom didn't save the recipe or how-to for these eggs. They are different than the ones you might see today on Pinterest. Instead of using liquid starch these eggs are made with a blend of sugar and glue to make them stronger and give them a more textured look. I used Mod Podge, a balloon, and colored string (all from Michael's craft store).
 I carefully wrapped string around an inflated balloon. I started at the top and went all the way down and around a few times. Then I started wrapping in different directions. It's a little tricky at first but once the string goes around a few times it stays in place nicely. You don't have to completely cover the balloon.
 I suspended the balloon from the light over my table with some of the string. It was the easiest way to apply the sugar mixture and also allowed the balloon to keep its egg-like shape. If you can't do it this way you can suspend the balloon from a hanger on a kitchen cabinet or anywhere you have room.
 I mixed equal amounts of sugar and Mod Podge in a container and spooned it onto the top of the balloon. It goes on thick so I used a sponge brush to spread the mixture out and make sure most of balloon was covered. You will need to handle the balloon while you are doing this so it's a good idea to have a wet cloth handy to wipe off of your hands when you're finished with each layer.
 The excess mixture dripped into the pan. I waited for the first coat to dry almost completely before I added another layer. It's best to work in small batches so the glue doesn't dry out while you wait. Cover any leftover glue and rinse out the sponge while you wait for each layer to dry. I repeated this process until the balloon was almost completely covered and I had a texture I liked. This took almost 2 days.
 When the coating on the balloon was dry and firm to the touch it was ready for the next step.
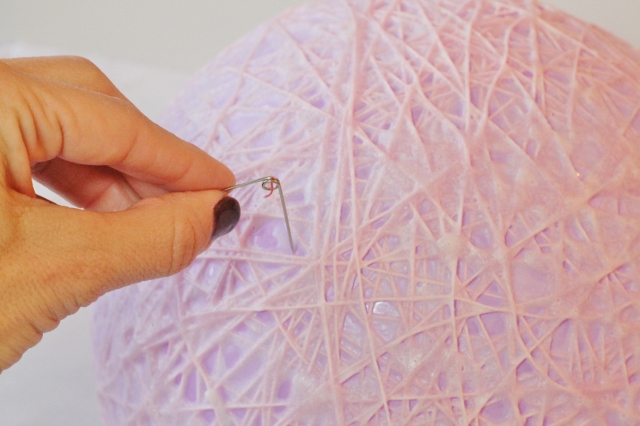 I popped the balloon with a pin to release it from the string. It's so cool to watch what happens when you do this. If you have kids let them watch you do this step.
 The balloon will be stuck inside the egg and may be in two pieces.
 There will be a hole at the top of the egg where the balloon was knotted. Hold the egg upside down so that the balloon falls to the bottom and pull it through the hole. You might need to use tweezers to do this. You will notice that the balloon is wet. The inside of the egg will still be a little bit sticky.
 I cut a hole in the front of the egg with a pair of sharp scissors. If you aren't good at estimating you can draw the opening with a pencil first. Do this right away since the inside of the egg is still slightly pliable. Once you are finished stand the egg up on hard surface so the bottom dries flat.
 Instead of using lace like my mom did, I softened the cut edge in the opening of the egg by brushing it with a little bit of glue and sprinkling it with sugar. I filled it with a newer version of Easter grass and placed a chocolate rabbit inside.
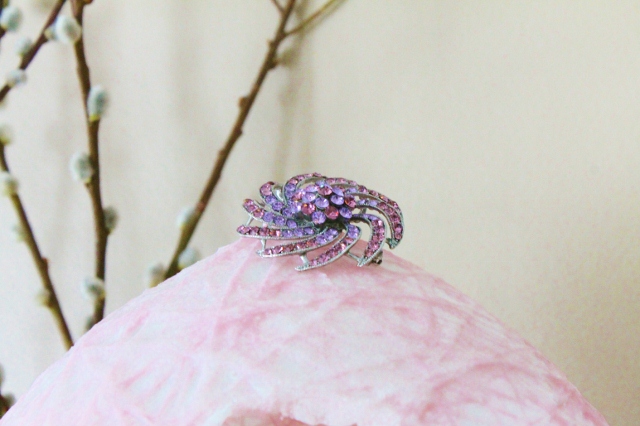 I added a little bit of bling to my egg by placing a pretty crystal broach in the hole at the top of the egg instead of ribbon.
 I love looking at these eggs side by side. Not only is it fun to see how things change over time but it's awesome to think about what something so simple can represent; forty years of memories and tradition that will live on for many years to come. So what may look like a simple little Easter craft is really one of those little things in life that is definitely worth celebrating!
Have a beautiful day!
Leslie xo
Favorite Things
 Each time a season changes, we are reminded of how quickly life moves and how important it is to stop and pay attention to the little things around us. This week we welcomed spring and although there is still a chill in the air where I live, there are some definite signs winter is slowly moving out. If you look around, you'll notice that things are starting to come alive. There are buds on the trees, the birds are singing and the flowers are peeking out of the ground. Spring is another opportunity to reflect, make changes and look forward to the many wonderful things ahead. Today I thought I would share some of the little things I've been noticing as spring begins. Happy Friday!
 Although it seems to be a myth, robins have always been considered a sign that spring has arrived.
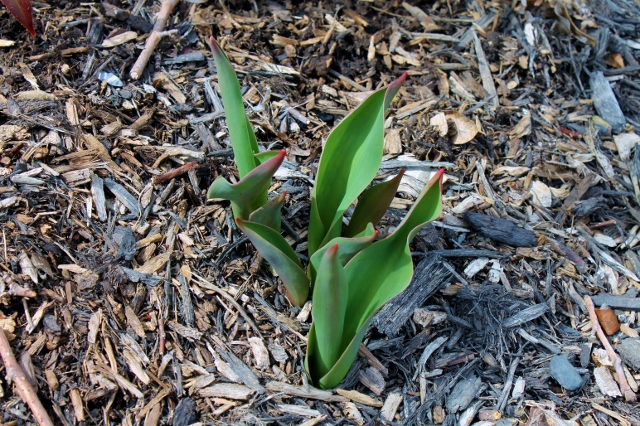 As the tulips start to rise, I look forward to the color that will be scattered throughout my flower beds.
 Pansies are one of my favorite flowers. They are hearty enough to stand up to the last of the cold weather so they are the first flowers I plant each spring.
 I love to see rabbits wandering around the yard, another sign that spring is here.
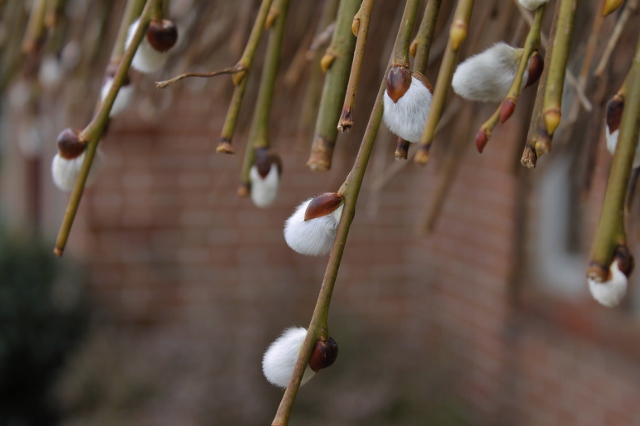 One of my favorite signs of spring is when the pussy willows start to bloom. Their soft fuzzy buds are such a perfect announcement of the new season.
We are in a transition right now and it's a beautiful thing to watch. Enjoy all of the little things spring has to offer because before you know it, they'll be gone. Life moves fast, don't miss it!
Have a wonderful weekend!
Leslie xo
Robin and Rabbit photos courtesy of Doug Reese
All other photos by Leslie Reese
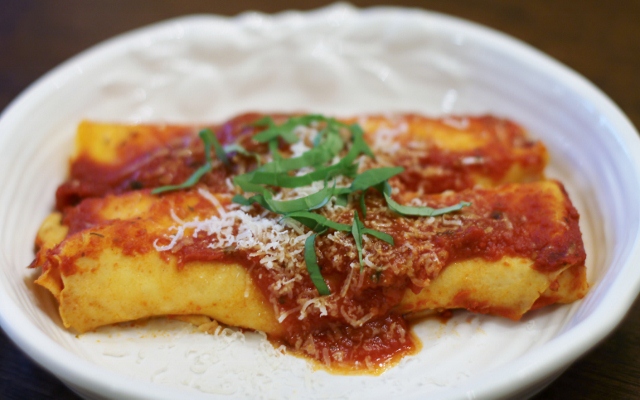
Homemade Manicotti
 I love pasta. Whether it's a bowl of linguine or a plate of lasagna, it's all good to me. Most of the time I will make a simple dish like penne or spaghetti with marinara sauce but once in a while, when I have some time, I'll make something a little more involved like homemade manicotti. Instead of using store bought pasta I make crepes. They are actually easier to fill and they taste so much better. I'll show you how I made mine.
 I have a basic crepe recipe I use for both sweet crepes and manicotti. There are only a few ingredients. If I am making sweet crepes I add sugar.
 I like to add different ingredients to the crepe mixture for a little extra flavor. It's fun to be creative here. I have been in the mood for basil lately so I decided to add some to this batch. By the way, these cool scissors make cutting fresh herbs so much easier. If you chop a lot of herbs, I highly recommend getting a pair!
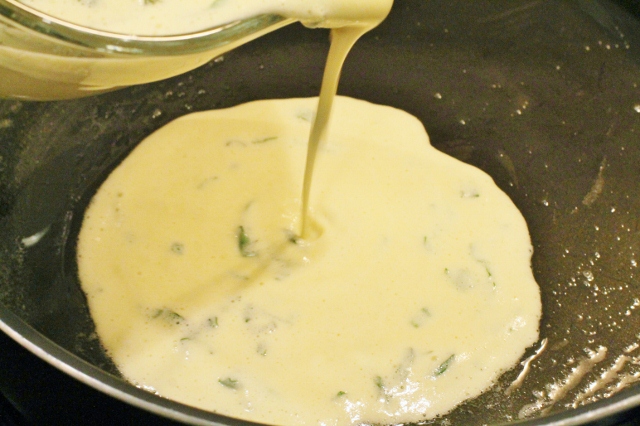 I do not use a crepe pan. I use a large frying pan that is brushed lightly with olive oil and a tiny bit of butter. I keep the heat low so the crepes don't burn or stick. I pour the crepes the same way I would pour a pancake but I make them much thinner. I flip them with a regular spatula.
 A thinner crepe makes a lighter, tastier manicotti.
 One recipe yielded fifteen 6-7 inch crepes.
 I fill the crepes with a blend of cheeses, egg and seasoning.
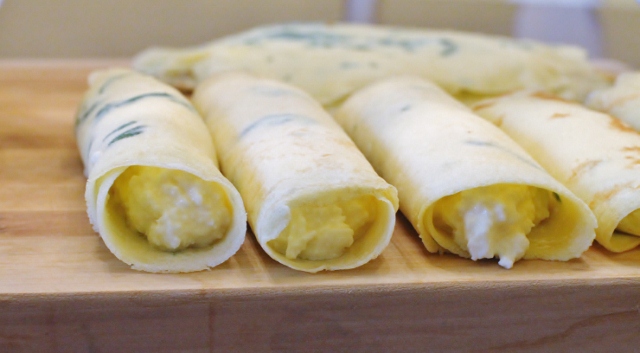 Once the crepes are rolled I will bake some and freeze the rest. I like to freeze them without sauce so I can easily take out what I need later.
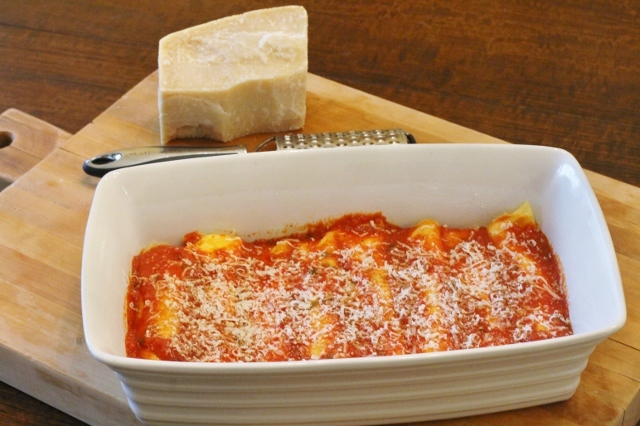
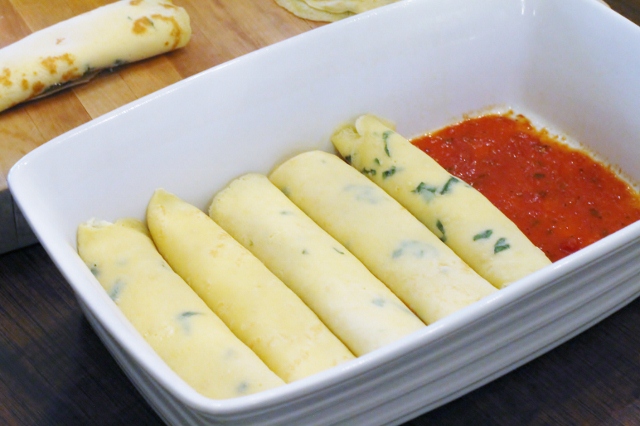 I will place the remaining manicotti in a greased baking pan that has a layer of sauce on the bottom.
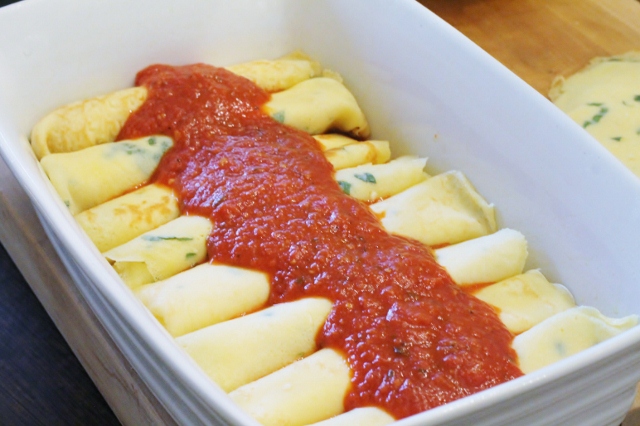 I cover the manicotti with additional sauce and some grated cheese and bake it for about 40 minutes.
 There are so many ways to make this great Italian dish. If you have a favorite recipe or fun idea, I would love to hear about it!
- Basic Crepe Recipe
- 1 1/4 cup flour
- 3 eggs beaten
- 1 1/2 cups milk
- 2 tablespoons melted butter
- pinch of salt
- Cheese Filling for Manicotti
- 1 15 ounce container ricotta cheese
- 2 cups of your favorite shredded Italian cheese ( I use a blend of mozzarella, provolone, parmesan and asiago)
- 2 eggs beaten (for thicker cheese filing use 1 egg)
- salt and pepper
- Italian seasoning (optional)
- Additional Ingredients
- Pasta sauce ( 1 jar or 4 cups of homemade sauce)
- Grated cheese for topping
- Blend all ingredients in mixing bowl beating well. Let batter stand up to an hour for more perfect crepes.
- Pour a thin layer of batter into a heated pan that has been brushed lightly with olive oil and butter.
- Cook over low heat just until batter comes together to form a crepe.
- Flip crepe to cook other side and then carefully lift out of the pan with a spatula and place on a plate.
- Repeat until batter is gone.
- Blend all ingredients together.
- Place a few tablespoons of cheese mixture on top of each crepe and roll.
- Line the bottom of a greased pan with your favorite sauce (I use homemade marinara sauce. If using store bought sauce, you will need approximately 1 large jar for 1 batch of crepes.
- Cover the crepes with sauce and grated cheese (optional).
- Bake at 350 degrees for 30-45 minutes until the crepes are heated through.
Mangia!
Leslie xo
Favorite Things
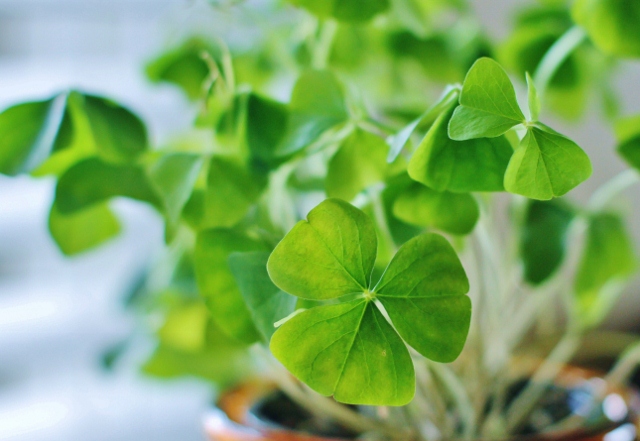 Irish Shamrocks
This weekend people everywhere are going to be getting their green on while they celebrate St. Patrick's Day. There will be parades, pub crawls and a lot of green everywhere to carry on this Irish tradition. One of my favorite memories of St. Patrick's Day is of our family traveling to New York City to see The Lion King on Broadway and then watching the St. Patrick's Day Parade march down 5th Avenue. It was quite a spectacle. My kids were young and had so much fun wearing green beads and shamrock glasses while the floats and bands went by. If you have never been to New York City to watch a parade, put it on your bucket list. It's a great time! This week I thought I would share my favorite green foods to kick off the celebration. Happy Friday!
 Lime Green Finger Jello
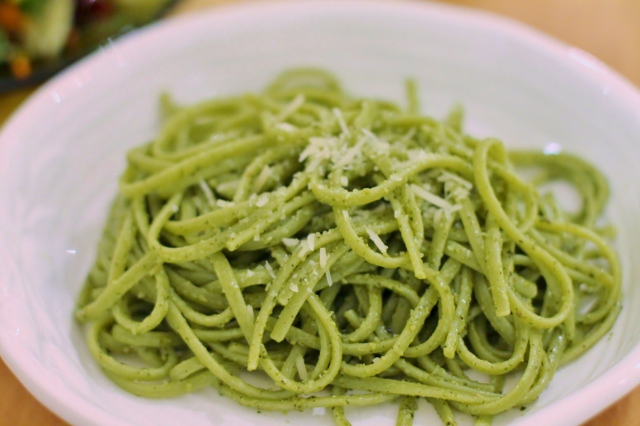 Spinach linguine with basil pesto sauce
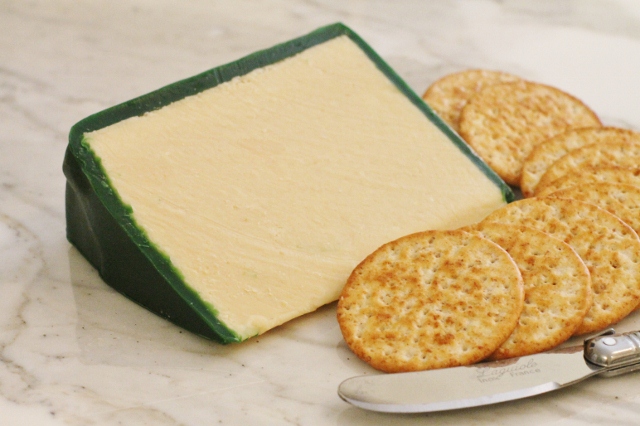 Irish Cheese ~ Kerrygold Dubliner with Irish Stout
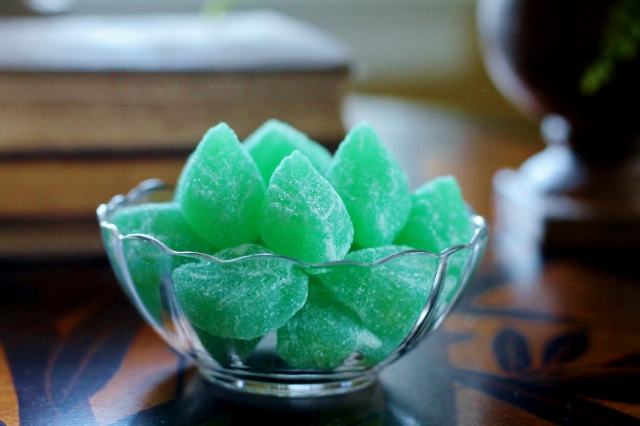 Green Spearmint Leaves Candy
 Granny Smith Apples with Caramel
Happy St. Patrick's Day! Have a great weekend!
Leslie xo
Lemon Cheese Bar Recipe
 This past weekend we had beautiful weather in Central Pennsylvania. The sun was shining and it was 60 degrees outside. It felt like spring and the warm weather made me wish winter would just move on. I was in the mood to bake so I thought I'd celebrate the changing seasons with something light and fresh like Lemon Cheese Bars. I have had this recipe for years. My children's grandmother baked them when the kids were little and shared the recipe long ago. They are easy to make and so delicious. It's no wonder people ask for the recipe all of the time. Lemon Cheese Bars are perfect served with tea or coffee.
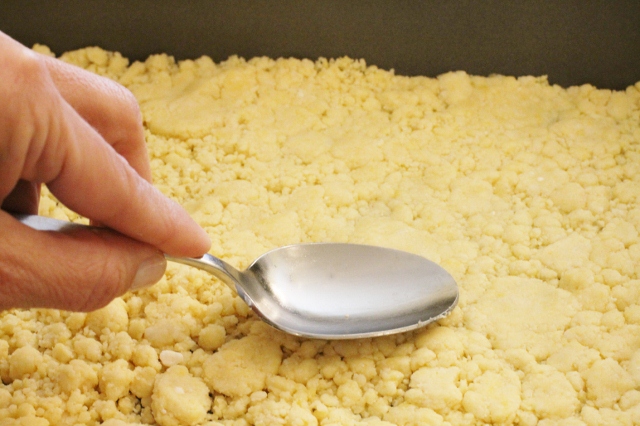 Lemon Cheese Bars start with a boxed yellow cake mix. You add a few other ingredients to make a crumb mixture that is pressed into the bottom of a cake pan.
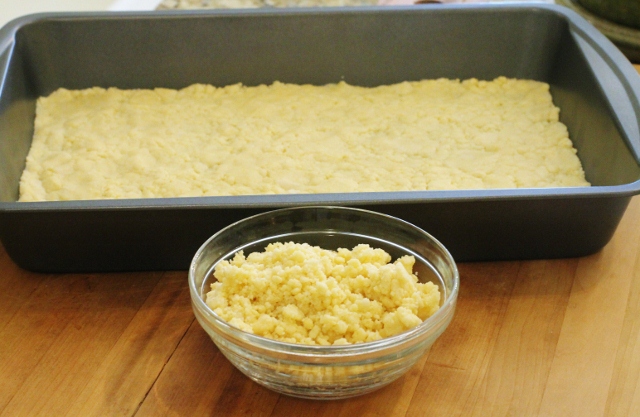 One cup of the crumbs are reserved for the top layer of the bars.
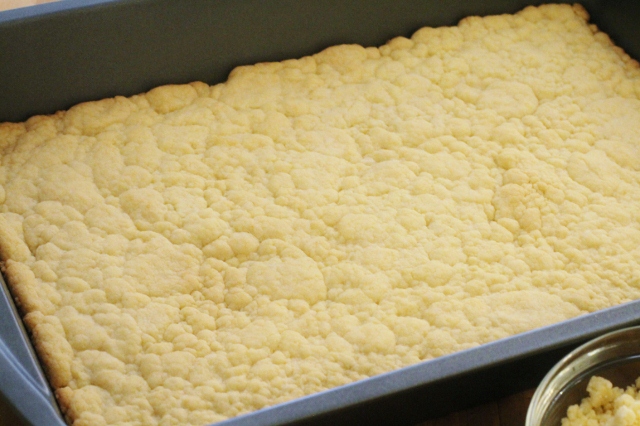 The crumbs that were pressed into the pan are baked for about 15 minutes creating the first layer of the bars.
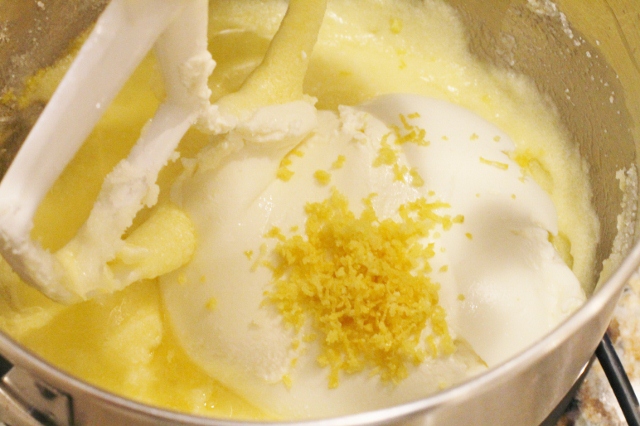
 Cream cheese, an egg and sugar are whipped to make a topping for the bars.
 Fresh squeezed lemon juice is a key ingredient in the whipped topping.
 The whipped topping is spread on top of the first baked layer.
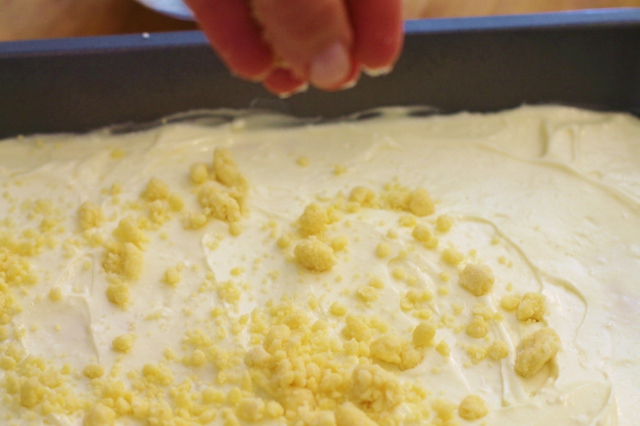 The reserved crumbs are sprinkled on top of the whipped topping and the pan is put back in the oven to bake for 15 more minutes.
 When the Lemon Cheese Bars are cool, cut into squares to serve.
- 1 box yellow cake mix (pudding in the mix)
- 8 ounces softened cream cheese
- 1/3 cup sugar
- 1 teaspoon lemon juice
- 2 eggs
- 1/3 cup vegetable oil
- confectioner's sugar (optional)
- Preheat oven to 350 degrees.
- Mix cake mix,1 egg and oil until mixture is crumbly; set aside 1 cup.
- Pat remaining crumbs lightly into an ungreased 13 X 9 pan.
- Bake for 12-15 minutes or until just beginning to brown.
- Beat cream cheese, sugar, 1 egg and lemon juice until light and smooth.
- Spread mixture over baked layer.
- Sprinkle with remaining crumb mixture.
- Bake 15 minutes longer.
- Cool. Cut into bars to serve.
- Lightly sprinkle with confectioner's sugar before serving (optional)
Lemon Cheese Bars look pretty on a dessert bar and are perfect for an afternoon tea or Easter brunch.
Enjoy!
Leslie xo
Favorite Things
 This Friday I feel the need to stop and take a moment to be grateful. I have spent the past two weeks in Florida, taking care of my father after a scheduled heart procedure. It was an interesting place to be in life. Even at my age, I am used to being the one to need my dad. He doesn't need me. He is the one my sisters and I call for advice, for help, and for guidance. This time he needed us. We didn't hesitate. My sister, Lori, came to Florida with me, and our sisters from California were on call, just in case. It was a long first week followed by a lighter, more relaxed second week. The surgery was a success and my dad will be just fine. It's moments like these that you stop to think about life and what's important. You take time to feel grateful and make the most of every minute. I thought I would share some favorite photos that were taken this week. They are simple things that made us smile and things we enjoyed doing together. Happy Friday!
 One of the greatest compliments I have ever been given was to be told I am just like my dad.
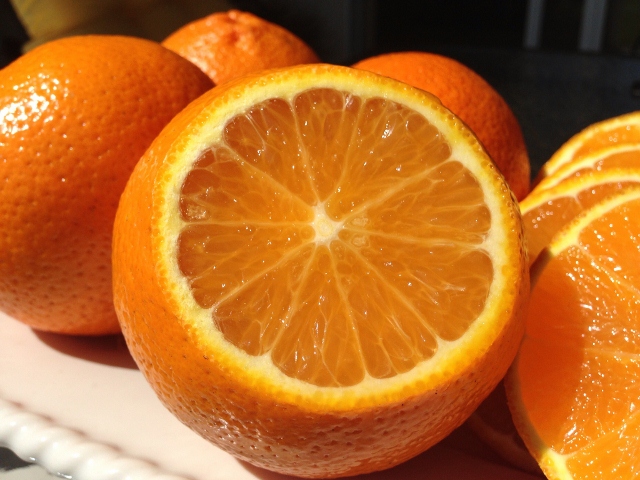 A trip to Sun Harvest Citrus for fresh Florida oranges.
 Enjoying some of the best Gelato ever at Artisan Gelato by Norman Love in Ft. Myers. Almond Joy was the pick of the day.
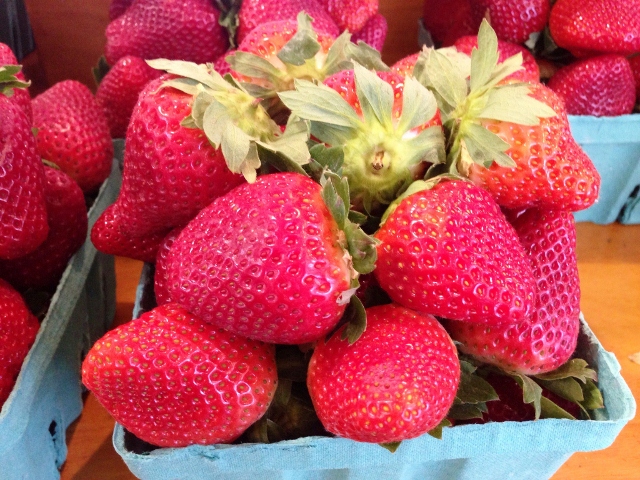 Fresh strawberries that seem to taste better where the sun is shining.
 We picked up some beautiful and delicious gourmet chocolates at Norman Love Confections in Ft Myers. It's become a regular stop when we visit.
 Watching dad play Bocce with his Italian Club. It was the first activity we "allowed" him to participate in after his surgery. He probably can't wait until we leave!
 Enjoying a cocktail by the pool at the end of the day. Cheers to a successful trip!
The past two weeks have taught me a lot. I will travel home today, sad to leave my dad, but grateful for the time we spent together and grateful that I had the opportunity to help him when he needed it. Family is so important. Be thankful for the one you have each and every day!
Have a wonderful weekend!
Leslie xo
DIY Metallic Confetti Bowl
 While recently browsing through Pinterest, I found a fun DIY project for an interesting little bowl made out of colored confetti. I wanted to try it but I thought it might be fun to do something a little bit different. I wanted to make a silver bowl so I decided to use metallic confetti instead. It turned out really cool and I learned a few things in the process. I'll show you what I did.
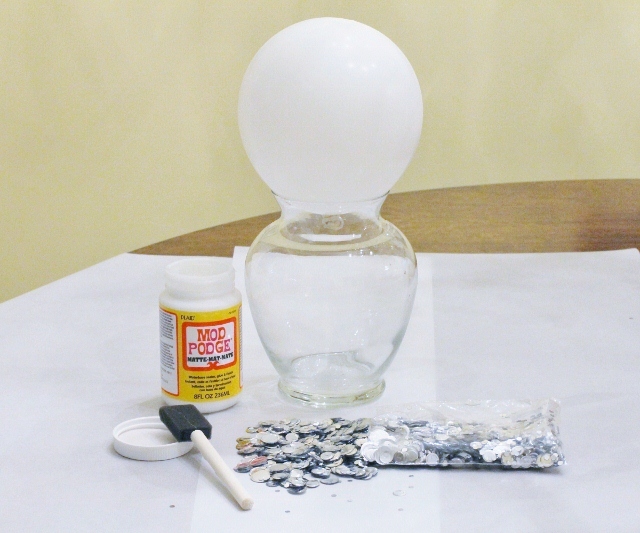 You only need a few things to make this bowl: a balloon, confetti, a sponge or paint brush, a container of Mod Podge (you can get this at your local craft store), and a vase or something to set the balloon on while you work.
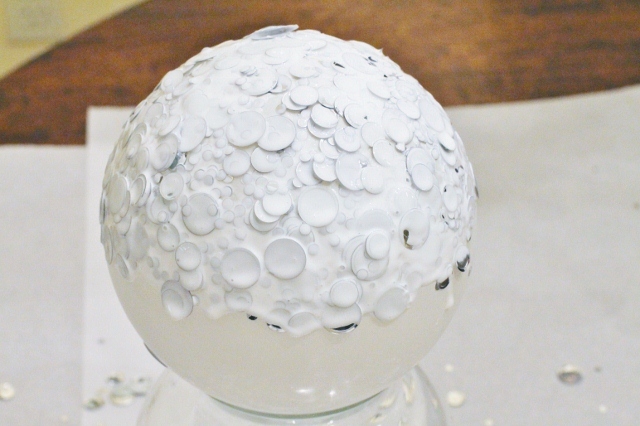
 Inflate the balloon and set it on the vase. Paint a layer of Mod Podge over the bottom half or third of the balloon (whatever size you want your bowl to be).
 Sprinkle confetti over the balloon.
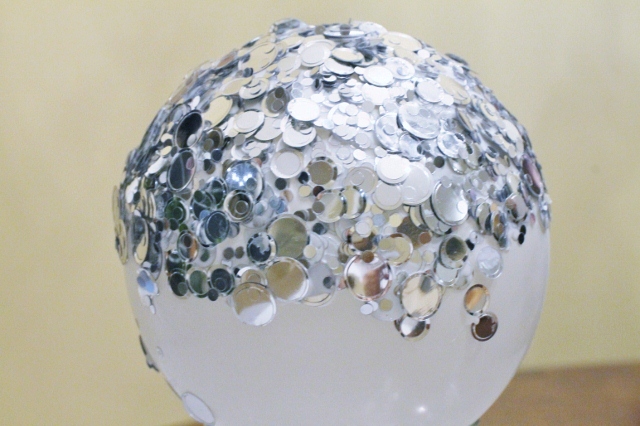
 I found it easier to hold onto the balloon when covering the sides with confetti.
 Once the balloon is covered, let it dry long enough for the first layer to stick, about an hour. Cover it with another layer of Mod Podge.
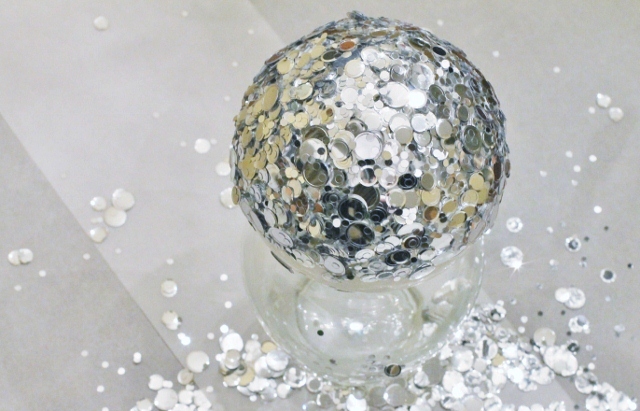
 Sprinkle with another layer of confetti.
 You will need a couple layers of confetti to make the bowl sturdy enough to keep it's shape. I made this bowl with two layers.
 Set the balloon on the vase and let it dry overnight.
 The next morning, I noticed that my bowl had an odd shape to it. What I realized was the metallic confetti does not breathe the way paper confetti does. That caused the balloon to buckle a bit.
 I popped the balloon and removed it from the confetti. The bowl was actually a decent shape. I loved how it looked sort of artsy and wavy.
 The inside of the bowl was still wet because the Mod Podge did not dry completely overnight but the bowl felt sturdy.
 I trimmed the edges to clean it up.
 I painted a layer of Mod Podge inside the bowl to reinforce it and keep it from coming apart on the inside. I let it dry completely before filling it with colorful chocolate candies.**see note below
 I love this little metallic bowl because it's unique and makes a great conversation piece. It was an interesting project that got my creative juices flowing, giving me some other fun ideas in the process. I can't wait to get busy on the next one!
Have a great week!
Leslie xo
**Please note: Mod Podge is non-toxic but has not gone through FDA approvals to be considered food safe so if you decide to add something edible to your confetti bowl, like I did, you might want to place another bowl inside of it first before filling.
Favorite Things
 Tuesday I shared my daughter Elizabeth's bridal shower with you. I posted pictures and told you what a wonderful event it was. What I didn't tell you, was that the very next day we had another party. This one was for my daughter Lauren. She and her husband are expecting their second child in May. When we realized all of Lauren's aunts were going to be in the same place at the same time, we decided to celebrate! We threw a surprise "Sprinkle" for Lauren, which is a smaller version of a baby shower. We kept the party simple, just close family, and enjoyed a lovely brunch in a very laid back setting. I thought it would be fun to share some favorite shots from that day. Happy Friday!
 A simple invitation was tucked inside a velum envelope filled with tissue paper confetti.
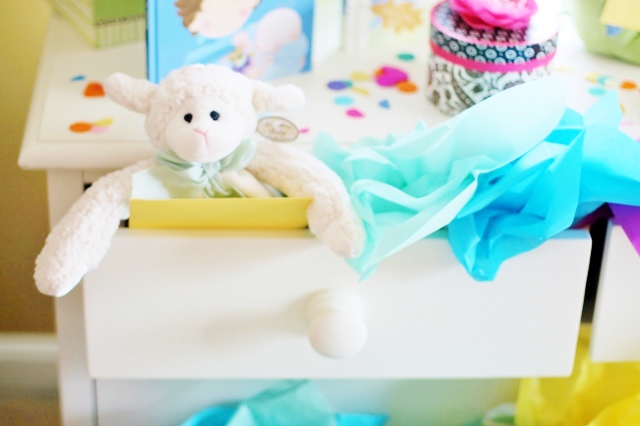 We filled the drawers of a baby dresser with colored tissue paper and small gifts. It was a nice way to display a large item that could not be wrapped.
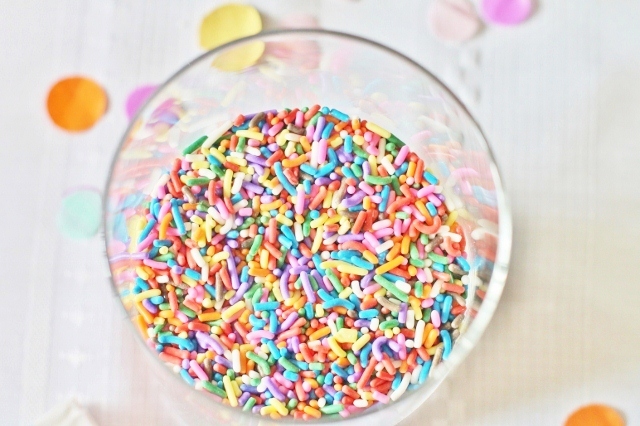 We used colored sprinkles to decorate everything from food to flower vases.
 A thin glass vase filled with water and flowers was placed inside a larger vase. Colored sprinkles were placed in between the glass to create the illusion of one sprinkle filled vase.
 To keep it simple, we placed tissue paper flowers in the chandelier that hung over the table.
 Colorful polka dots complimented the sprinkles on the table.
 Fresh fruit was served in waffle cones.
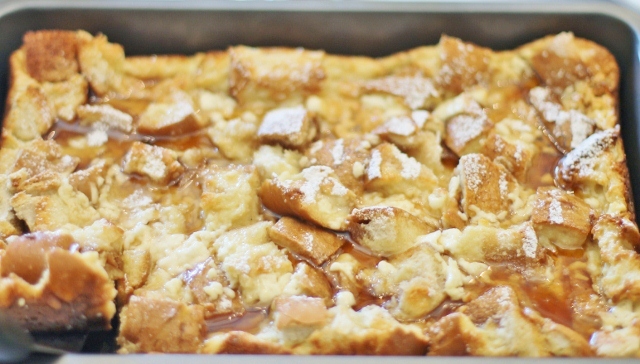 French toast souffle with maple syrup.
 Sun-dried tomato, asparagus and cheese Frittata.
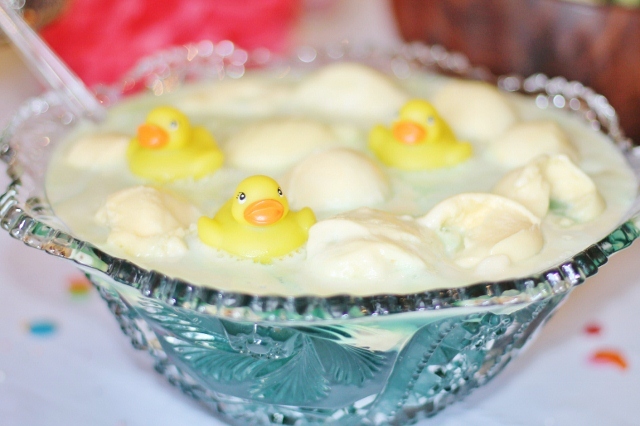 The Ducky Baby Shower Punch was a huge hit, and looked so adorable on the table.
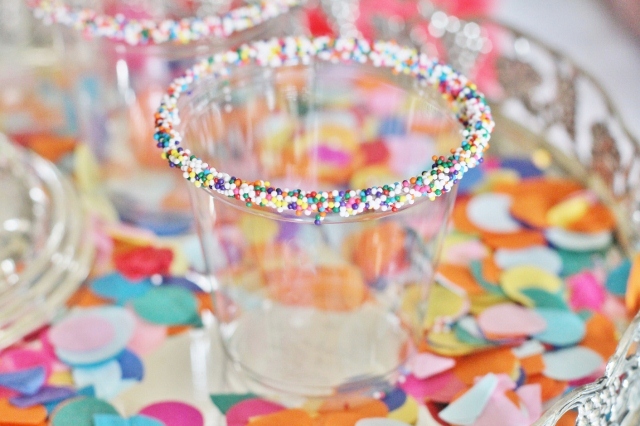 Festive punch cups! We brushed the rims lightly with Karo Syrup before dipping them in sprinkles.
 Strawberry Cheesecake Bites.
 Funfetti cupcakes with sprinkled frosting.
From weddings to babies our week was full of celebrating! It was challenging to keep details straight and secrets safe, but in the end, both parties were a huge success! Next up, a little rest and relaxation!
Have a great weekend!
Leslie xo
Bridal Shower Love
 This past weekend was a very special weekend for our family. My daughter, Elizabeth, is getting married this summer and on Saturday, we honored her at a beautiful bridal shower, styled especially for her. It was an incredible afternoon spent with family and friends at a fabulous little bakery called The Baker's Table, in Lancaster, PA. The focus was on color, and a simple but hip, non-traditional theme. The result was a fresh, clean look in a comfortable setting and a very happy bride-to-be. I thought it would be fun to share photos from the day along with a few links on how and where to find some of the things we used. The shower was a collaboration between myself and Elizabeth's sisters, Lauren and Lynsie. Our ideas were simple but came together beautifully, creating a memorable event.
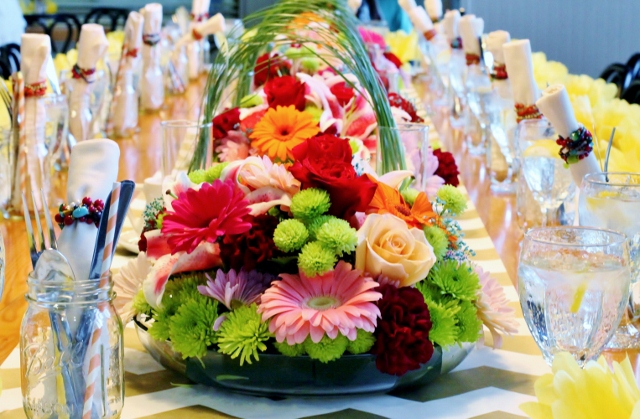 A beautiful 14' X 5' table, crafted out of wood beams that were a part of the original building structure, is the focal point in this space. We placed a gold Chevron Paper Runner down the middle of the table. Five large bowls of flowers were placed along the runner. We decided to go with lots of color instead of just the colors that were chosen for the wedding to make the table pop. Bear-grass, stretched between two vases, was used to create an archway between each flower arrangement.
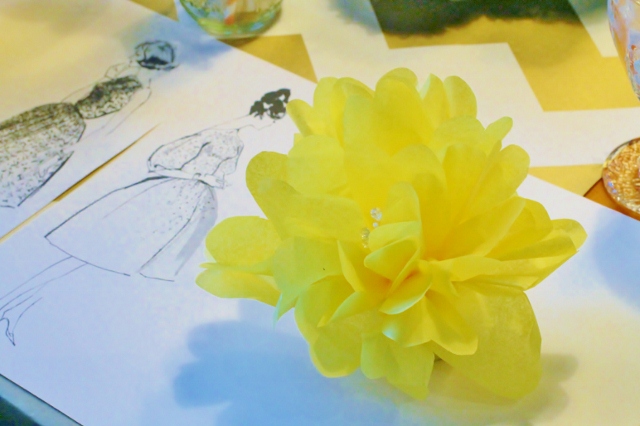 Placemats with sketches of girls in pretty dresses were perfect for a bridal shower table setting. A bright yellow tissue paper flower filled with petite chocolate candies, was placed in the center of each one.
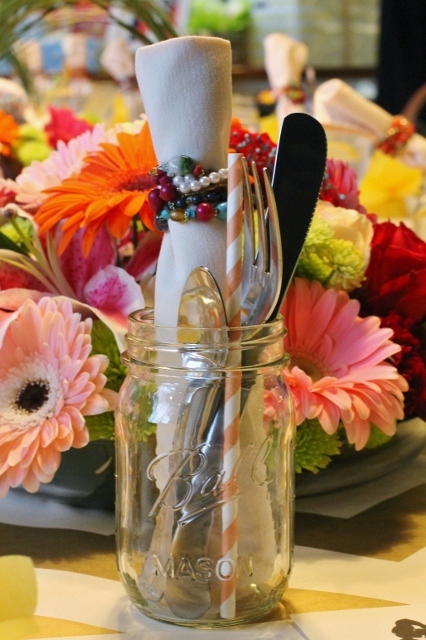 A mason jar was used to hold the utensils and keep the placemats from looking cluttered. The idea came from The Baker's Table website. We used bright beaded bracelets for napkin rings and added a pretty paper straw to dress it up for a shower. The jars added something fun to the table and the bracelets doubled as a small favor for the guests.
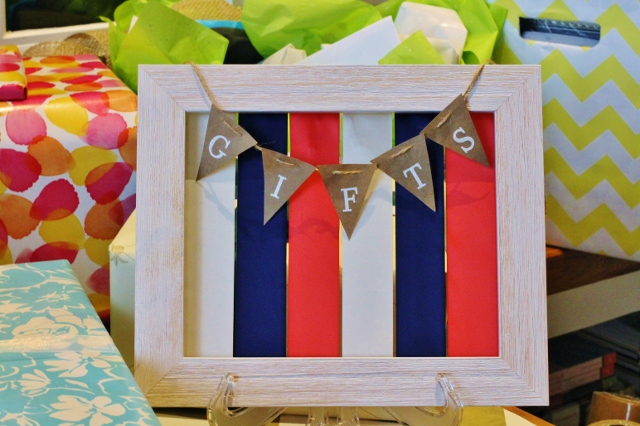 A sign made with satin ribbons and a wooden frame was used to direct guests to the gift table.
 A Blushing Bride Cocktail was chosen to toast Elizabeth on her special day. The bride-to-be, dressed in a coral sweater, is surrounded by her beautiful bridesmaids.
 The pastry chef at The Baker's Table made a delicious vanilla cake filled with chocolate mousse for Elizabeth. It was beautifully frosted with bright stripes of buttercream frosting.
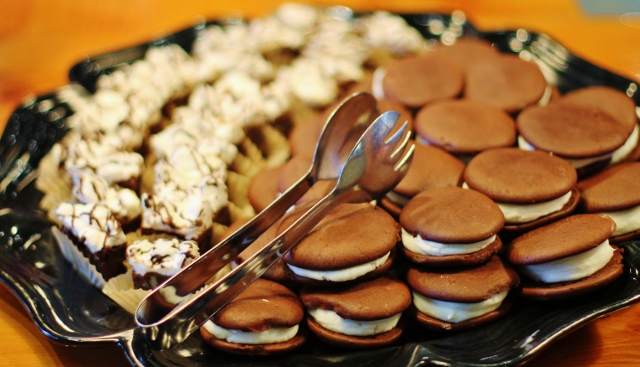 The Baker's Table celebrates baking and for that reason alone, it is the place to go for some of the most wonderful baked goods around. We incorporated some favorite desserts, in addition to the cake, so that guests could experience what The Baker's Table is all about.
 The desserts were served buffet style, which provided plenty of opportunity for guests to enjoy something sweet at their leisure.
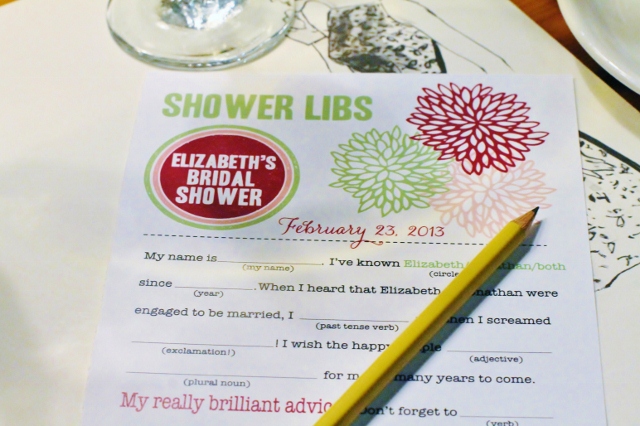 What's a bridal shower without something fun to do during gift time? These Shower Libs provided plenty of entertainment for the guests.
 Lauren and Lynsie came up with a game that was also quite entertaining. Wedding veils and bow-ties were glued to wooden dowels and guests were given one of each. The bridesmaids read answers to questions that Elizabeth and her fiance, Jon, had to answer before the shower. For example: We asked Elizabeth and Jon what their favorite color was. The answer was blue. Guests had to guess "who said it" and raise the appropriate stick, veil or bow-tie. It was a lot of fun.
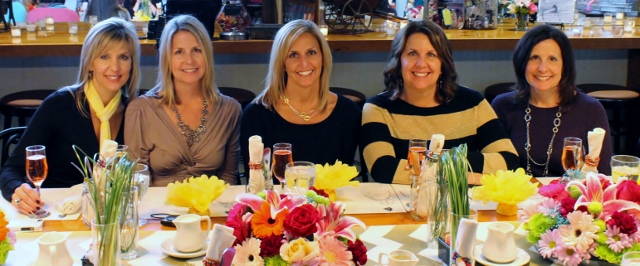 One of my greatest blessings in life is having four amazing sisters. Three of them now live on the West Coast. All four of them traveled home just for the shower. Not one of them gave it a second thought. Distance is not something that gets in the way of the most special occasions in our family. I will never take for granted how lucky I am to have these women as my best friends in life. Our weekend was full of laughing until we cried, catching up and celebrating some wonderful things.
 This is Elizabeth with her Mimi. My mother is the woman who we look up to, admire and adore. She is another wonderful blessing in all of our lives.
The party is over and my sisters are gone but hey, who said we can't plan another party? It's what my girls and I love to do and I can't wait to bring you the next one. There are some fun things on the calendar and I hope to share them all with you. Remember to have fun with whatever it is you are doing each day. It's the little things that make the difference!
Have a great week!
Leslie xo
Favorite Things
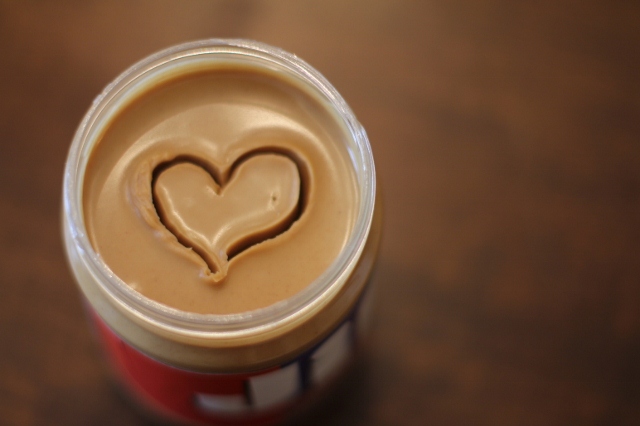 When it comes to favorite things, peanut butter is on the top of my list lately. I'm convinced I could live on a jar of peanut butter alone. It's a little bit sweet but perfectly salty and it goes with so many things. Whether it's a meal or a cure for a craving, I find peanut butter does the trick for me. You may remember a while ago, I said if I were stranded on a desert island and could only have one thing, it would be trail mix. Well, peanut butter would be just fine too. Here is what I'm pairing it with these days. Happy Friday!
 tMy guilty pleasure is swirling Hershey's Kisses right through peanut butter. This is by far my favorite quick fix!
 Slicing apples and spreading them with peanut butter is almost a daily occurrence for me right now.
 Chocolate cake with peanut butter icing. Period.
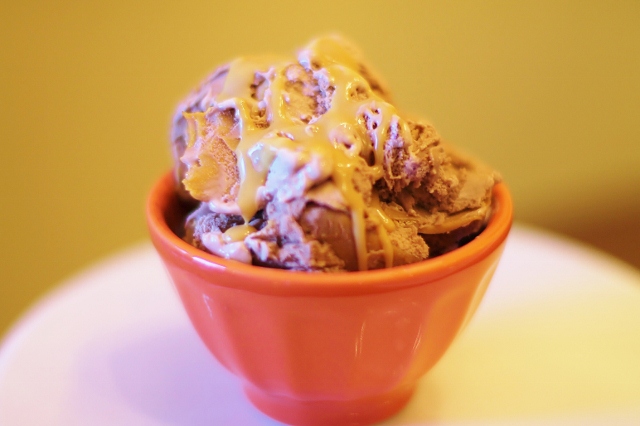 On the rare occasion that I break down and eat a bowl of ice cream it will most definitely be chocolate and peanut butter.
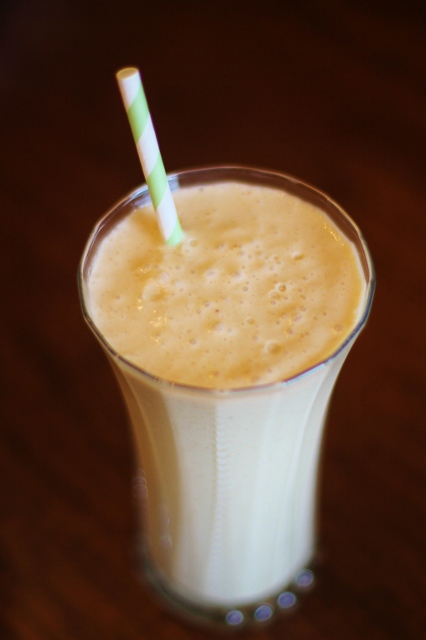 On a healthier note, a peanut butter and banana smoothie is perfect after a workout, which I will obviously need if I keep up this addiction. This one is made with almond milk, flax and wheat germ. No guilt.
Have a wonderful weekend!
Leslie xo
Coconut Bread Recipe
 As you know from my Friday post, I have been working with CFCA to help bring awareness to a wonderful organization that I am extremely passionate about. One of the things we are doing, that I am really excited about, is sharing recipes from the countries of our sponsored friends around the world. It's fascinating to see how our daily lives differ so much from these people yet somehow we are all trying to accomplish the same things. We are doing our best to take care of our families and finding ways to make ends meet. What is interesting though is how quickly we take for granted the things that people in third world countries have no access to. For instance, today I am sharing a bread recipe. If I didn't have an oven, I wouldn't bake bread. However, in Guatemala, a woman named Isabel bakes bread every day without an oven. She uses wood and fire, because she has to.
In honor of Isabel and all of the women in Guatemala who work hard to provide for their families, I decided to share a recipe for coconut bread that you would find here in the United States. If you think it looks difficult or time consuming, you need to watch the video of Isabel making her coconut bread. She makes it every day. It is humbling to watch and will make you truly appreciate the little things you are lucky to have!
 I used ingredients that I could pick up in a grocery store. Isabel shreds the coconut by hand.
 I used coconut milk. Isabel uses the water that she squeezes from the shredded coconut.
 The dough needs to be kneaded by hand. Imagine doing that every single day.
 The dough is set aside until it doubles in size. It's really hot in Guatemala so I'm sure the dough rises quickly there. It took about an hour and a half in my house.
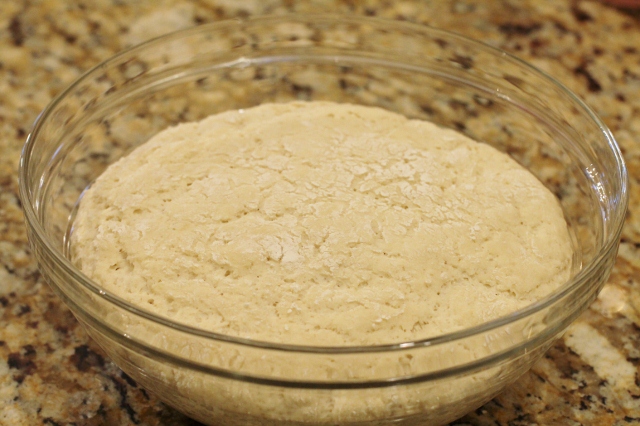 Once it doubles, it is divided into small pieces and set aside to double again.
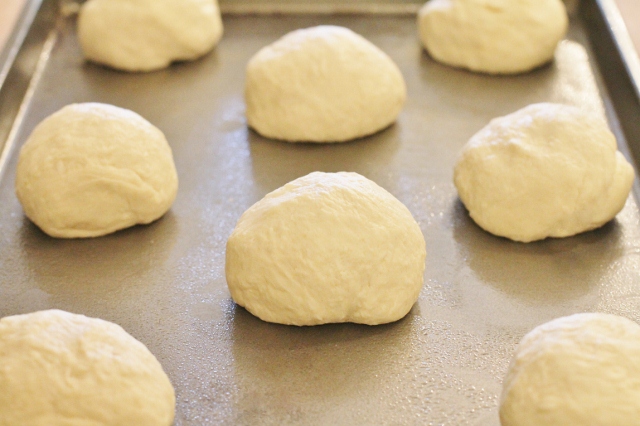 I actually set the tray of rolls in my microwave so the dough would rise. It's a little warmer there than on top of the counter.
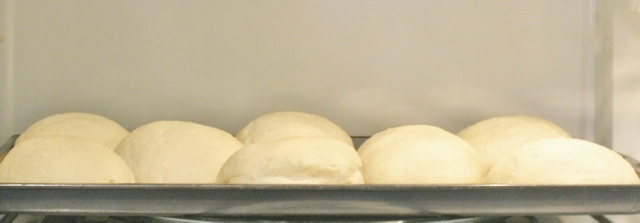 Once the dough rises a second time, the rolls are ready for the oven. They took about 20 minutes to bake. They were absolutely delicious, a little sweet with a hint of coconut flavor.
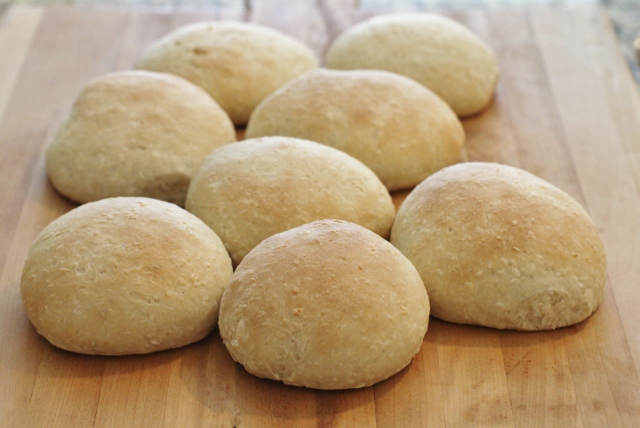 I appreciate the opportunities I have living in this country and feel fortunate to have access to the things that make life comfortable. I respect the hard work that people in less fortunate countries have to do in order to survive. Whatever you are doing today, appreciate exactly where you are. We have a lot to be grateful for!
Enjoy!
Leslie xo
- 1/2 cup unsweetened finely grated cocount
- 2 tablespoons sugar
- 1 (0.25 ounce) package active dry yeast
- 1/2 cup warm water
- 3 1/2 cups all-purpose flour, more for kneading
- 3/4 teaspoon salt
- 1 cup coconut milk
- 3 tablespoons butter or non-hydrogenated vegetable shortening, melted
- Put coconut, sugar, yeast and water into a small non-reactive bowl and stir briefly. Set aside until mixture is swollen and bubbly, about 15 minutes.
- Mix flour and salt together in a large bowl. Add yeast mixture, coconut milk and butter. Using your hands or a wooden spoon, stir until well combined.
- Turn dough out onto a well-floured surface and knead, dusting with more flour as necessary, until soft and elastic, 5 to 6 minutes. Form dough into a ball, dust generously all over with flour and transfer to a clean large bowl. Cover bowl with a kitchen towel and set aside in a warm spot to let rise until doubled in size, about 1 1/2 hours.
- Divide dough into 8 pieces and roll each into a ball. Arrange balls of dough on a large greased baking sheet, spacing them 3 to 4 inches apart. Set aside in a warm spot, uncovered, to let rise until doubled in size again, about 45 minutes.
- Preheat oven to 350°F. Bake bread until deep golden brown and cooked through, 20 to 25 minutes. Serve warm or set aside to let cool to room temperature.
Click here for the Guatemalan Coconut Bread Recipe
Click here to watch the video of Isabel making Coconut Bread
Here's what's coming up...
You can put any content in here.